summary
This is a help page for setting up Connection Configuration for Google Play.
Set JSON Key
- Refer to Obtaining a Google Cloud JSON Key to obtain a JSON Key. Service accounts should be assigned the following roles
- Cloud Storage > Storage Manager
-
Paste the service account email address into the Service Account Email form.
-
Copy the entire contents of the obtained JSON Key and paste it into the JSON Key form on TROCCO's Create Connection Settings screen.
Enable API
Link your Google Play Developer account to your Google Cloud project in order to use the Google Play Developer API.
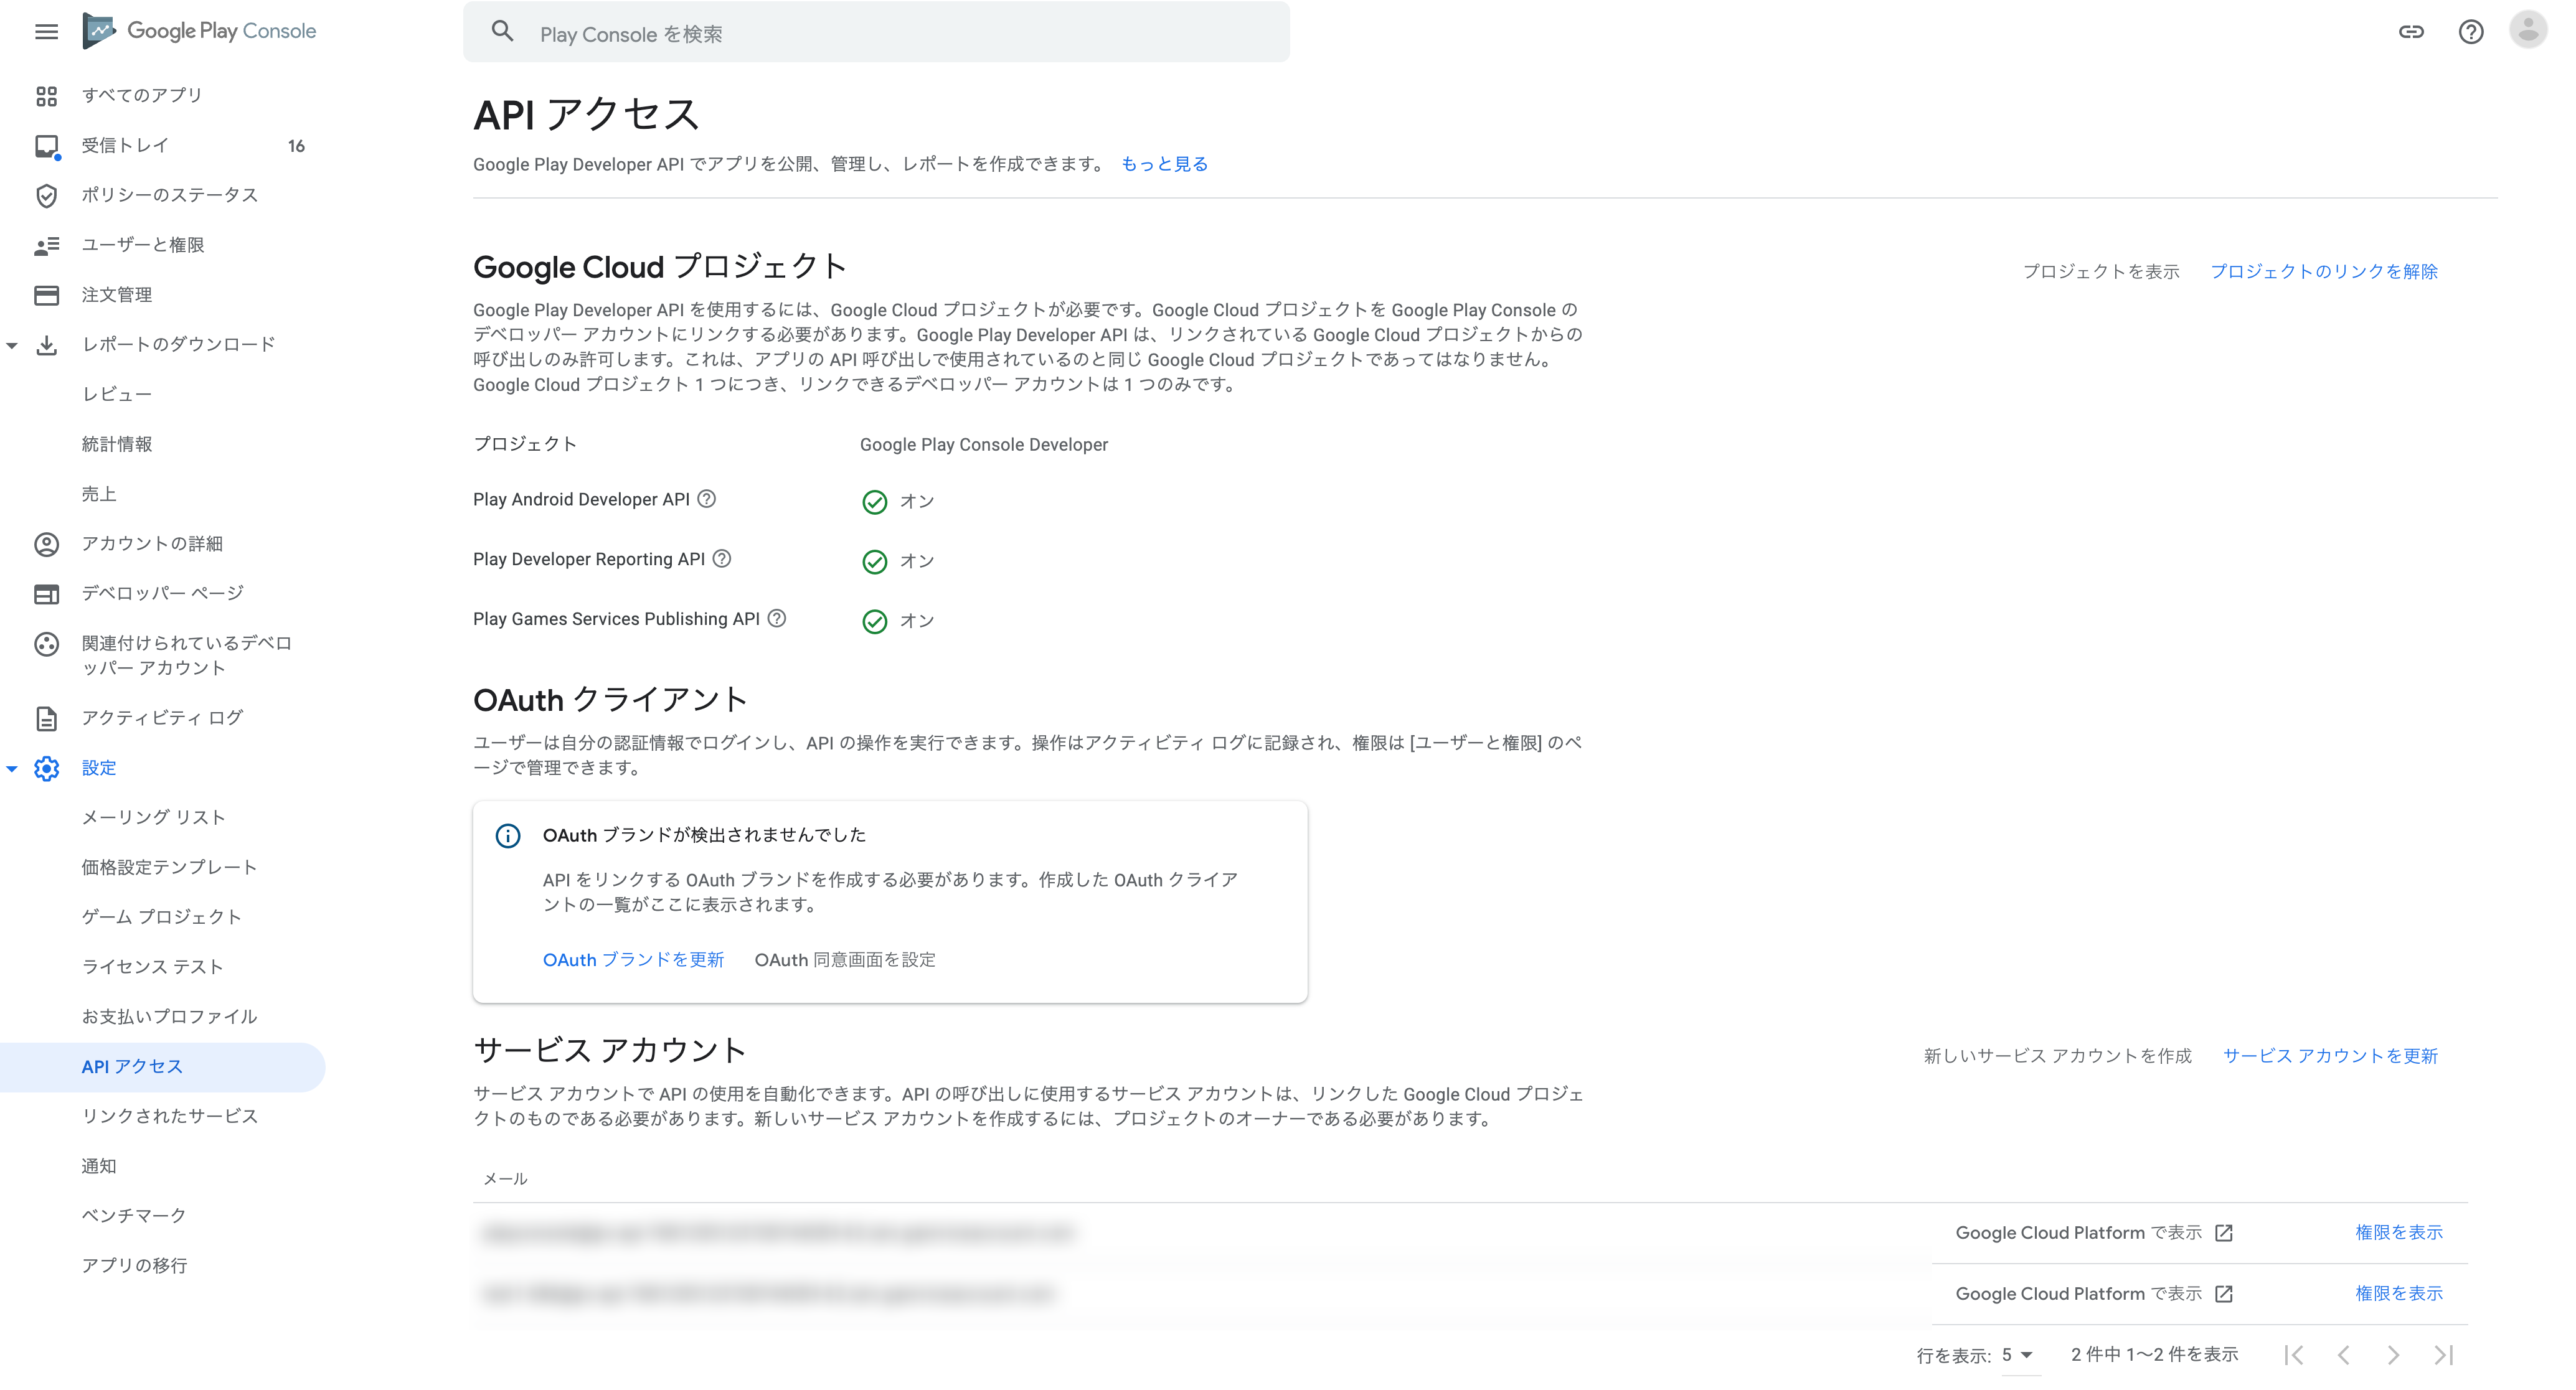
- Open the API Access page of the Google Play Console.
 "" width=""}
-
Choose whether to create a new project or use an existing project.
For more information, please refer to the official documentation. -
On the API Access page of the Google Play Console, click Turn on Google Play Developer API.
-
Approve the API key in the GoogleCloud project.
Granting privileges to service accounts
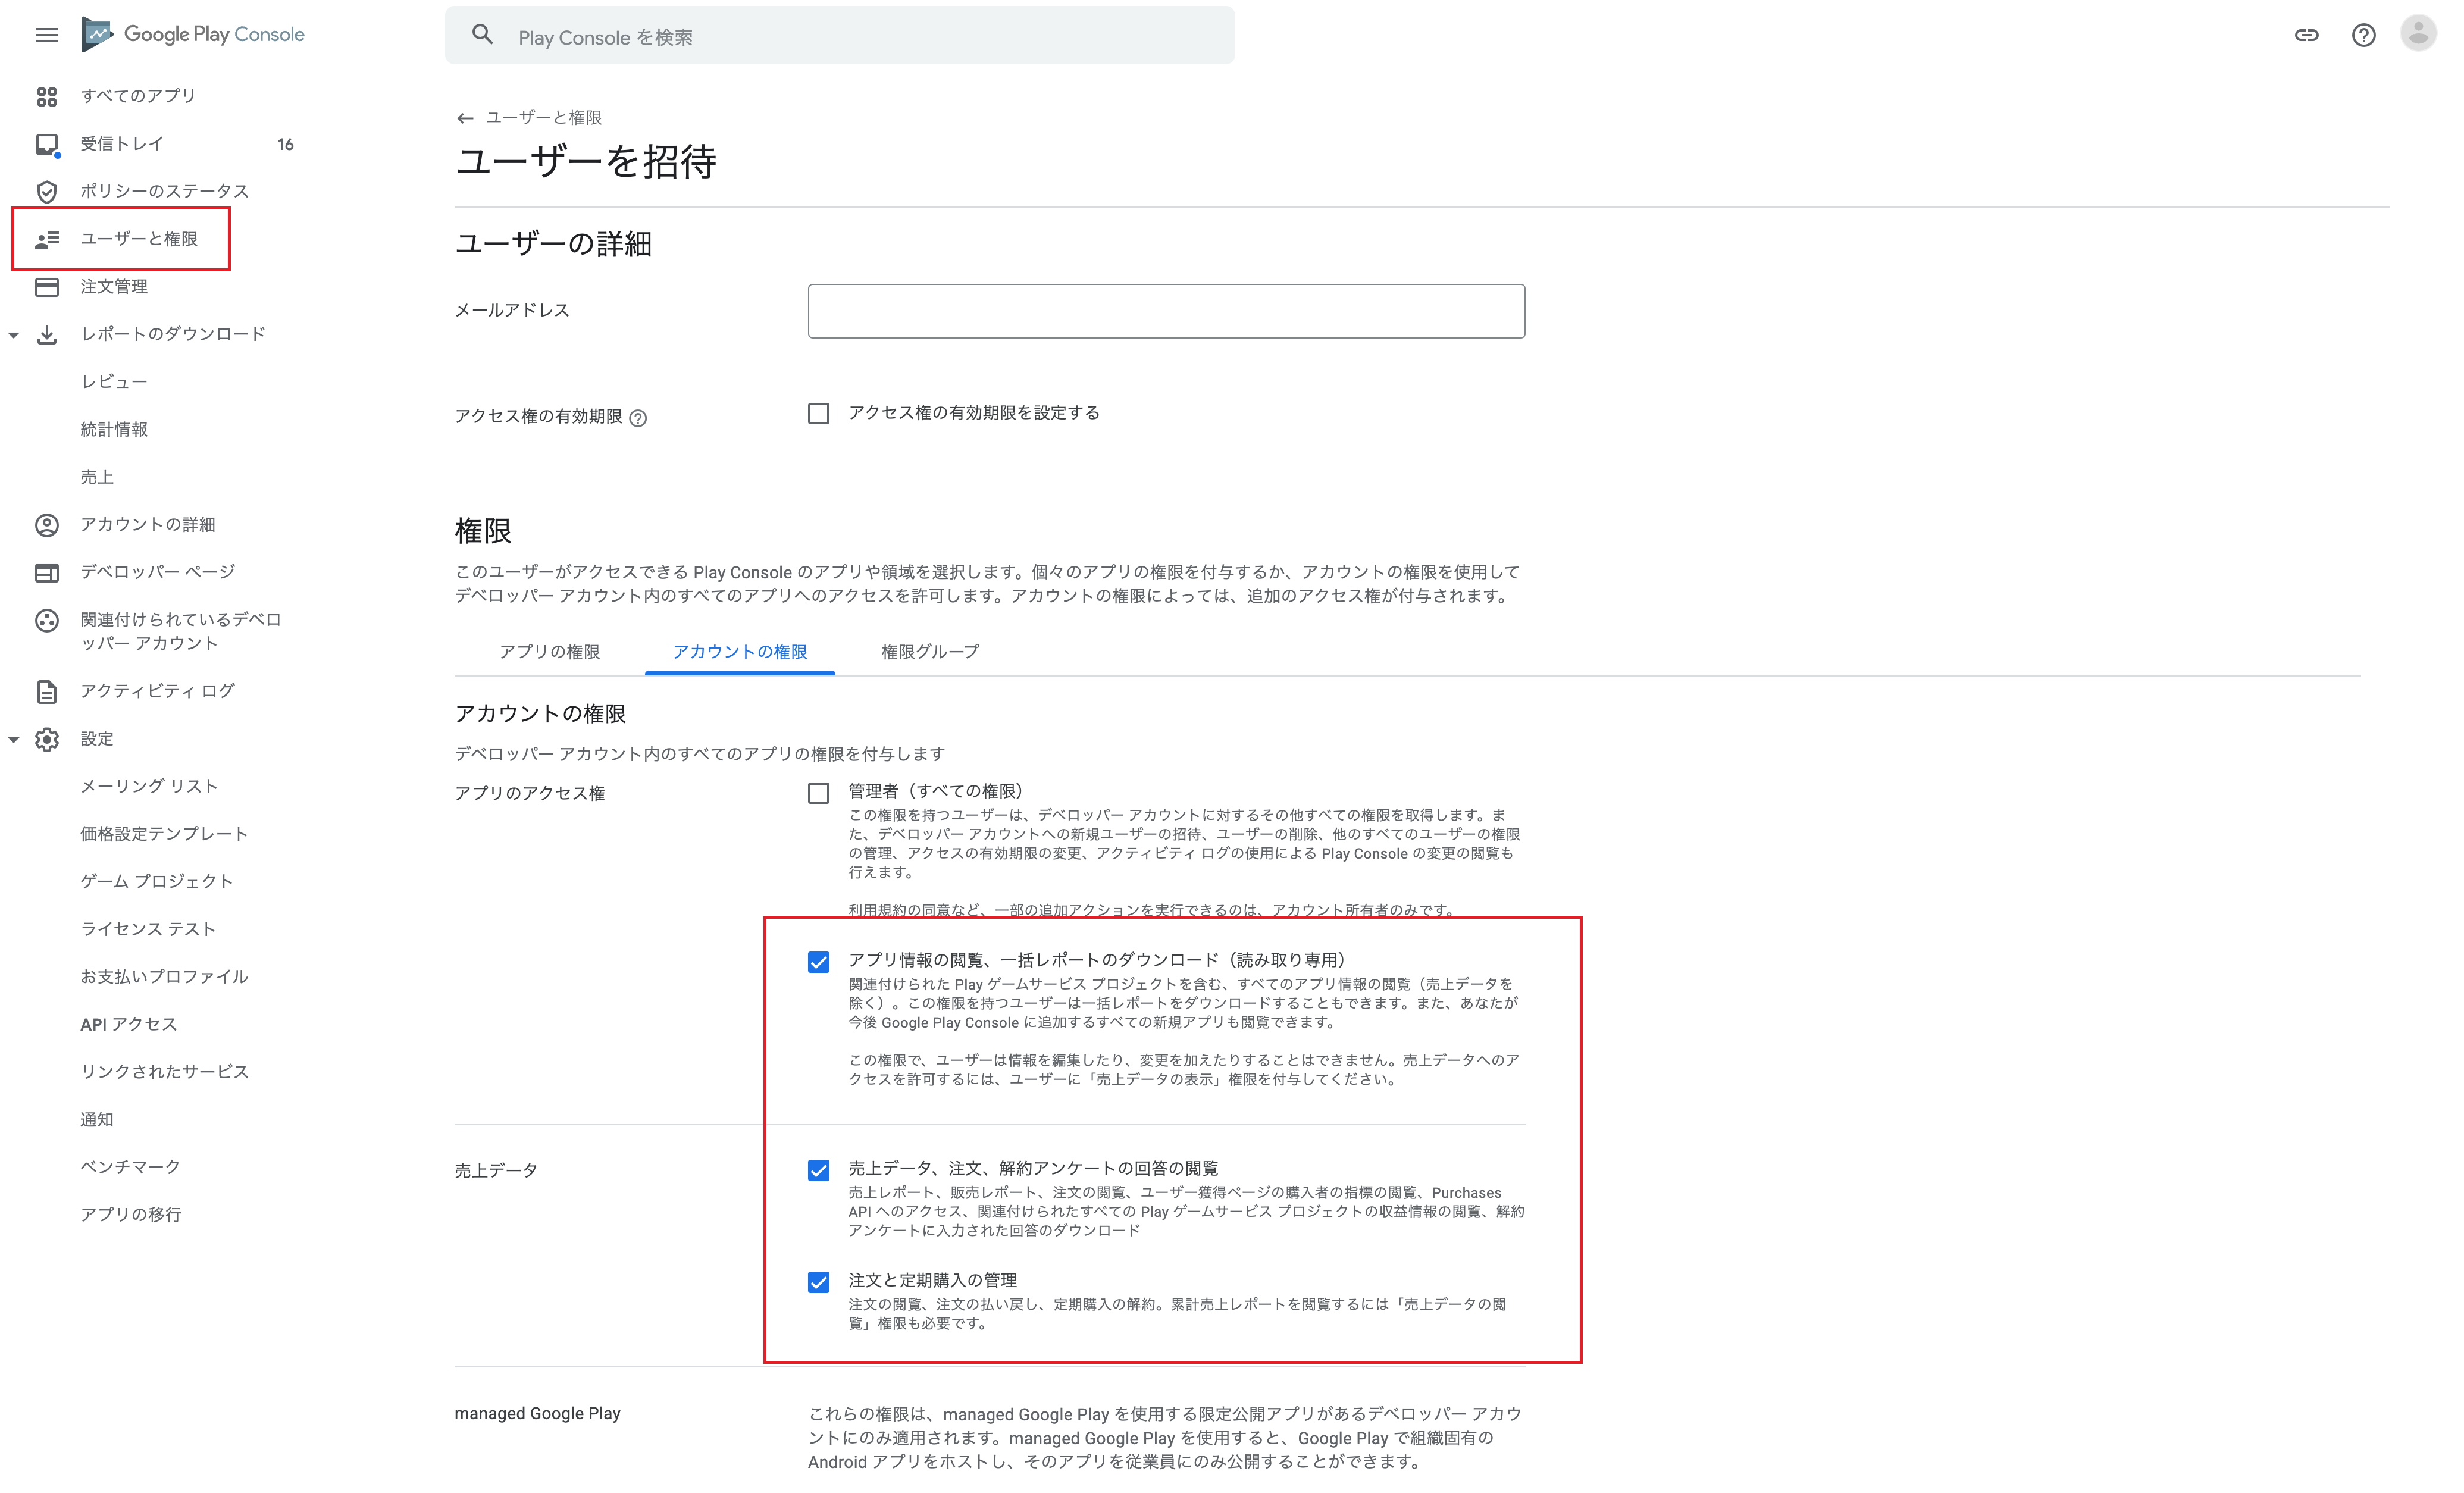
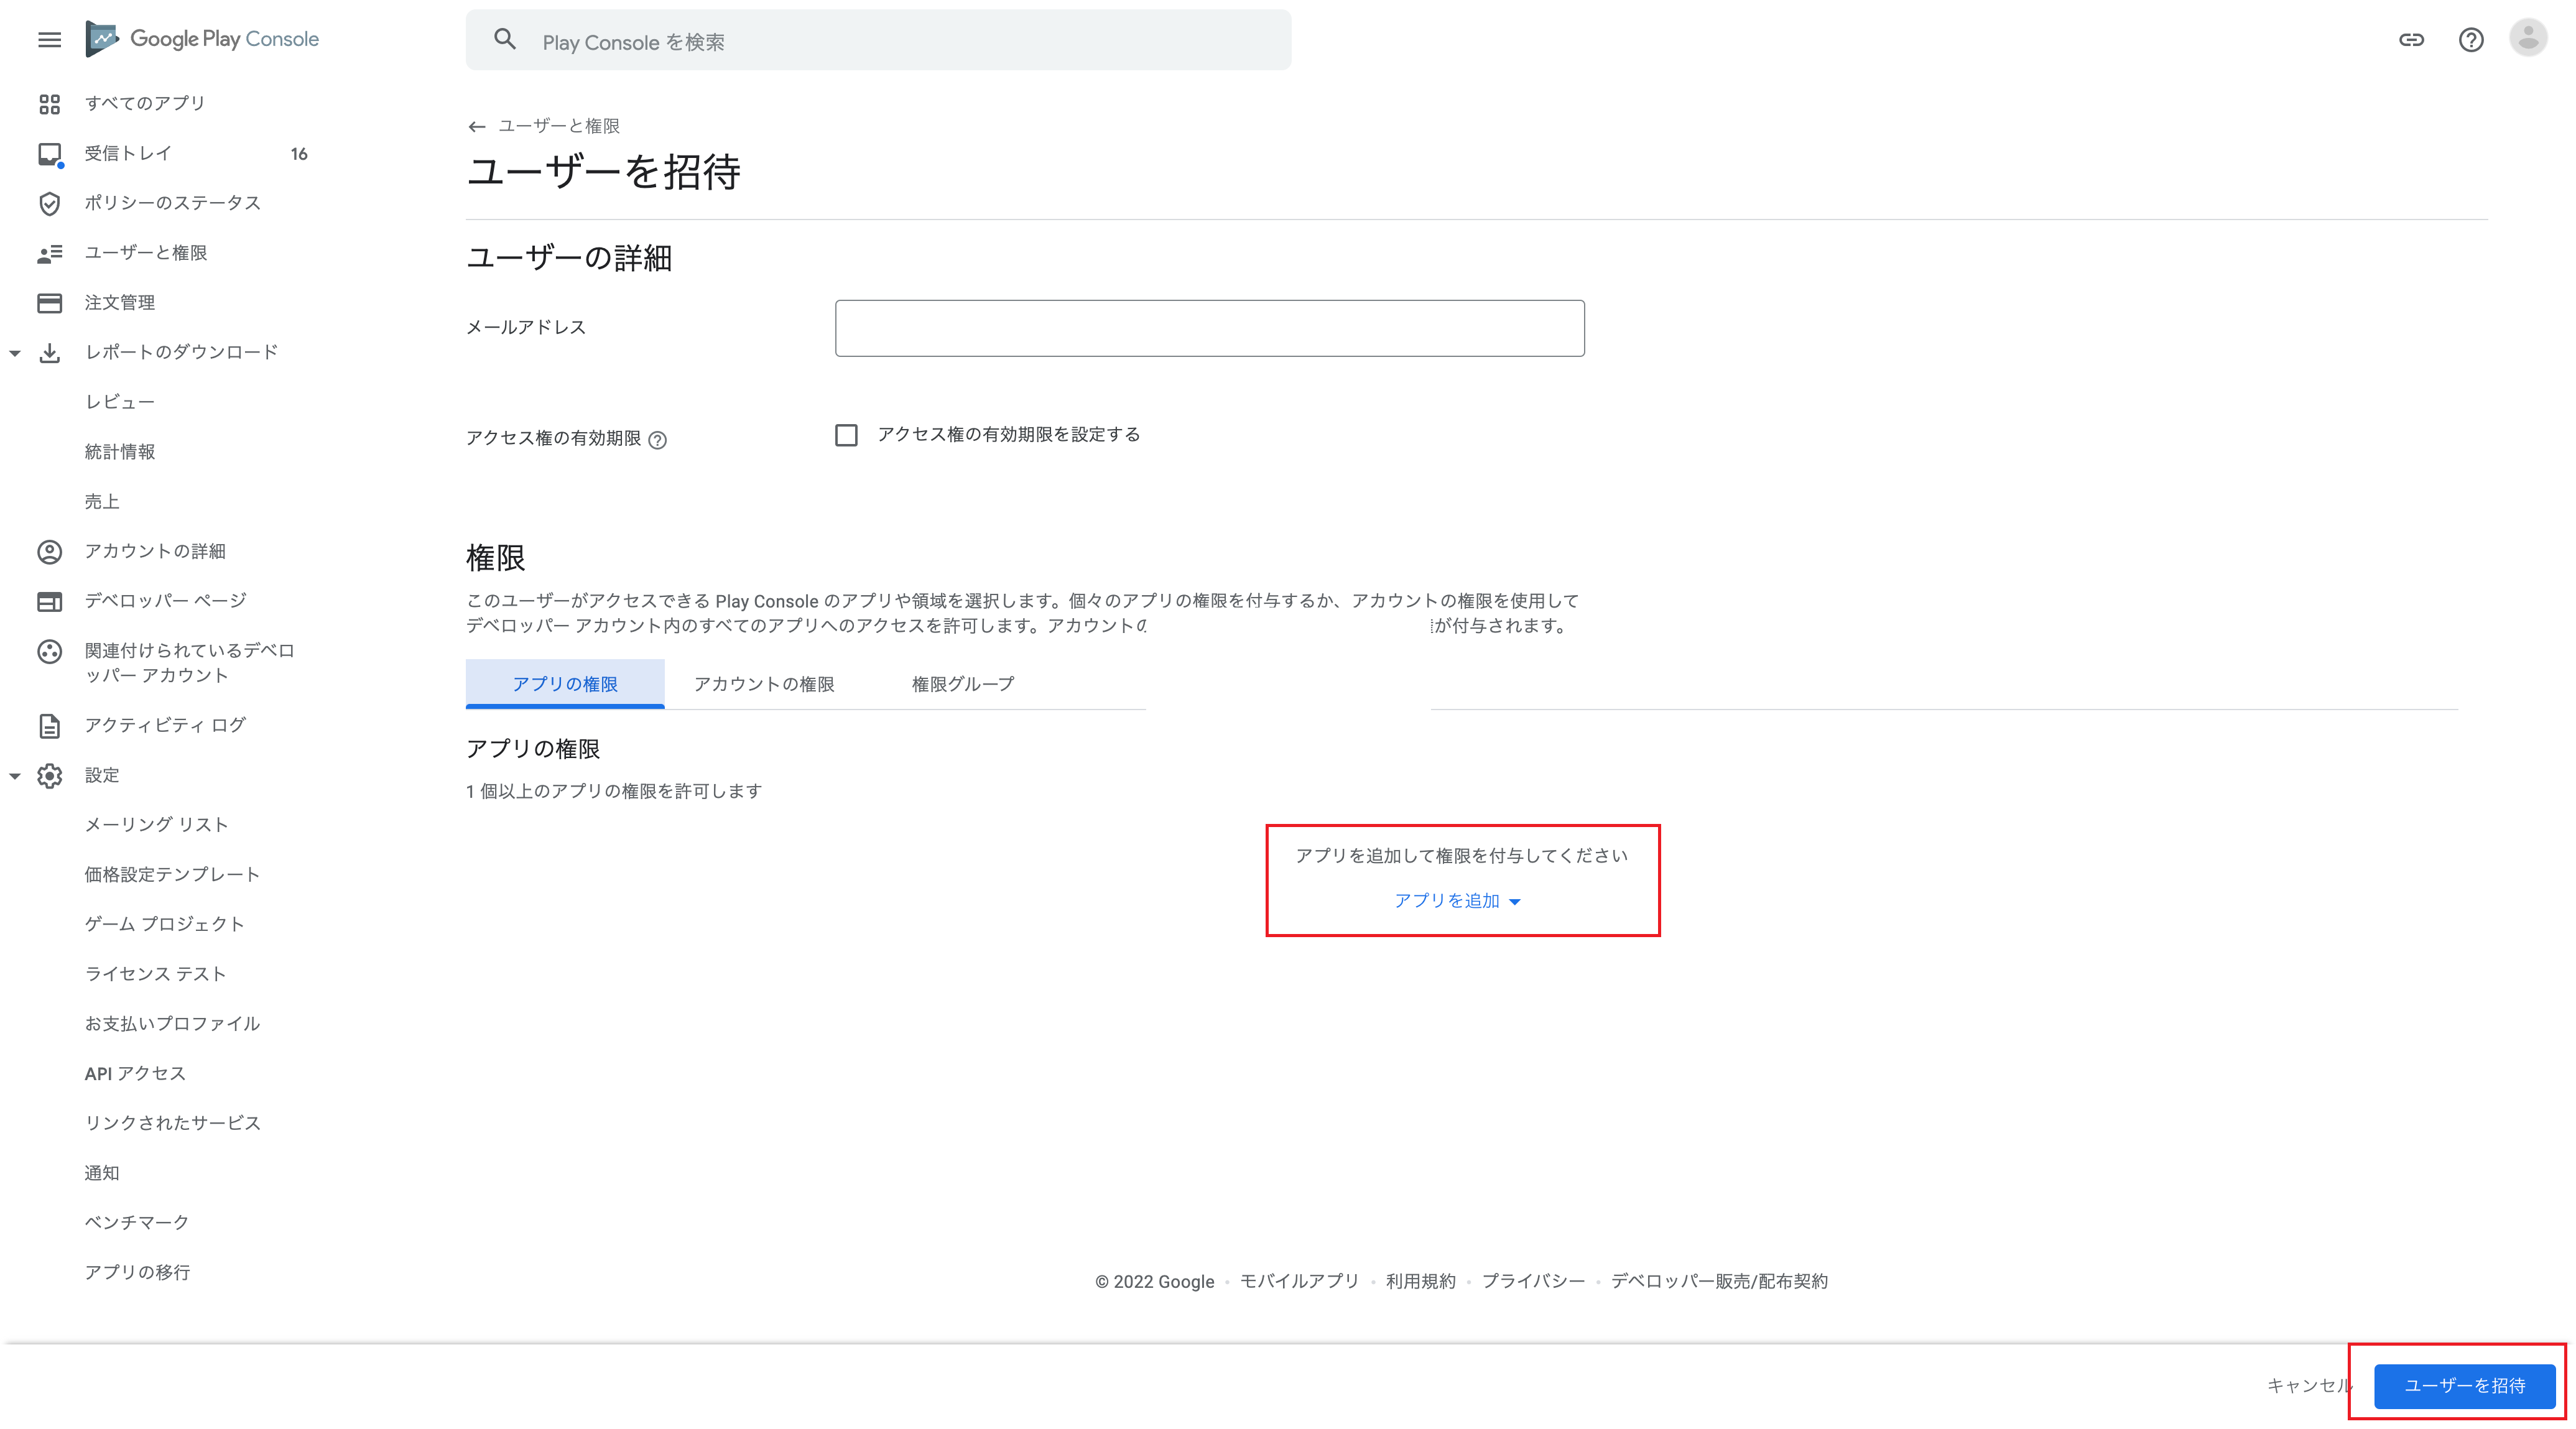
- Go to the User Invitation screen from Users and Permissions in the left menu of the Google Play Console, and under Account Permissions, check the following checkboxes
- View application information and download batch reports (read-only)
- View sales data, orders, and responses to cancellation surveys
- Manage orders and subscriptions
 "" width=""}
- Once you have granted the necessary permissions, click Invite Users.
 "" width=""}
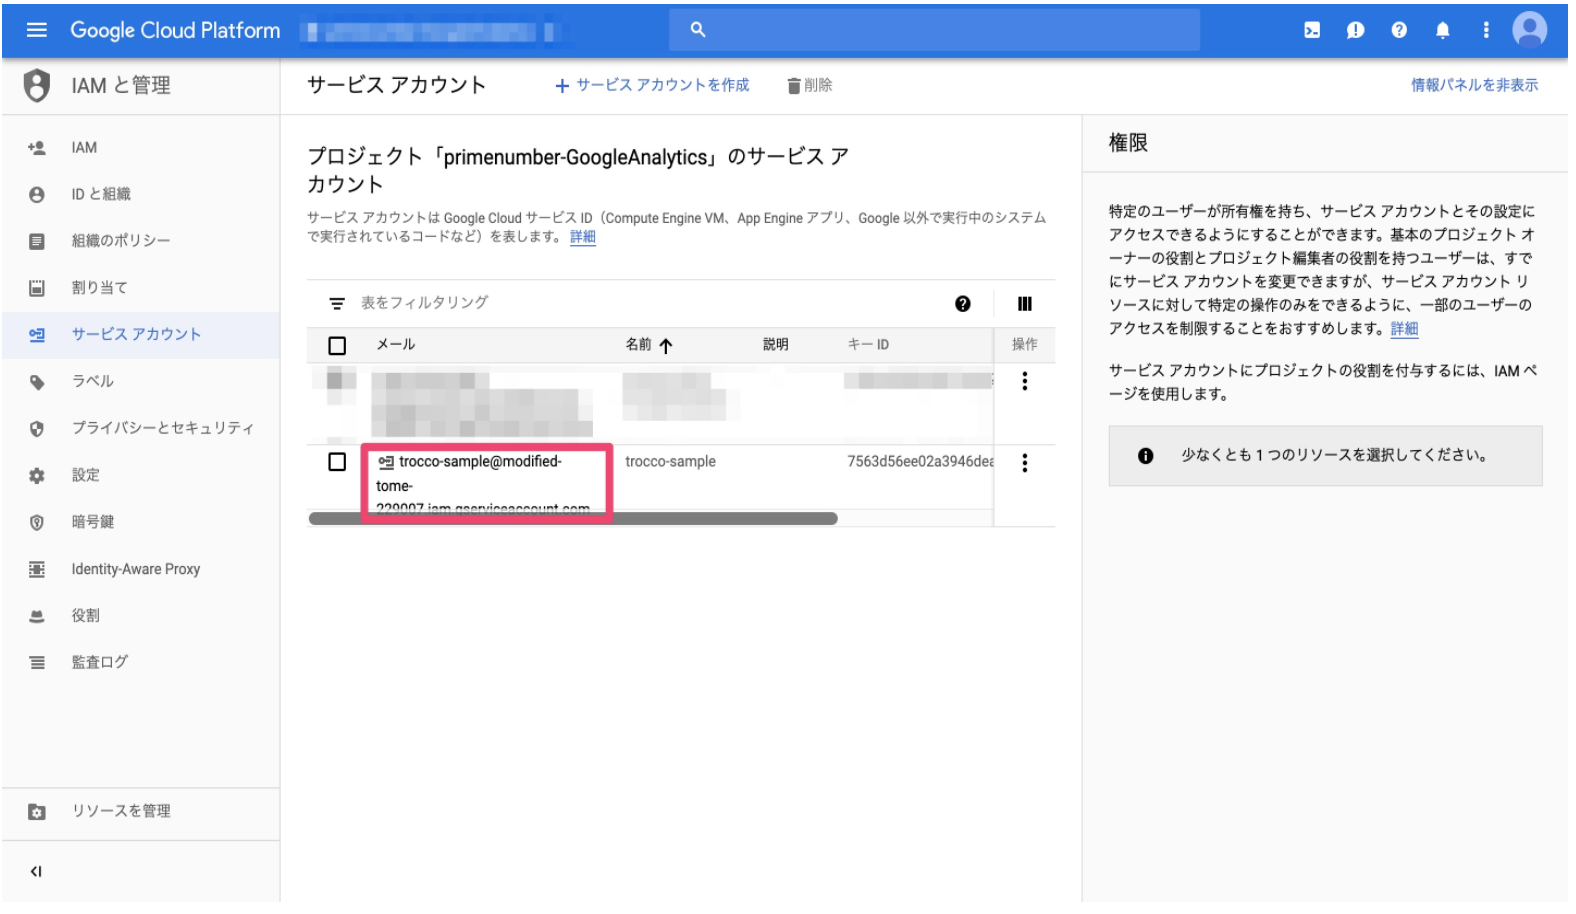
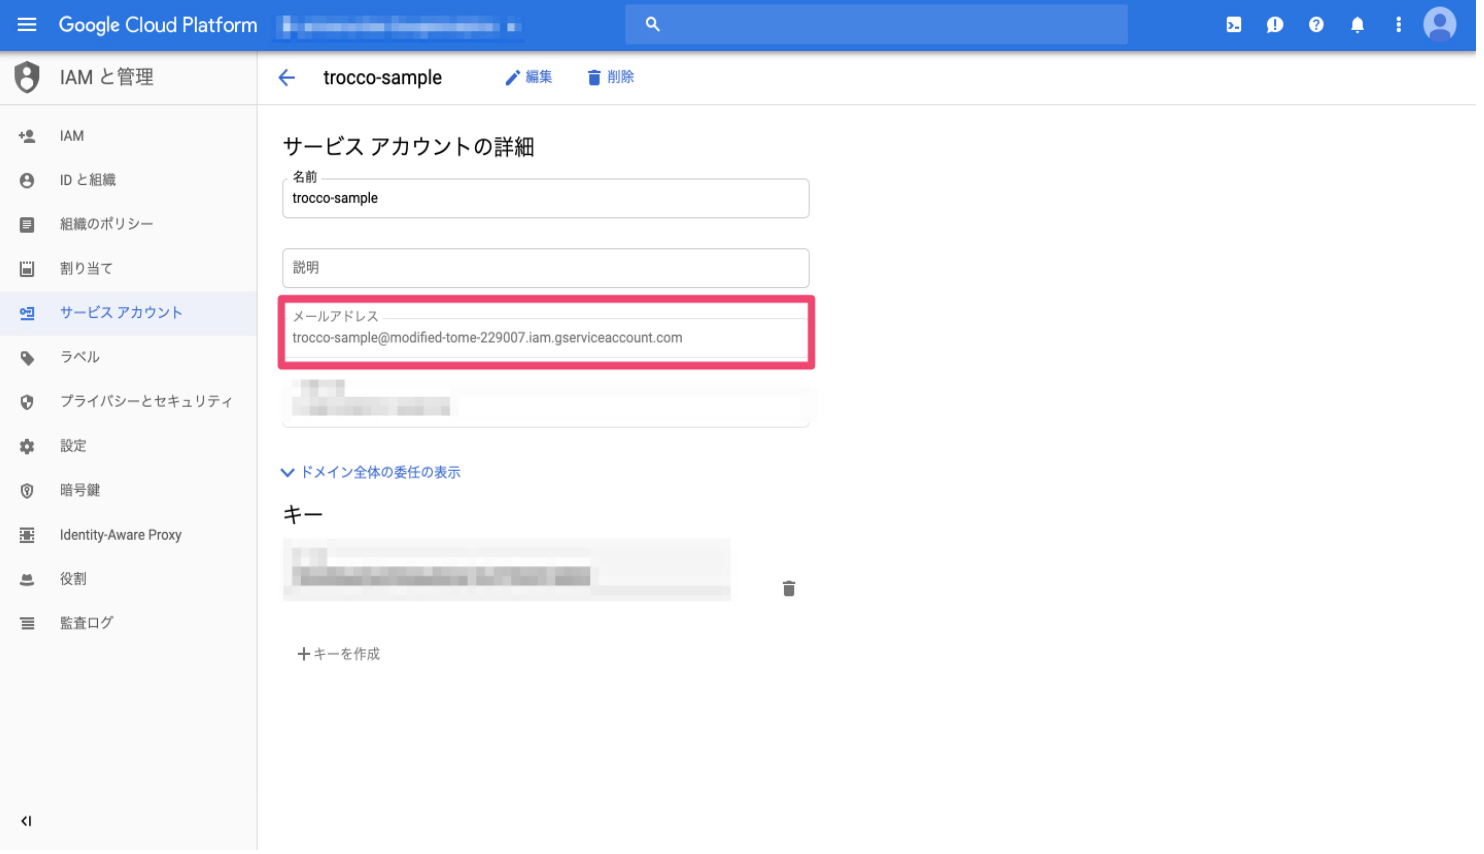
How to Confirm Service Account Email
You can see the Service Account Email on the screen when you select the item calledIAM and ManageService Accounts in the left bar, or on that screen when you select the account you want to use.