summary
This is a help page on the procedure for using S3 with TROCCO.
entry
Basic Information
| item name | indispensable | Contents |
|---|---|---|
| Name | Yes | Enter the name of the Connection Configuration to be used inside TROCCO. |
| memo | No | Enter a note of Connection Configuration to be used inside TROCCO. |
Connection Configuration
You can choose one of the following as your AWS authentication method
- IAM role: Obtains temporary authentication information during data transfer.
- IAM user: Permanent credentials are issued and used during data transfer.
Unlike authentication by IAM users, there is no need to enter credentials (AWS access key and AWS secret access key) on TROCCO. This allows for a more secure data transfer environment.
In addition, in order to obtain temporary authentication information during data transfer, in the AWS IAM role managed by the customer,
TROCCO's AWS account must be registered as a trusted entity type.
For more information on IAM roles, see IAM Role Issuance Procedure.
AWS Authentication Method: AWS Authentication Method: AWS Authentication Method: AWS Authentication Method For IAM roles
| item name | indispensable | Contents |
|---|---|---|
| AWS Account ID | Yes | Please enter the AWS account ID where your IAM role resides. |
| IAM role name | Yes | Enter the IAM role name created in your AWS account. Example: The trocco-role |
| TROCCO's AWS account ID (read-only) | - | Please allow the following AWS account ID when issuing IAM roles.545668264778 |
| External ID (read-only) | - | This information is automatically generated on TROCCO's Connection Configuration screen. Allow the external IDs shown on TROCCO when the IAM role is issued. |
AWS Authentication Method: AWS Authentication Method: AWS Authentication Method: AWS Authentication Method For IAM users
| item name | indispensable | Contents |
|---|---|---|
| AWS Access Key ID | Yes | Enter the access key ID of the IAM user created in AWS. |
| AWS Secret Access Key | Yes | Enter the secret access key of the IAM user you created in AWS. |
Procedure for issuing IAM roles
-
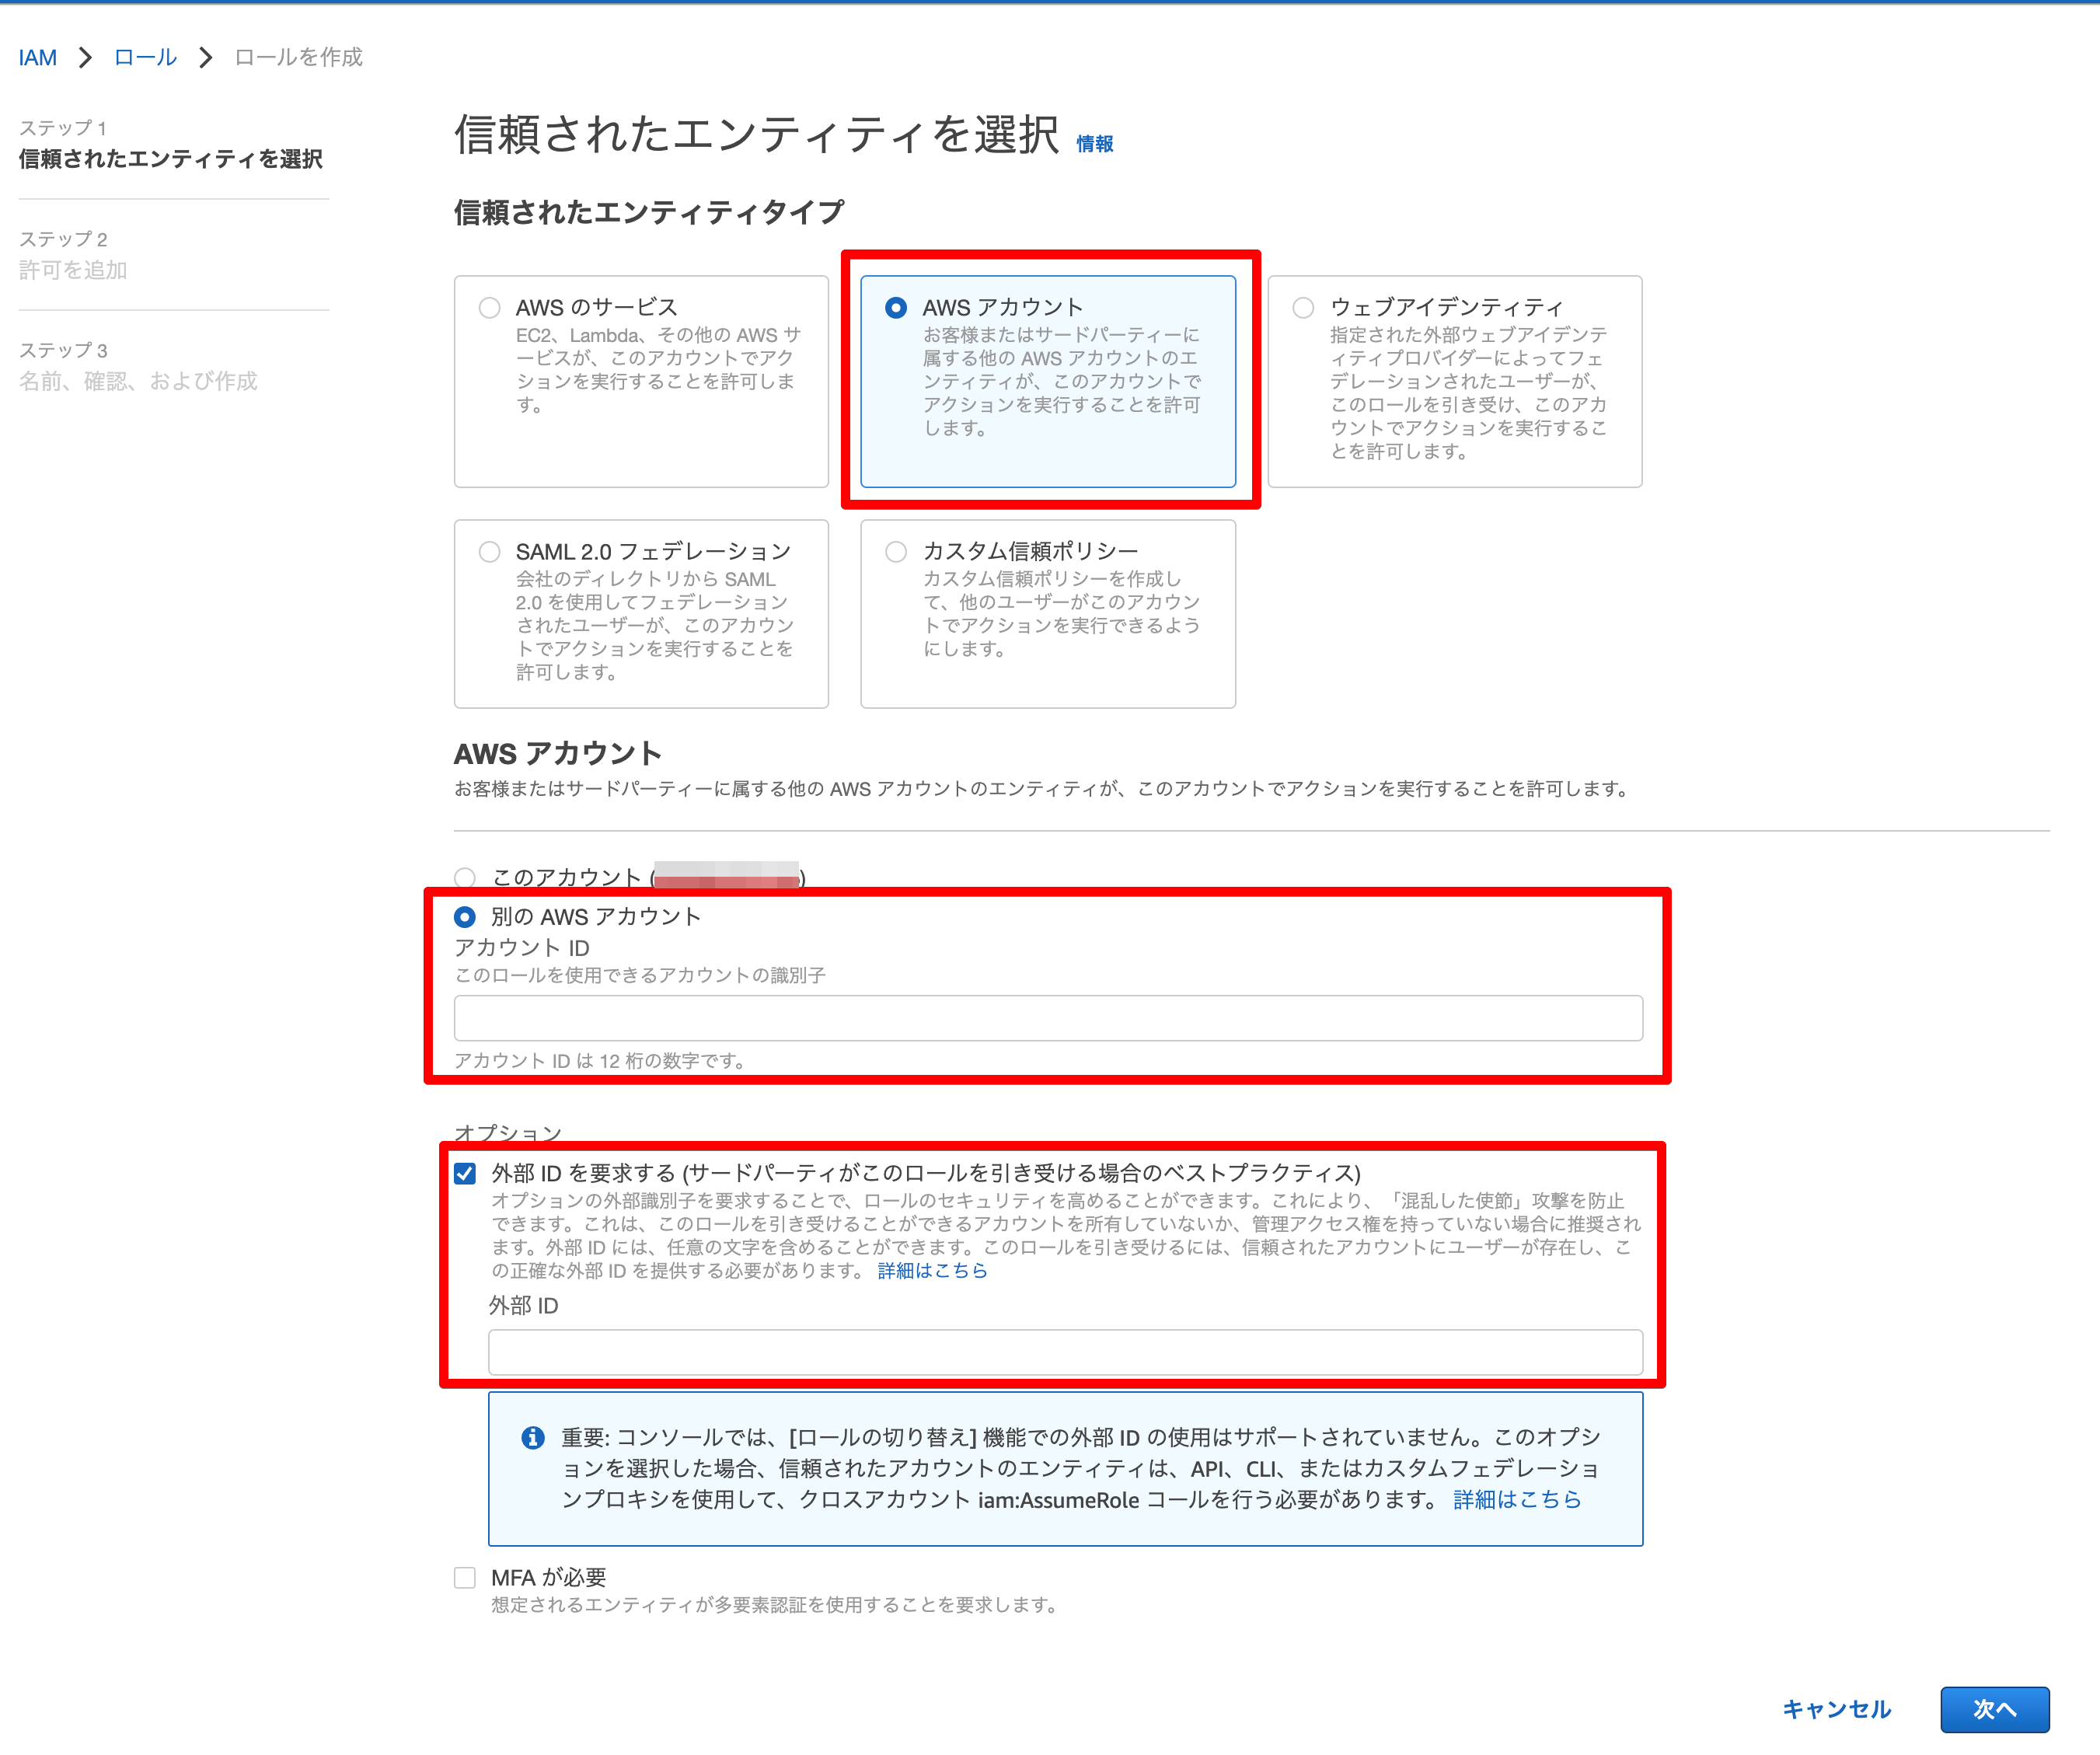
From the AWS IAM Management Console screen, click Roles > Create Role.
-
In Step 1, "Select Trusted Entities," configure as follows
Trusted Entity Type:. Select "AWS Account.Another AWS account:. Enter TROCCO's AWS Account ID on TROCCO's S3 Connection Configuration form.Request External ID > External ID:. Enter the "External ID" on TROCCO's S3 Connection Configuration form.
-
In Step 2, "Add Permissions," configure as desired.
-
In Step 3, "Name, Confirm, and Create," configure as desired.
- Note the role name entered here.
-
Enter the role name in the "IAM Role Name" field on TROCCO's S3 Connection Configuration form.
IAM User Issuance Procedure
Group Creation
-
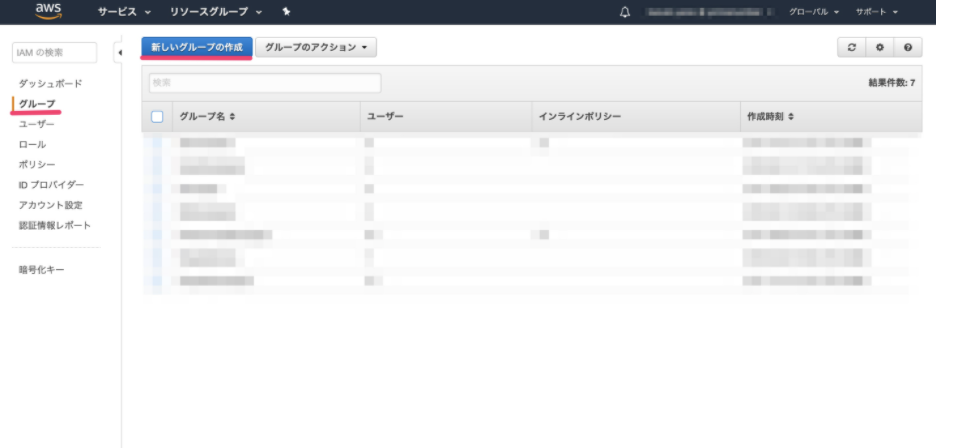
Log in to the IAM console.
-
From the main page, select Groups and click Create New Group.
-
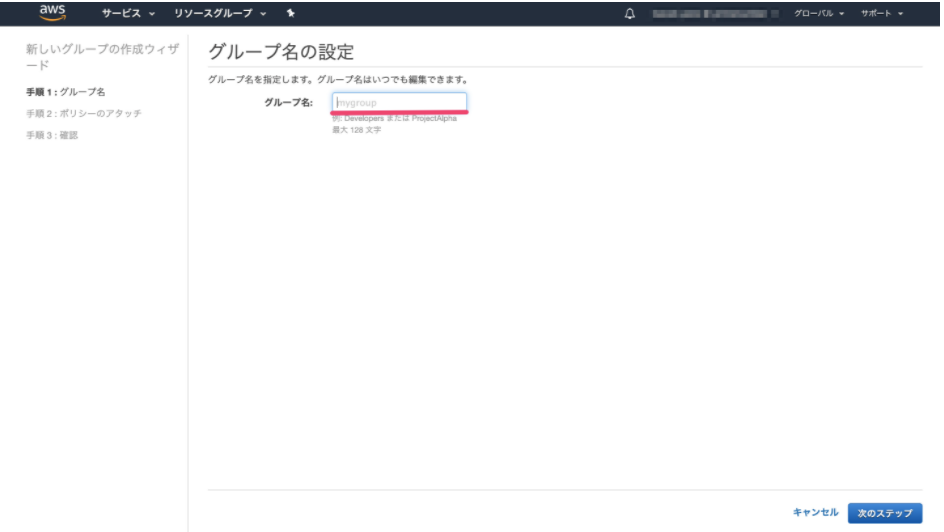
Enter a group name and click Next Step.
-
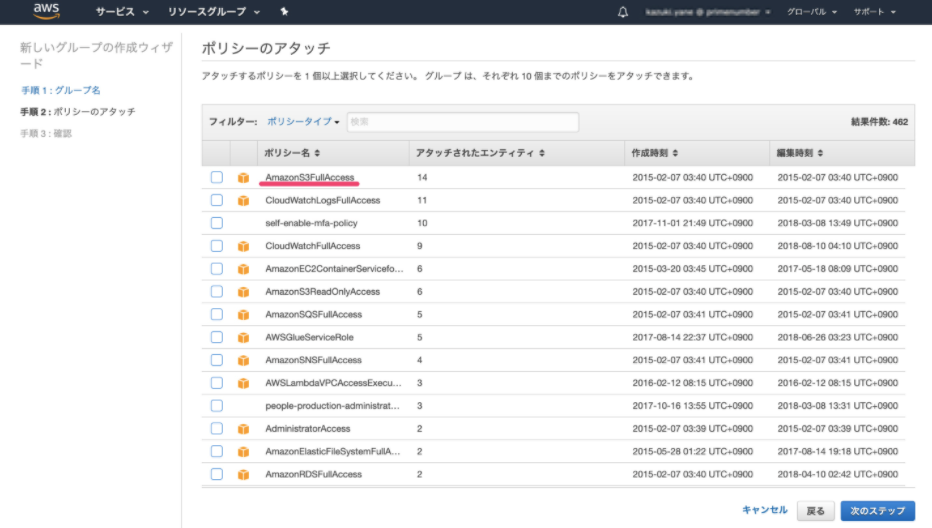
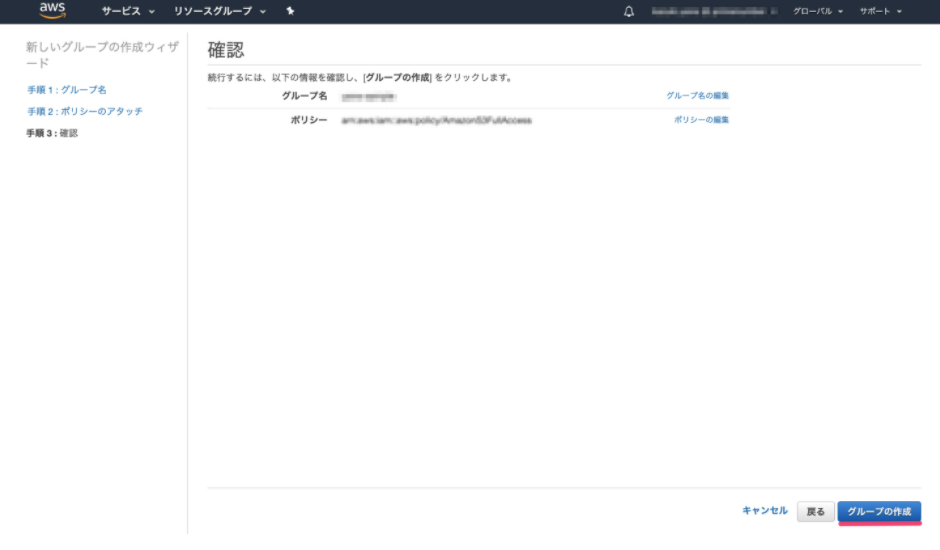
Select the desired policy and click Next Step. Select Amazon S3 Full Access.
-
Click Create Group.
User Creation
-
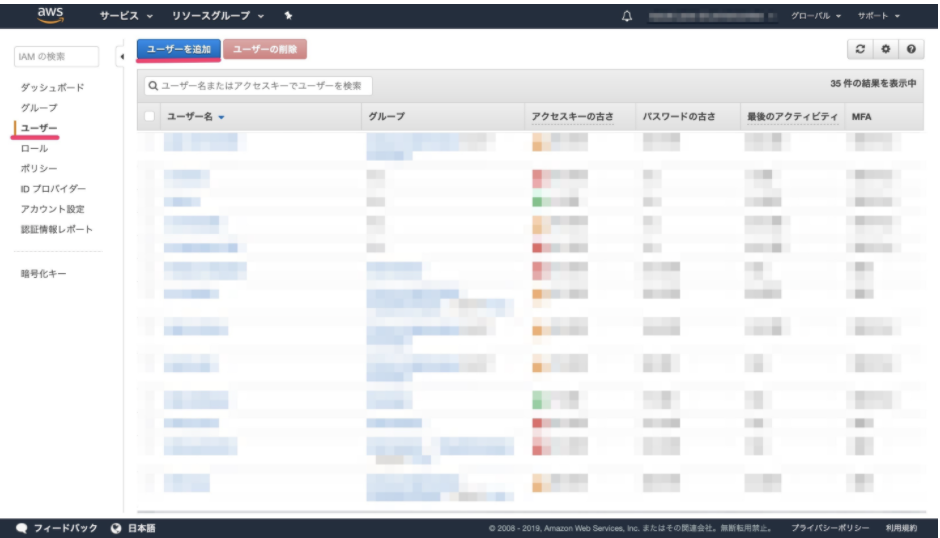
From the main page , select Users and click Create New User.
-
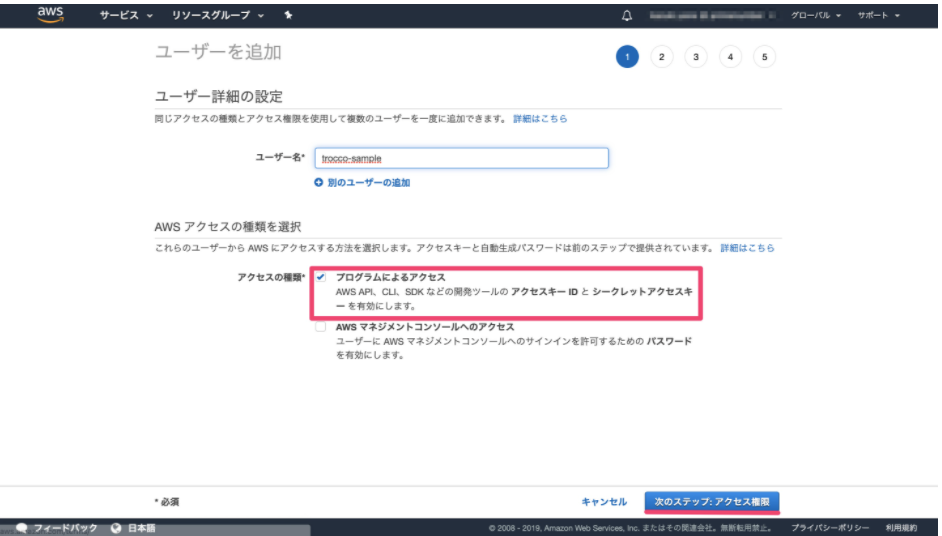
Enter a user name and select programmatic access under Access Type.
-
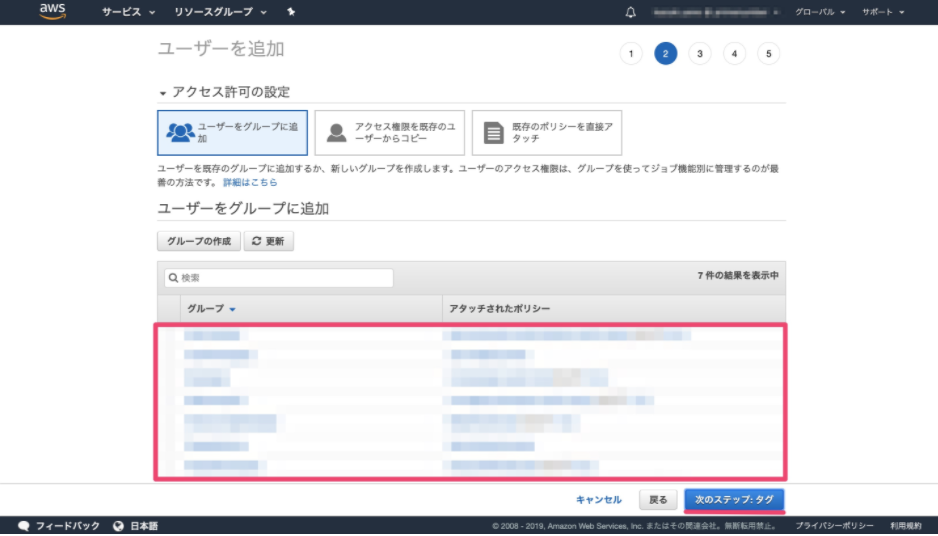
Create users by adding them to the group you just created.
-
After creation, the AWS Access Key ID and AWS Secret Access Key will be displayed.
Authority required to be granted
The permissions that must be granted to users for S3 Connection Configuration are as follows
s3:ListAllMyBucketss3:GetBucketLocations3:ListBuckets3:GetObjects3:PutObject(if there is a case where it is also used as Data Destination)
If the connection is to be used only as a Data Source, it can be established without any problem even if s3:PutObject is not assigned.
supplement
Reference: AWS official website