summary
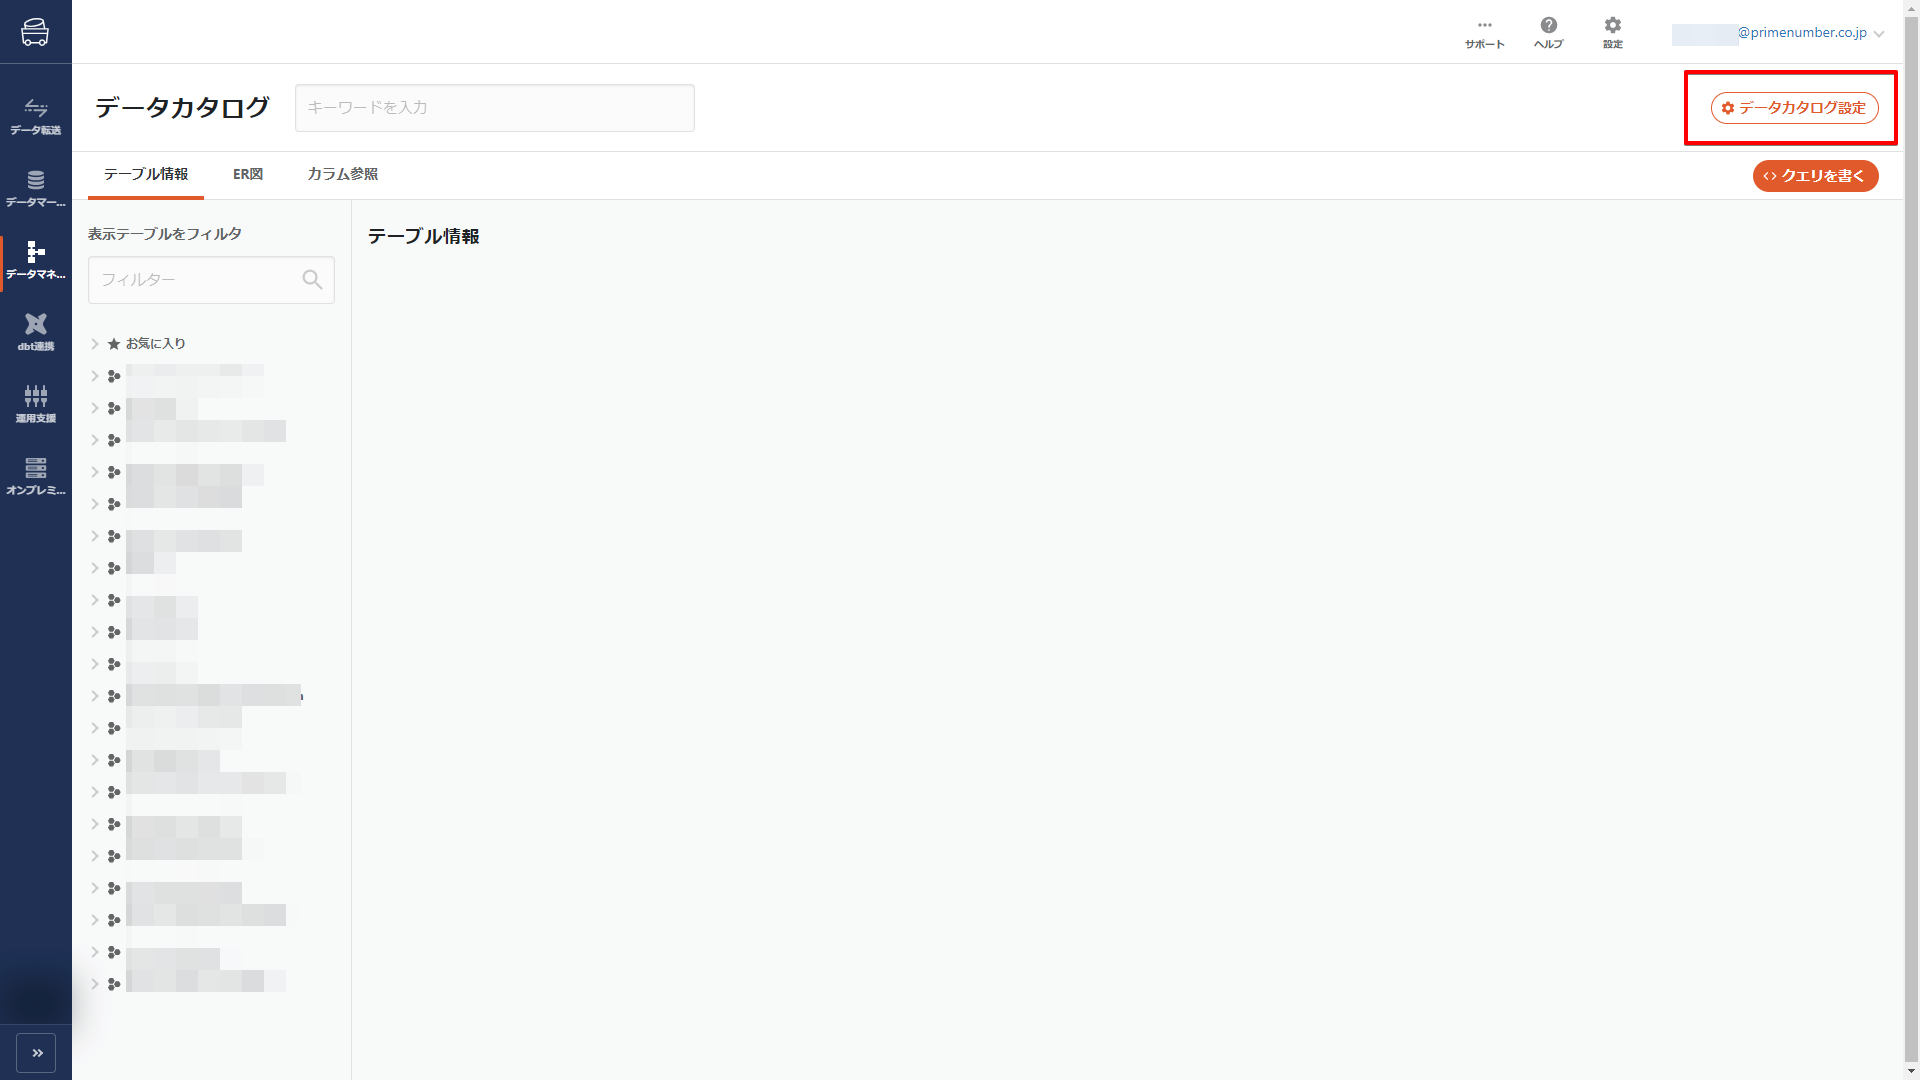
Click on Data Catalog Setting in the upper right corner of the screen.
Data Catalog Settings allow you to configure various settings related to the Data Catalog.
- TROCCO Basic Metadata Settings
- Templates for user-defined metadata
- Metadata Import
- Data Store Coordination Management
TROCCO Basic Metadata Settings
Set the fields to be displayed in the column information.
The default settings are as follows
- Logical name: Display
- Explanation: Not shown
Templates for user-defined metadata
Set the fields to be populated with user-defined metadata for each table column.
- Only one template for user-defined metadata can be created per table column.
- Fields added to the template cannot be deleted later.
- Fields that are set to be****required cannot be made mandatory later.
| item name | indispensable | remarks |
|---|---|---|
| Template Name | ✓ | Enter a template name. |
| Template Type | ✓ | Select either from a table or a column. |
| Field Name | ✓ | Enter a field name. |
| Tip. | - | You can enter a hint for the field. The information entered in this field will be displayed on the user-defined metadata entry screen. |
| data type | ✓ | Select one of the followingStringText(Markdown)IntegerBooleana``String or Text (Markdown) type is the target string in a table column search. |
| require entry | - | If this item is enabled, when editing user-defined metadata, the value of the corresponding field must be entered before it can be saved. This item cannot be changed later. |
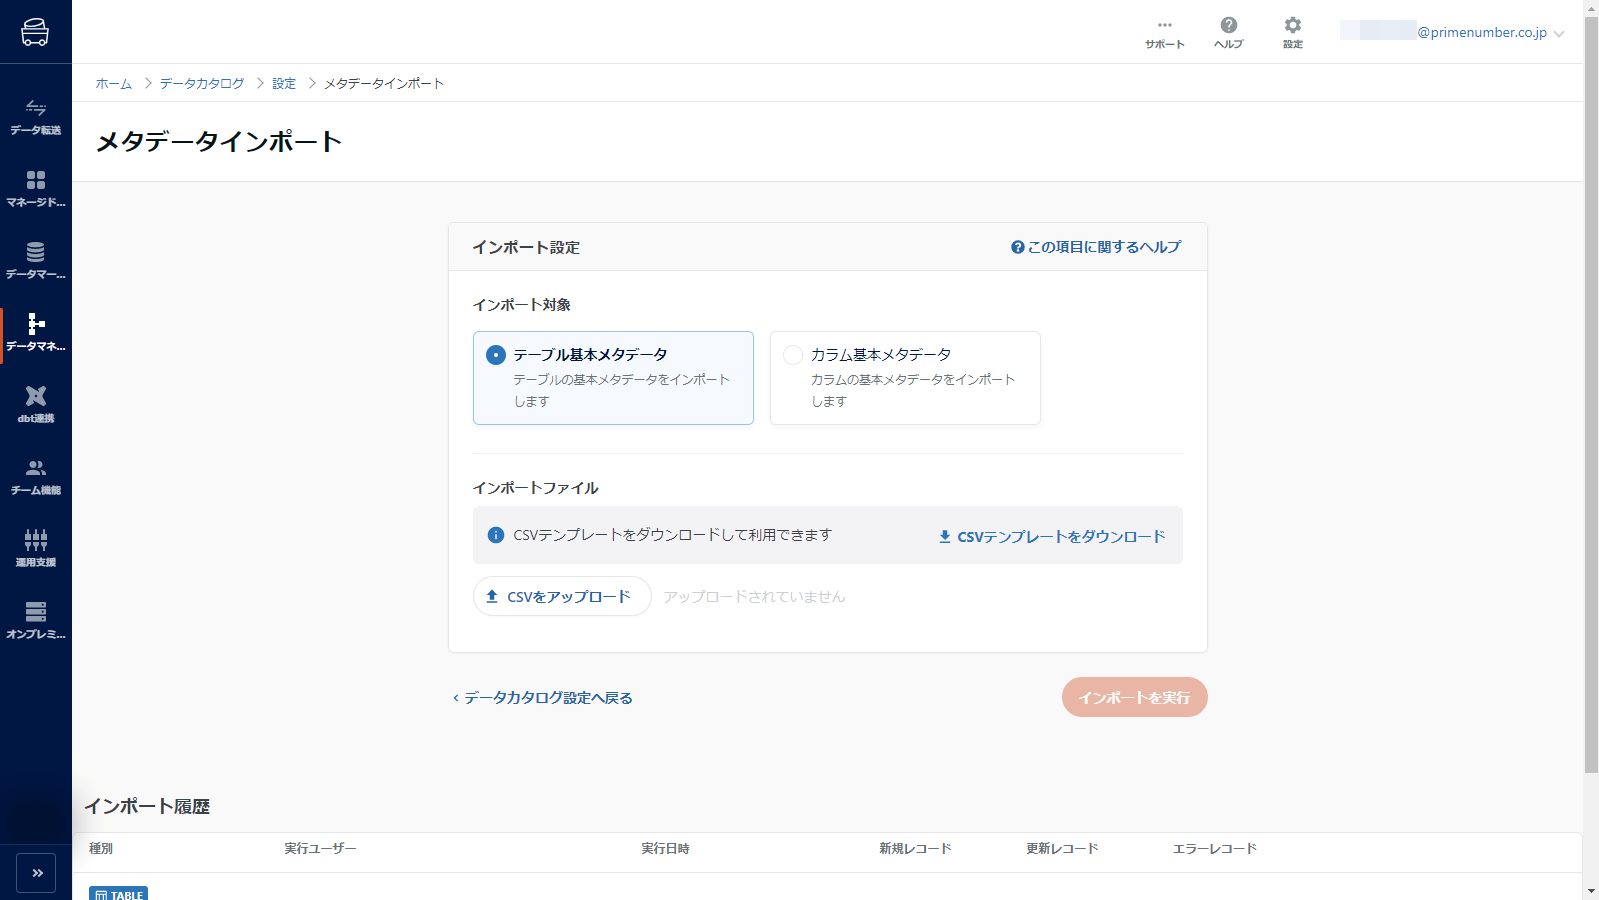
Metadata Import
CSV files can be used to import basic metadata values.
The results of the import can also be viewed from the import history at the bottom of the screen.
Metadata Import Restrictions
Metadata import using CSV files is supported only for basic metadata.
Import of other metadata is not supported.
UTF-8 is recommended.
For character codes other than UTF-8, some characters may not be readable.
The maximum file size for CSV files that can be uploaded is 100 MB.
If metadata values have already been entered, the imported values will overwrite the existing values.
CSV file format
Click on Download CSV Template.
Edit the downloaded CSV file accordingly and perform upload and import.
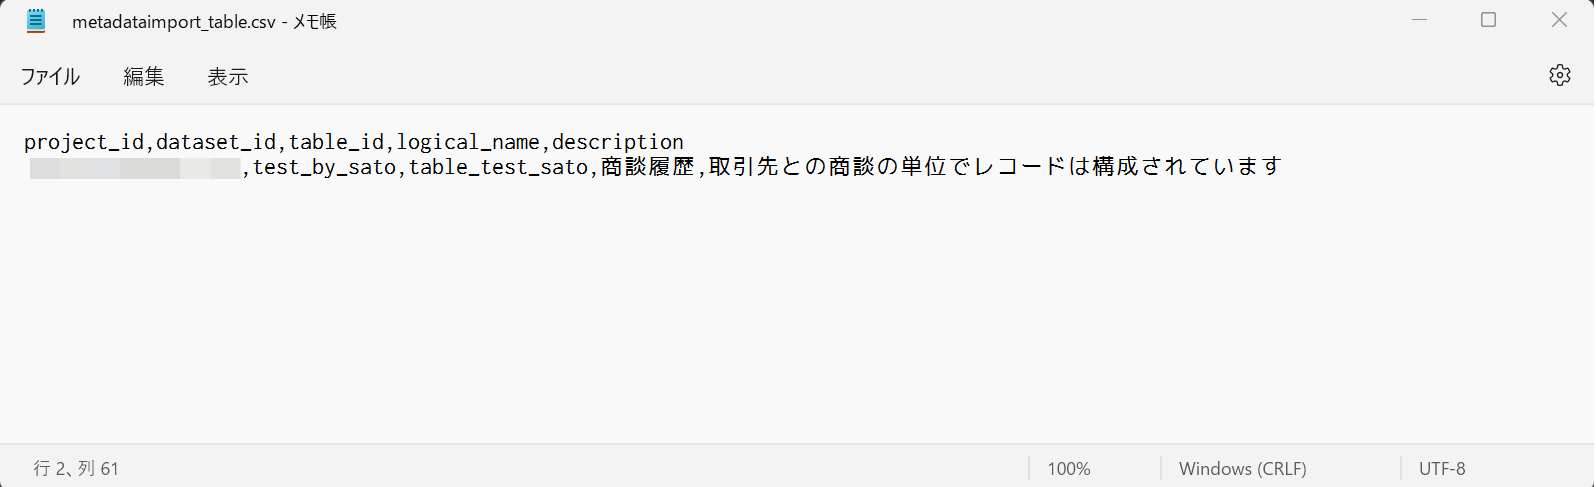
A CSV with the field name entered in the first line will be downloaded.
Enter metadata as appropriate on the second and subsequent lines.
Note that the structure of the CSV file will vary depending on your data store and the tables or columns to be imported.
Below is a description of the CSV file structure for each data store.
If you are using a BigQuery data store
For the first line of the CSV file, enter the following
- Basic Table Metadata
project_id,dataset_id,table_id,logical_name,description
- column basic metadata
project_id,dataset_id,table_id,column_id,logical_name,description
Enter the second and subsequent lines of the CSV file based on the table below.
| column name | indispensable | Information to be entered |
|---|---|---|
project_id |
✓ | Project Name |
dataset_id |
✓ | Data Set Name |
table_id |
✓ | table name |
column_id |
✓* | Column name associated with table Required only when importing basic column metadata |
logical_name |
- | Value you want to enter in the Logical Name field |
description |
- | Value you want to enter in the Description field |
If you are using Snowflake's data store
For the first line of the CSV file, enter the following
- Basic Table Metadata
database_name,schema_name,table_name,logical_name,description
- column basic metadata
database_name,schema_name,table_name,column_name,logical_name,description
Enter the second and subsequent lines of the CSV file based on the table below.
| column name | indispensable | Information to be entered |
|---|---|---|
database_name |
✓ | Database Name |
schema_name |
✓ | schema name |
table_name |
✓ | table name |
column_name |
✓* | Column name associated with table Required only when importing basic column metadata |
logical_name |
- | Value you want to enter in the Logical Name field |
description |
- | Value you want to enter in the Description field |
The following is an example CSV file used for importing basic table metadata from a BigQuery data store.
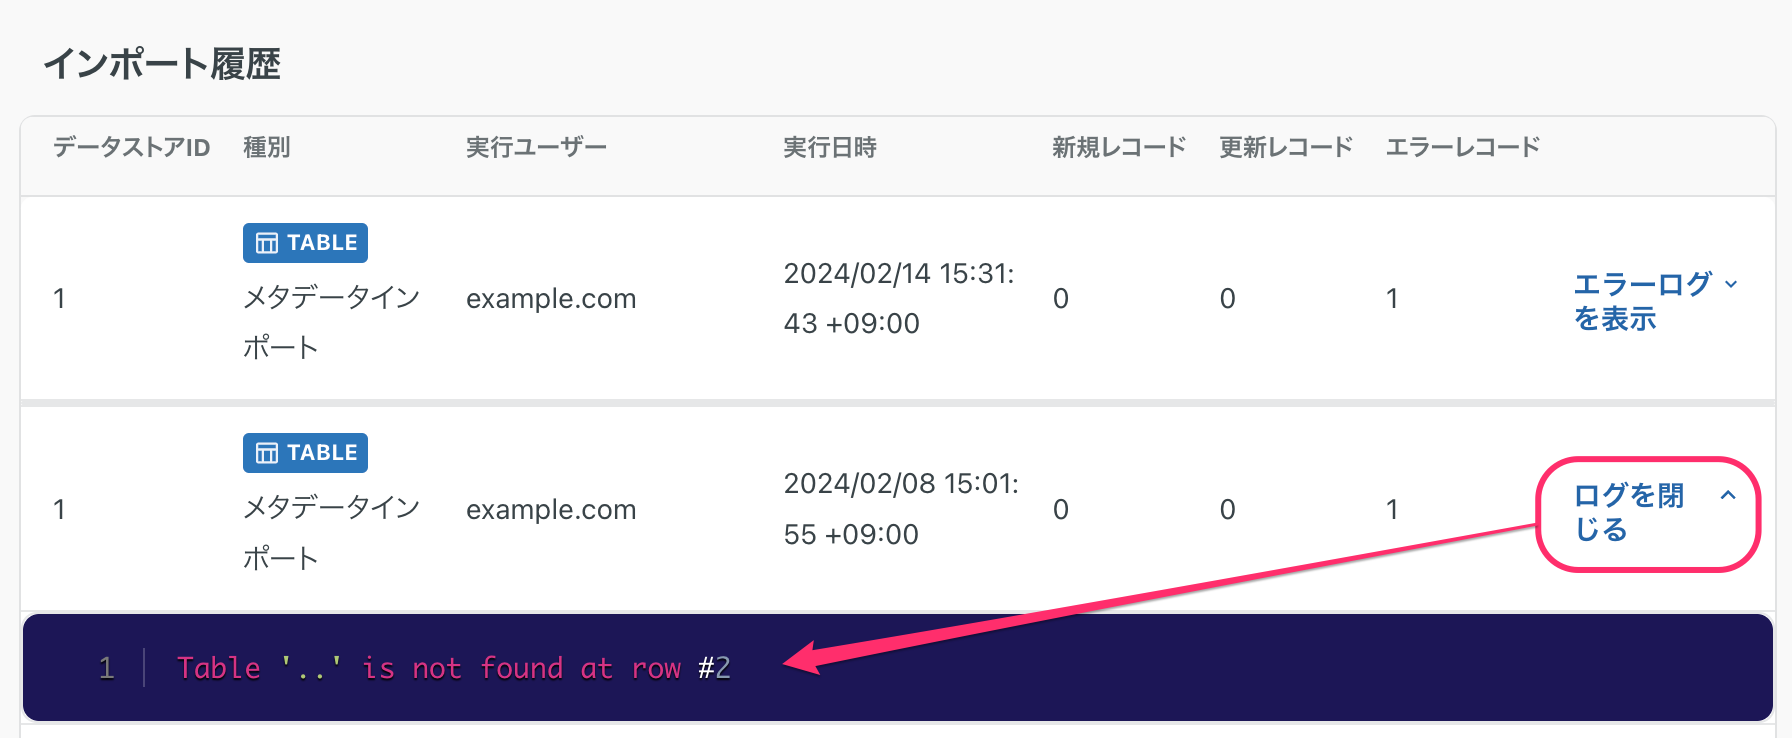
If import fails
Click View Error Log in****Import History to see the cause of the error.