summary
Help page for ETL Configuration of Data Setting to Cybozu's kintone.
constraints
- There are limitations of the kintone API.
- For more information, please refer to the kintone API official documentation - (Bulk record retrieval)Limitations ofcreating a cursor.
- For each ETL Configuration, an application must be created on the kintone side.
- It is not possible to automatically create an application from the TROCCO side.
- If
thetransfer mode isupsertand the update key contains an empty record, the record will be newly added.- Even if a record with an empty key exists in Data Destination, the row will not be updated.
supplementary information
Enter the field code in the kintone application for the column name in ETL Configuration STEP 2 "Column Setting".
Setting items
STEP1 Basic settings
| item name | indispensable | Contents |
|---|---|---|
| kintone Connection Configuration | Yes | From the previously registered Connection Configuration of kintone, select the one that has the necessary permissions for this ETL Configuration. |
| App ID | Yes | Enter the kintone application ID to which the data Destination will be sent. The application ID can be found at the URL on the application screen. 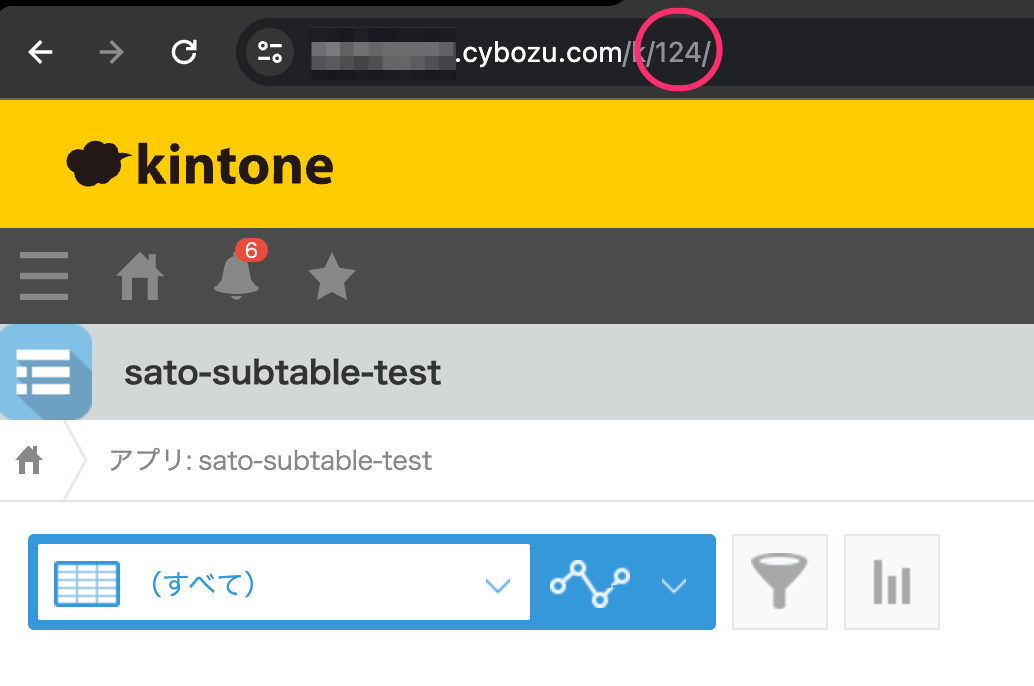 If you want to use the API, please refer to the kintone API official document - Obtaining the ID of the app. |
| Guest Space ID | No | If you are using a guest space, please enter the guest space ID. |
| transfer mode | Yes | Specifies the transfer mode.insert: Transfers a record to Data Destination.update: Update records with matching update keys.upsert: If there is a record with a matching update key, update it; otherwise, transfer a new record. |
| update key | Yes | Enter when update or upsert is selected in transfer mode.Enter the column name of the field with unique values. You can also specify a record ID. In that case, enter $id.Note that the update key must match any column name in the STEP2 Column Setting. |
STEP1 Detailed settings
Click on Advanced Settings to display the configuration items.
| item name | default value | Contents |
|---|---|---|
| table transfer key | - | Enter if you want to transfer records to a table (formerly a subtable) in the application. For details, please refer to the case where you want to update a table (formerly: sub-table) in the application. |
| Number of records to be updated in one request | 100 | Enter the number of records to be updated at one time. |
| Update processing when NULL is included | Update with NULL | You can set how to handle null values contained in ETL Configuration data when updating records on kintone. Please select from the following
null values of ETL Configuration data will be added as null values. |
STEP2 Output Option
You can configure detailed settings regarding columns.
| (data) item | Contents |
|---|---|
| column name | Enter any column name in ETL Configuration STEP2 Column Setting. |
| field code | Enter the field code of the Data Destination kintone application. |
| data type | Select this option if you want to explicitly specify the data type of a field.List of available typesSINGLE_LINE_TEXTMULTI_LINE_TEXTRICH_TEXTNUMBERCHECK_BOXRADIO_BUTTONMULTI_SELECTDROP_DOWNDATETIMEDATETIMELINKSUBTABLE |
| time zone | You can enter the time zone to be used during the deployment if you want to transfer with DATE or TIME type. |
| Columns to sort rows in table | If you want to transfer by SUBTABLE type, you can register the values in a table (formerly known as a subtable) with the values sorted in ascending order.For details, please refer to the case where you want to update a table (formerly: sub-table) in the application. |
If you want to update a table (formerly a subtable) in the application
You can also transfer records to a table within the application (referred to as a sub-table from this description onward ).
In the following, fields are distinguished by hierarchical structure.
- Fields directly below the application
- Fields in subtables
A single transfer can be used to transfer to fields directly under the application and to update fields in sub-tables at once.
- Even if
update or``upsert isselected as the transfer mode, data transfer to the sub-table is always a wash.
That is, the records in the existing sub-tables are replaced by the newly transferred data after each transfer. - There must be at least one field directly under the app that consists of unique values.
Update sub-tables using 2D tables
Transfer data to be prepared
Prepare a table in which the values of the fields immediately below the app are flattened and joined in a way that the records of the fields****in the sub-tables are of minimum granularity.
Specific examples will be used to illustrate this point.
- Directly below the application: A field called****Case ID and Company Name exists.
- Sub-table: A sub-table called Activity History with fields called****Activity Date and Activity Details
In such a case, prepare a table with four columns as follows
Note that the transfer data need not include elements related to the subtable itself ( activity history in the above example).
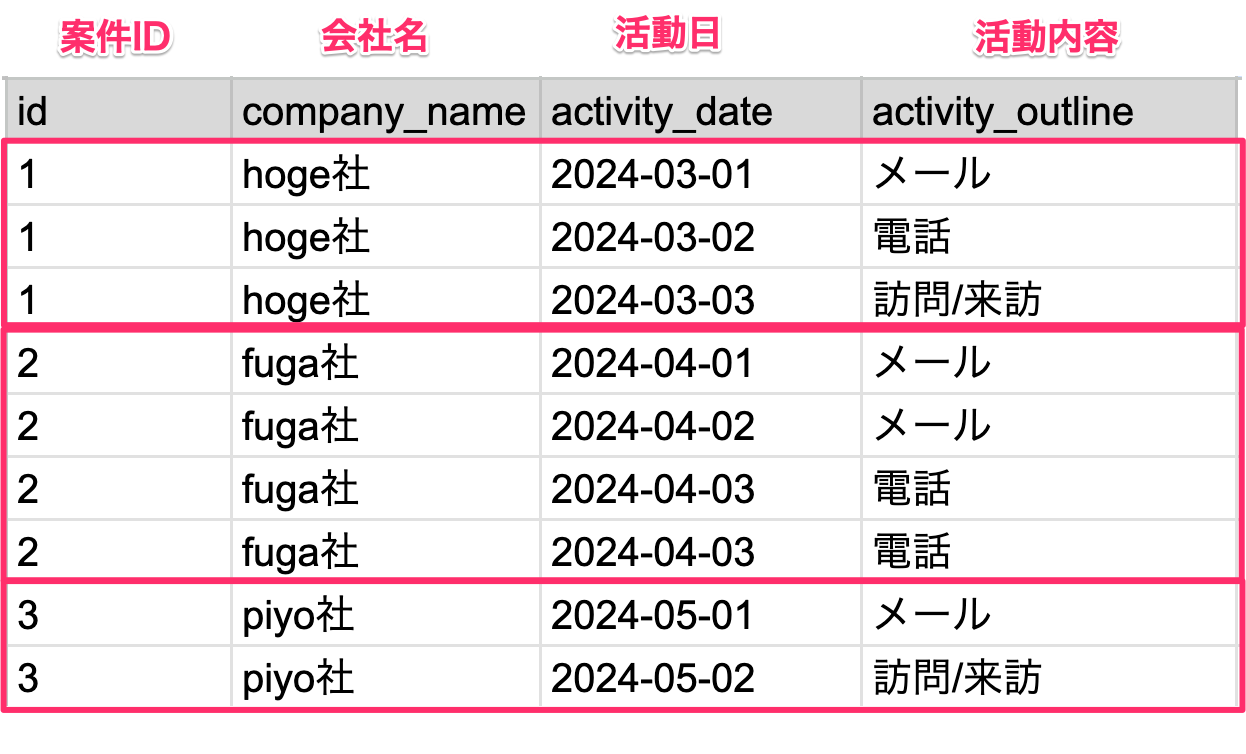
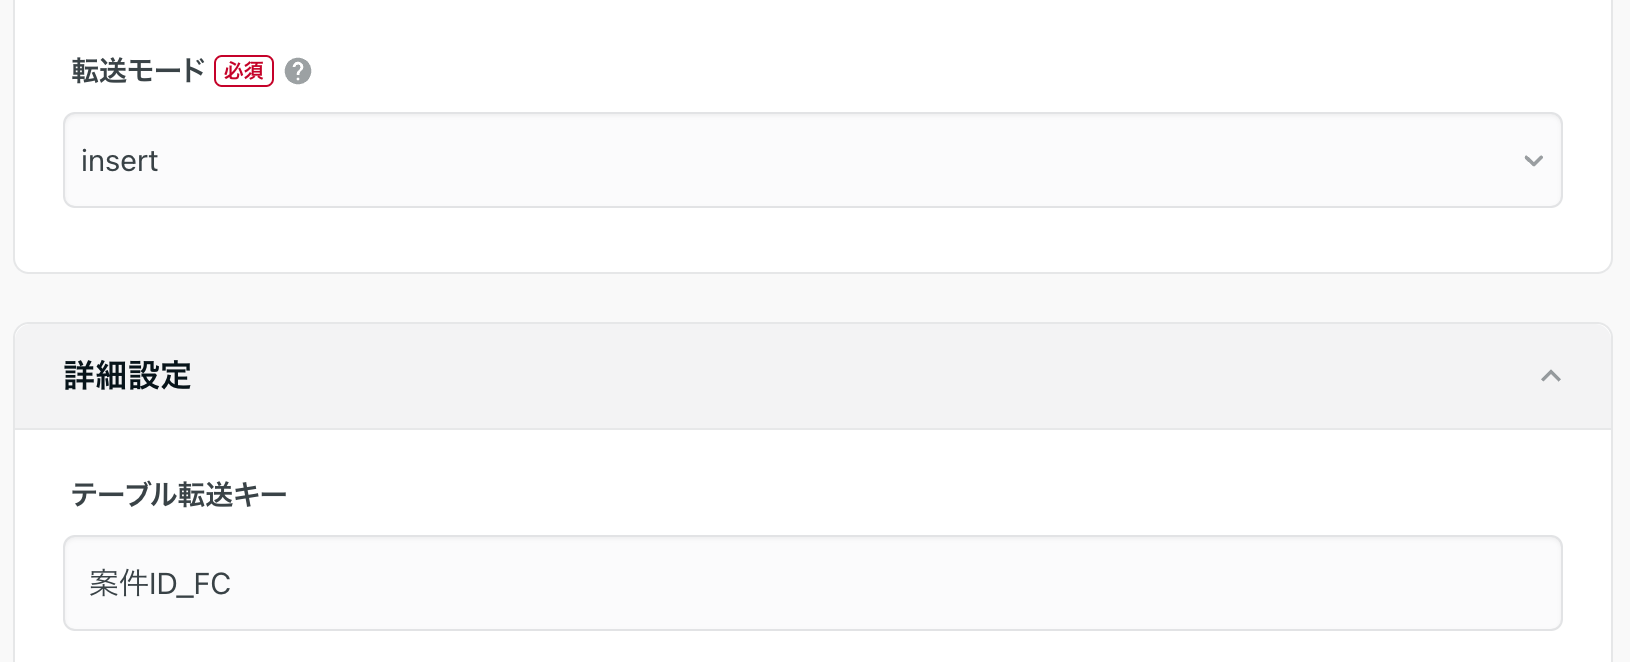
Table ETL Configuration STEP1 Detailed ETL Configuration Table Forwarding Keys
Enter the appropriate column name in the field directly below the app that consists of unique values.
The records of the subtables are grouped based on the column values specified here.
The value entered in this section must match any column name in the Column Setting to be set in the next step.
Column Setting for ETL Configuration STEP2
Enter the column names as follows, respectively
- Fields directly under the app: Field code of the corresponding field
- Field in a sub-table: Field Codes in Sub-Tables. Field Codes for Fields in Sub-Tables "
.must be included in the entry.
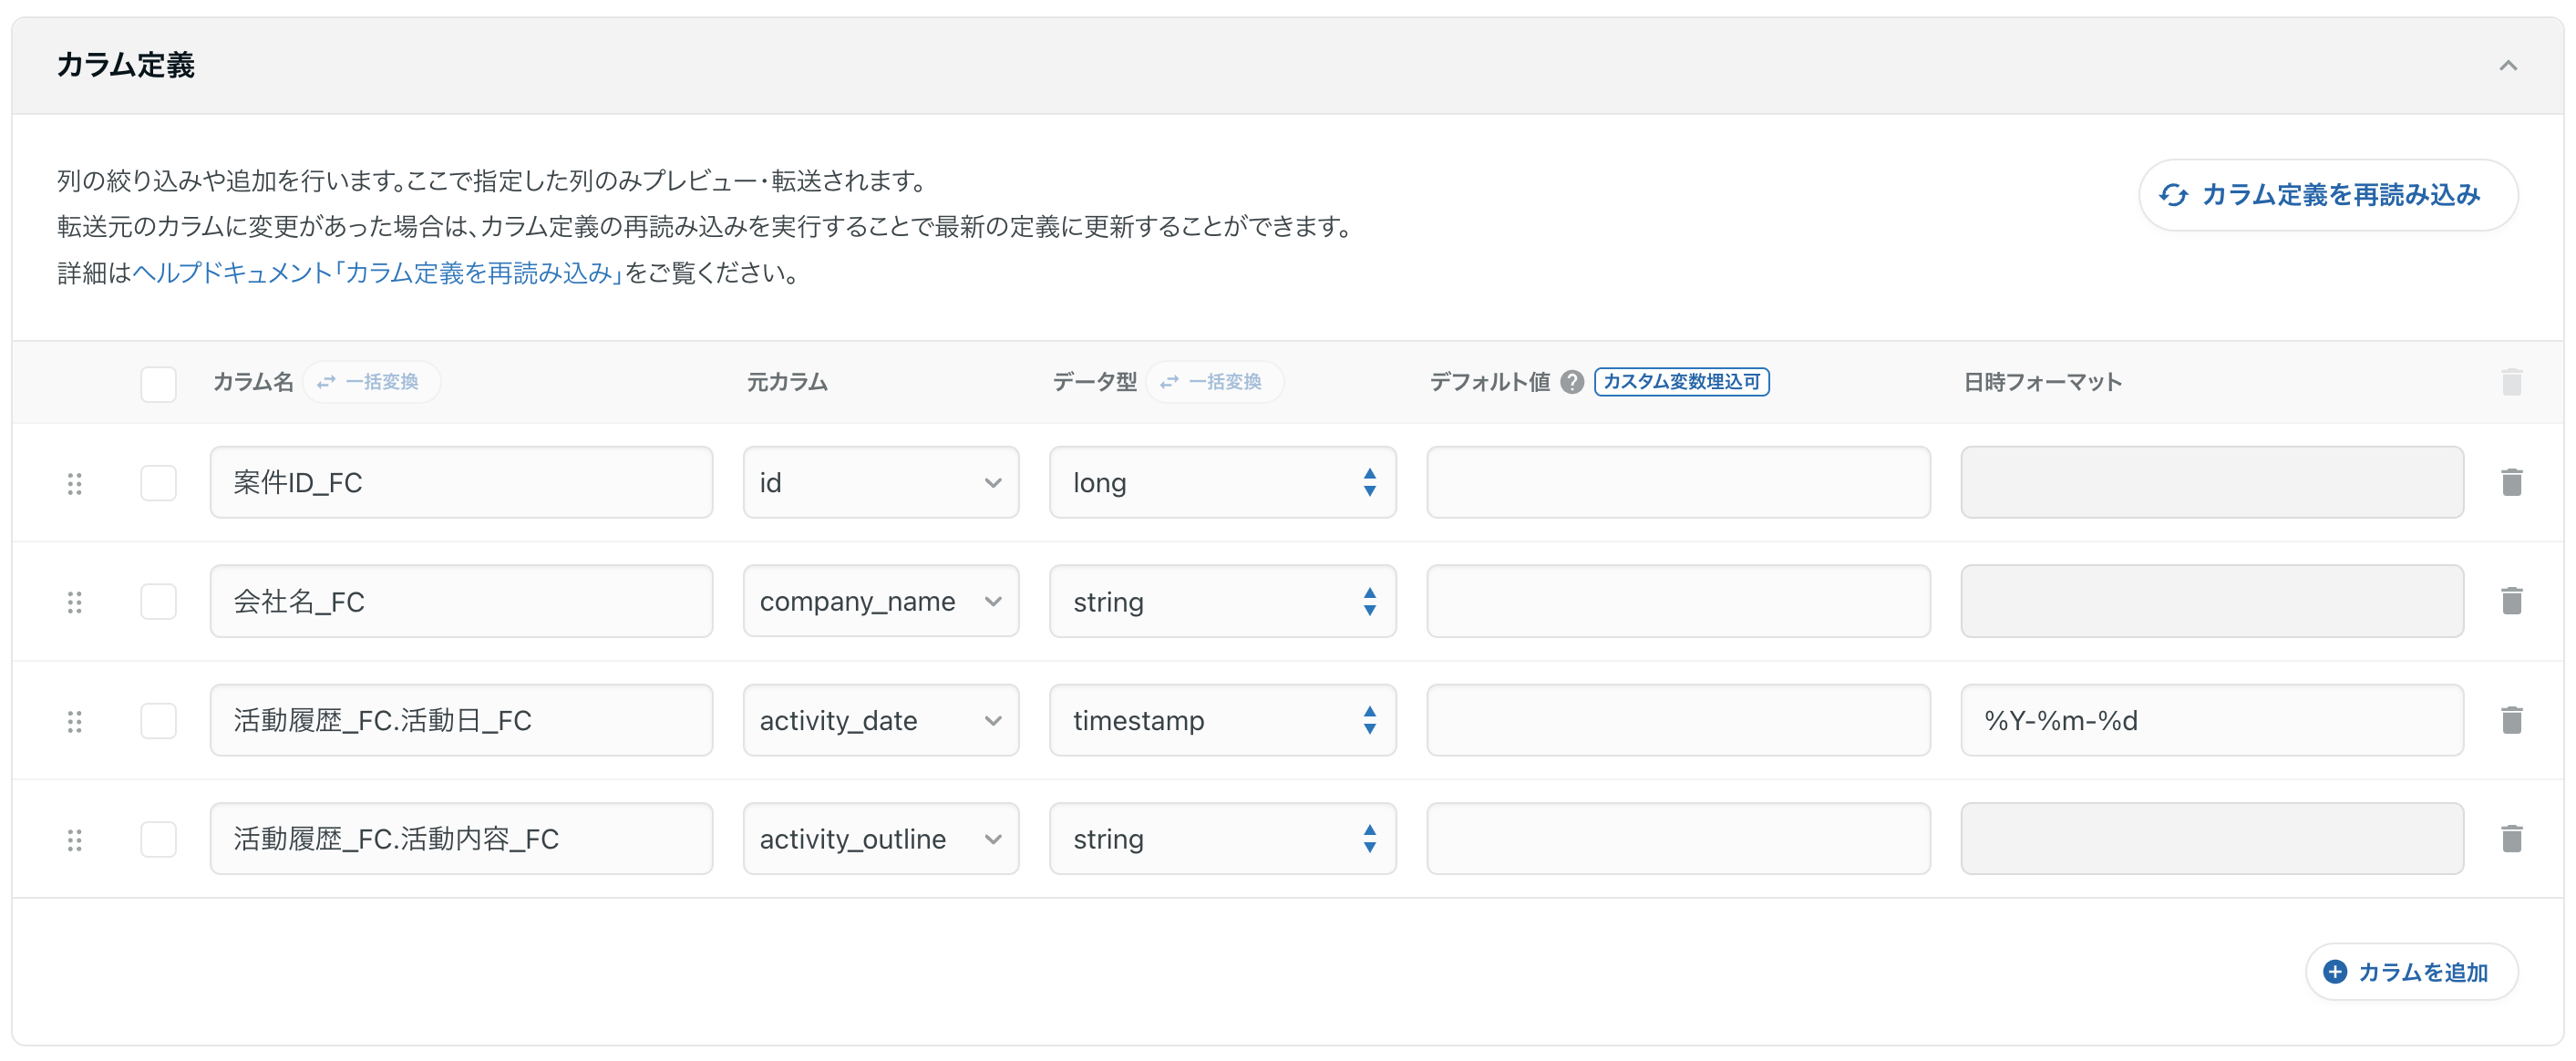
ETL Configuration STEP2Column Settings for Output Option
By adding a Column Setting, you can explicitly specify the data type for each field.
For Column Name, enter the column name specified in Column Setting in ETL Configuration STEP 2.
Note that for fields in sub-tables, the . must be included in the field.
It is also possible to transfer data to a sub-table by sorting in ascending order based on the value of some field.
If you want to sort and ETL Configuration, please add column configuration as follows
- Column Name: From the field in the sub-table specified in Column Setting in ETL Configuration STEP 2, enter the " Field Code of Sub-Table " part of the column name (the part before
the .) of the column name from the field in the sub-table specified in the column definition in STEP 2. - Field Code: Enter the field code for the relevant sub-table.
- Select data type: SUBTABLE.
- Columns to sort rows in table: please enter the field code of the field in any subtable.
- In this section, " Field codes for sub-tables . " (
.) is not required in this section.
- In this section, " Field codes for sub-tables . " (
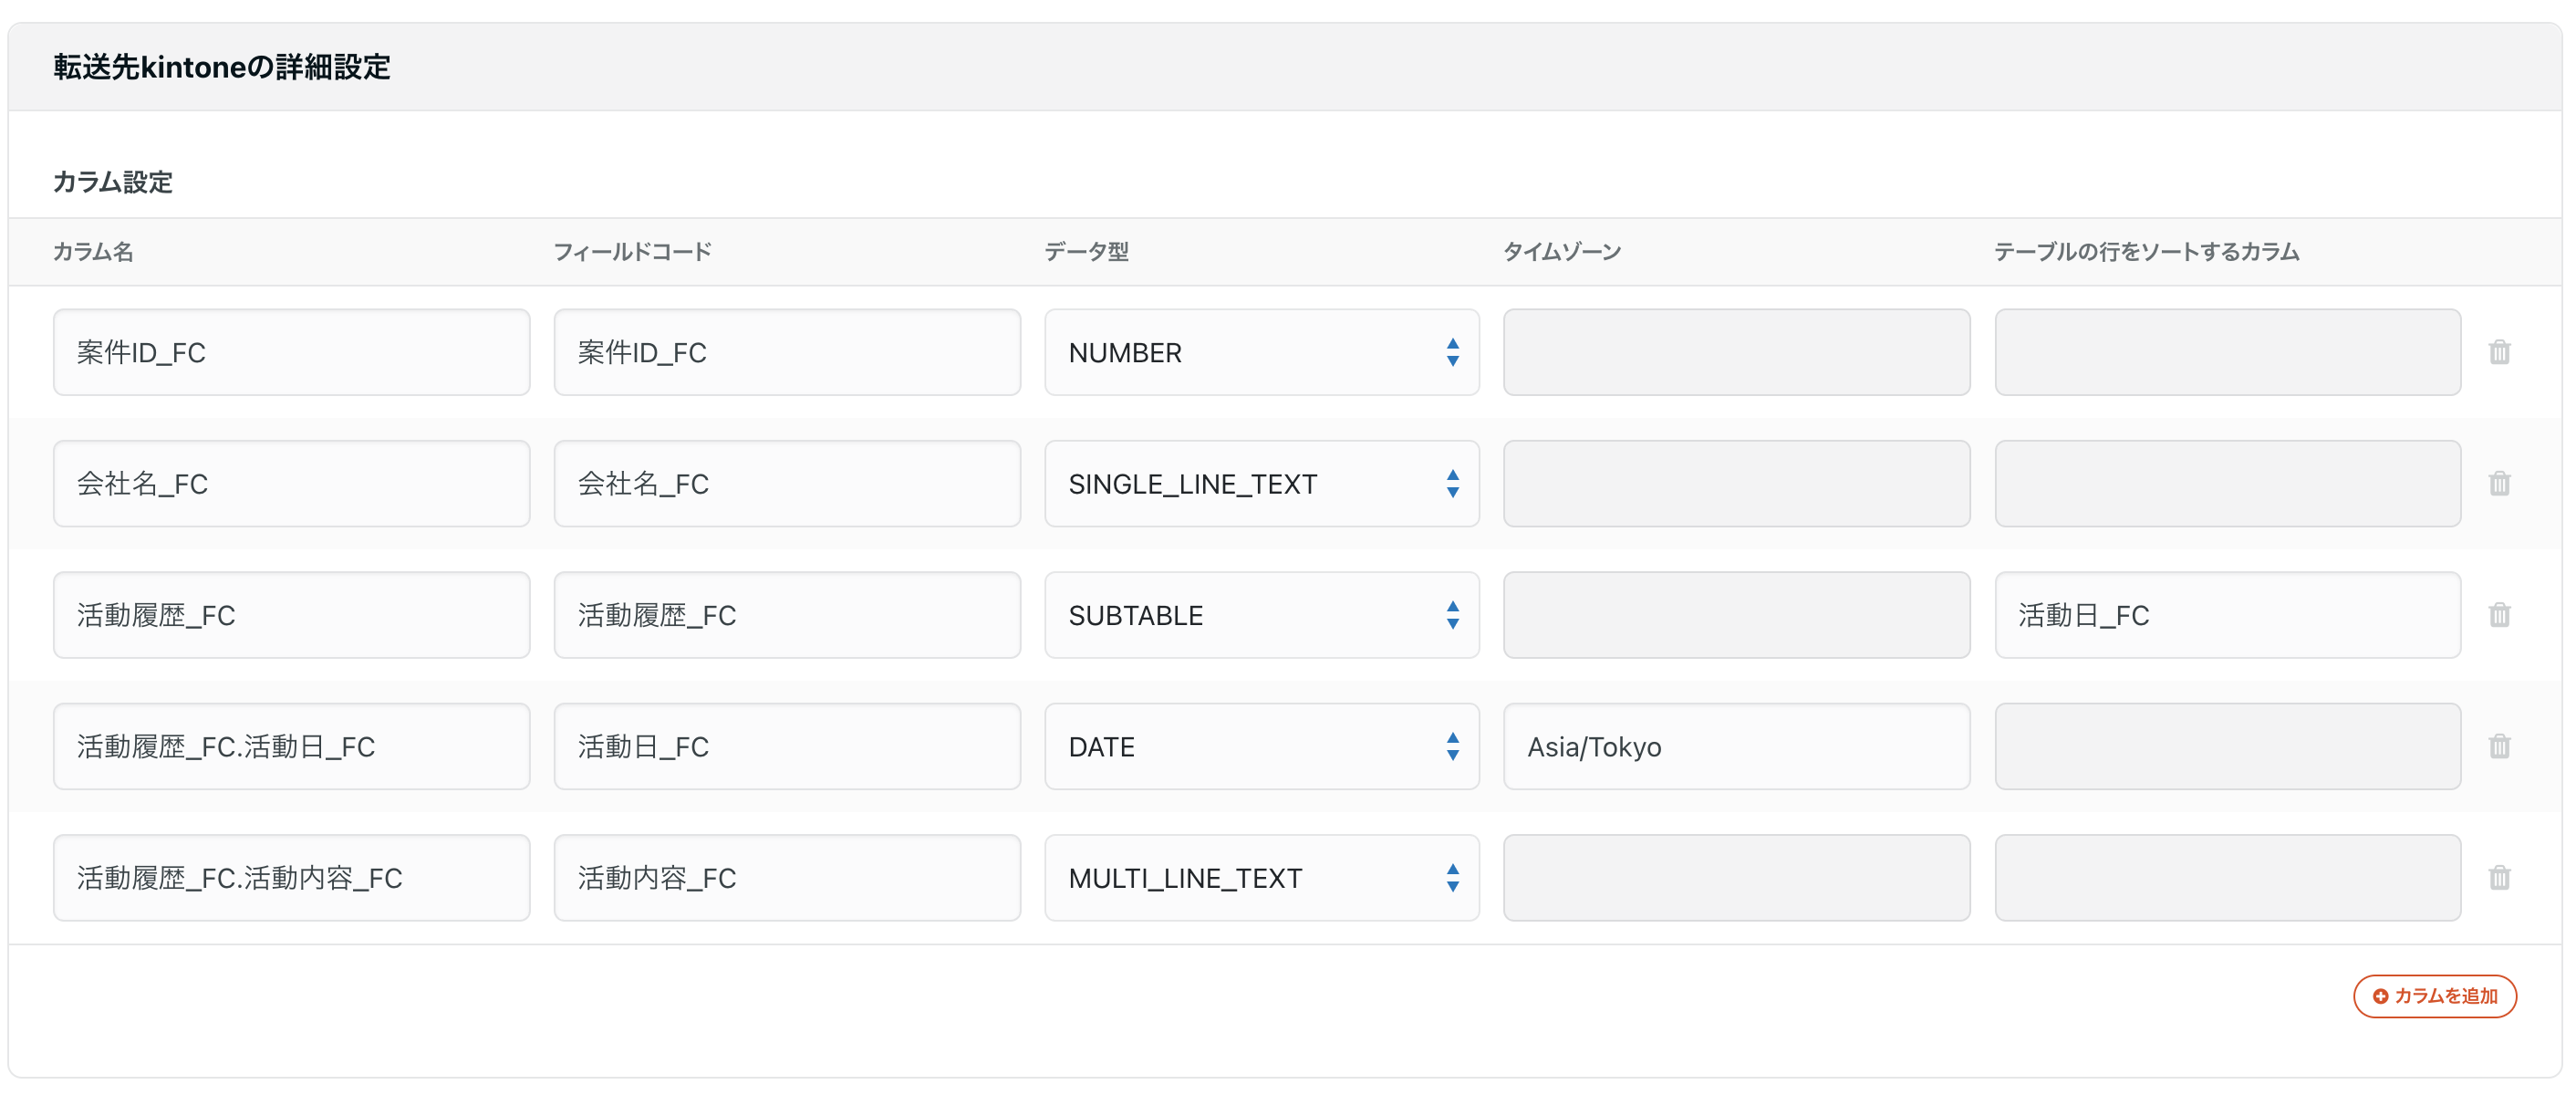
When an ETL Job is executed based on the above Job Settings, data will be transferred as follows

If you check the contents of the case ID of 1, you will see that the sub-tables have also been updated.
