summary
Git Integration allows ETL Configuration and Data Mart Configuration information to be output in YAML format and reflected in a specified Git repository.
This page describes how to set up and use Git Integration.
Git Integration is only available for accounts subscribed to the Advanced plan or higher.
Git Integration supports the major hosting services for Git repositories.
The following are examples of supported hosting services.
- GitHub
- GitLab
- Backlog's Git functionality
Git Integration is also available for on-premise environments using GitHub Enterprise, etc.
Reflected object
- ETL Configuration Configuration Information
- Configuration Information for Data Mart Configuration
Cooperation type
There are two types of Git Integration : User and****Resource Group.
You can have one Git Integration for your account or for each Resource Group.
Linkage type: User

This is a linkage setting for users of TROCCO.
All operations related to Git Integration Configuration are available for the following resources (ETL Configuration and Data Mart Configuration).
- Self-created resources
- Resources that do not belong to a Resource Group
Type of collaboration: Resource Group

role permission
The operations allowed depend on the type of role the Resource Group has granted to the team to which it belongs.
See Resource Groups for more information about each role in a Resource Group.
The operations allowed for each role are as follows
| Operation backspace | Resource Group Manager | Resource Group Editor | Resource Group Operator | Resource Group Viewer | No roll |
|---|---|---|---|---|---|
| Creating and Editing Git Integration Settings | ✓ | ✓ | - | - | - |
| Check diffs with Git | ✓ | ✓ | - | - | - |
| Commit and push to Git | ✓ | ✓ | - | - | - |
| Display of linkage information | ✓ | ✓ | ✓ | ✓ | - |
Below is an example of a user's Git Integration screen.
- For the Resource Group "Test_1", the user is granted the Resource Group Administrator or Resource Group Editor role.
- For the Resource Groups "Test_2" and "Test_3", the user is assigned the Resource Group Operator or Resource Group Viewer role.
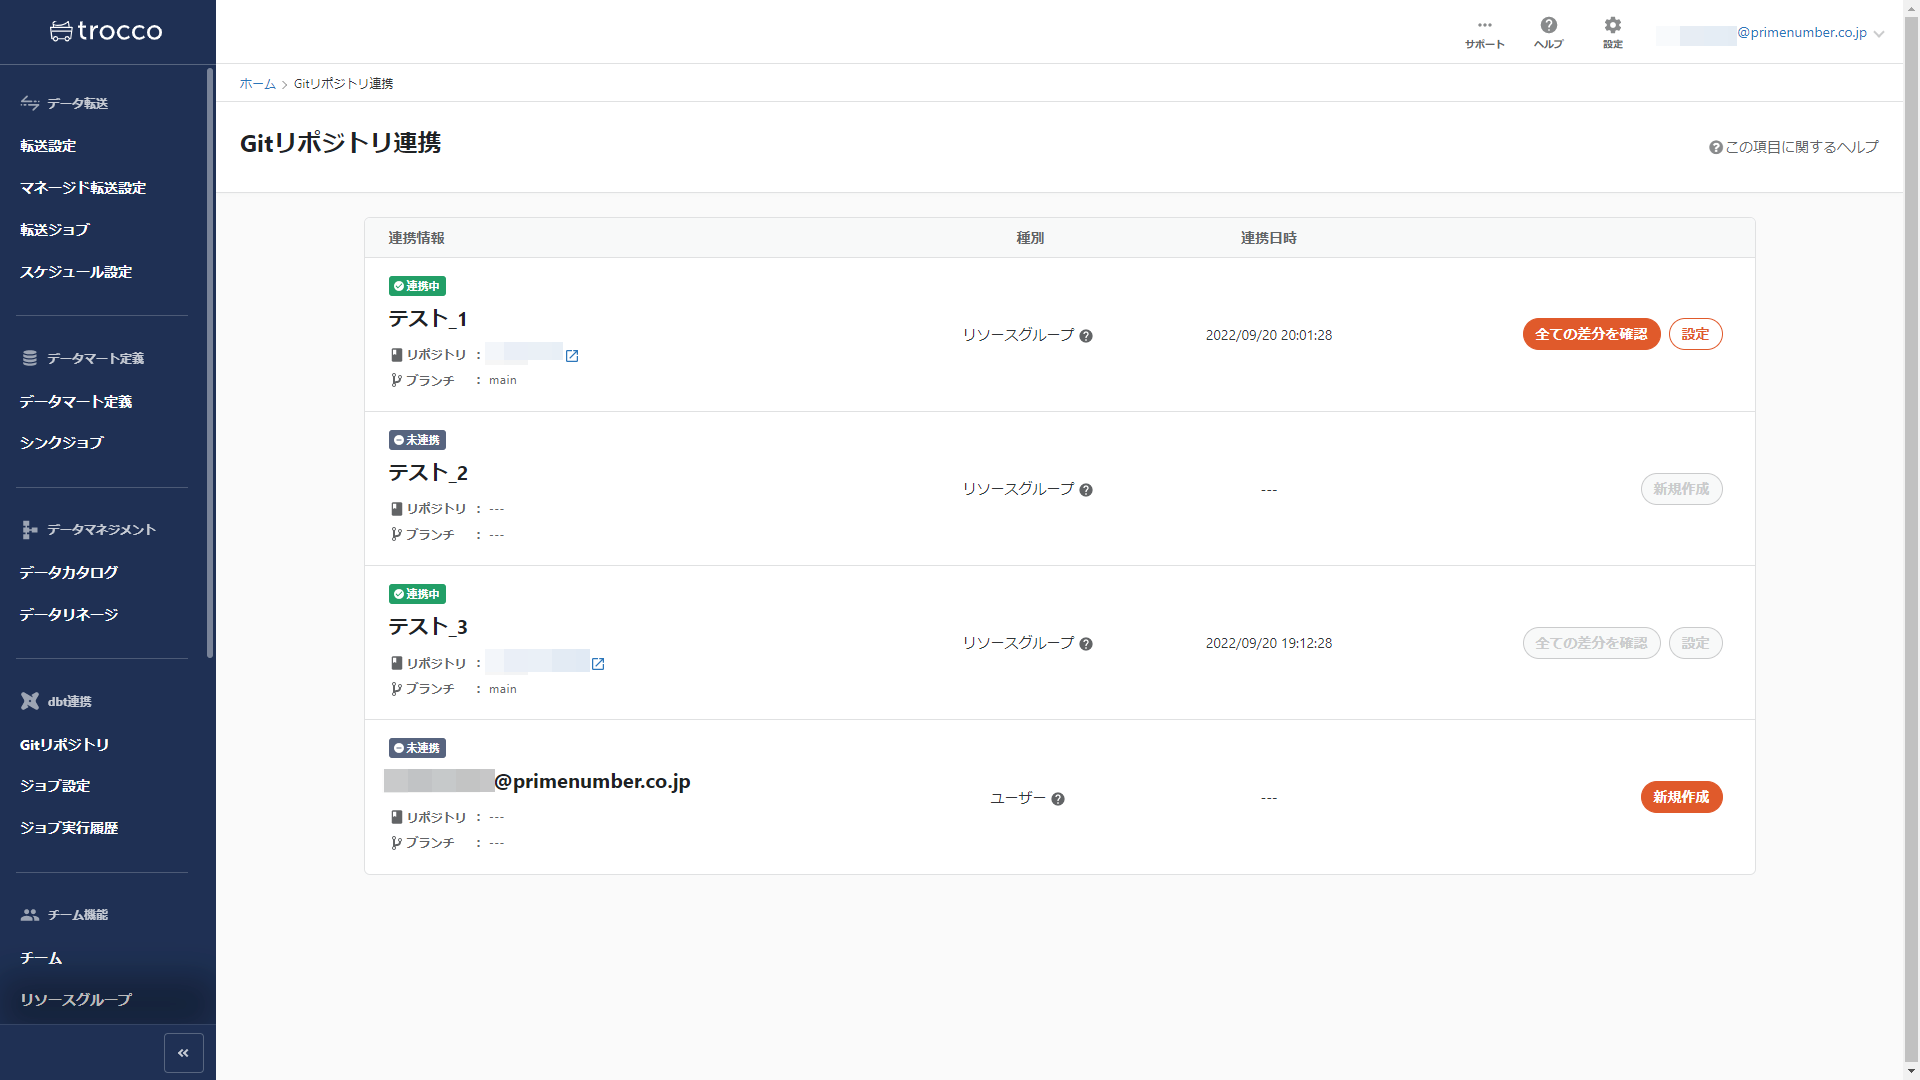
Resource Groups that you are not a member of and do not have a role on the team you belong to will not appear on the Git Integration screen.
Remote Repository Settings
-
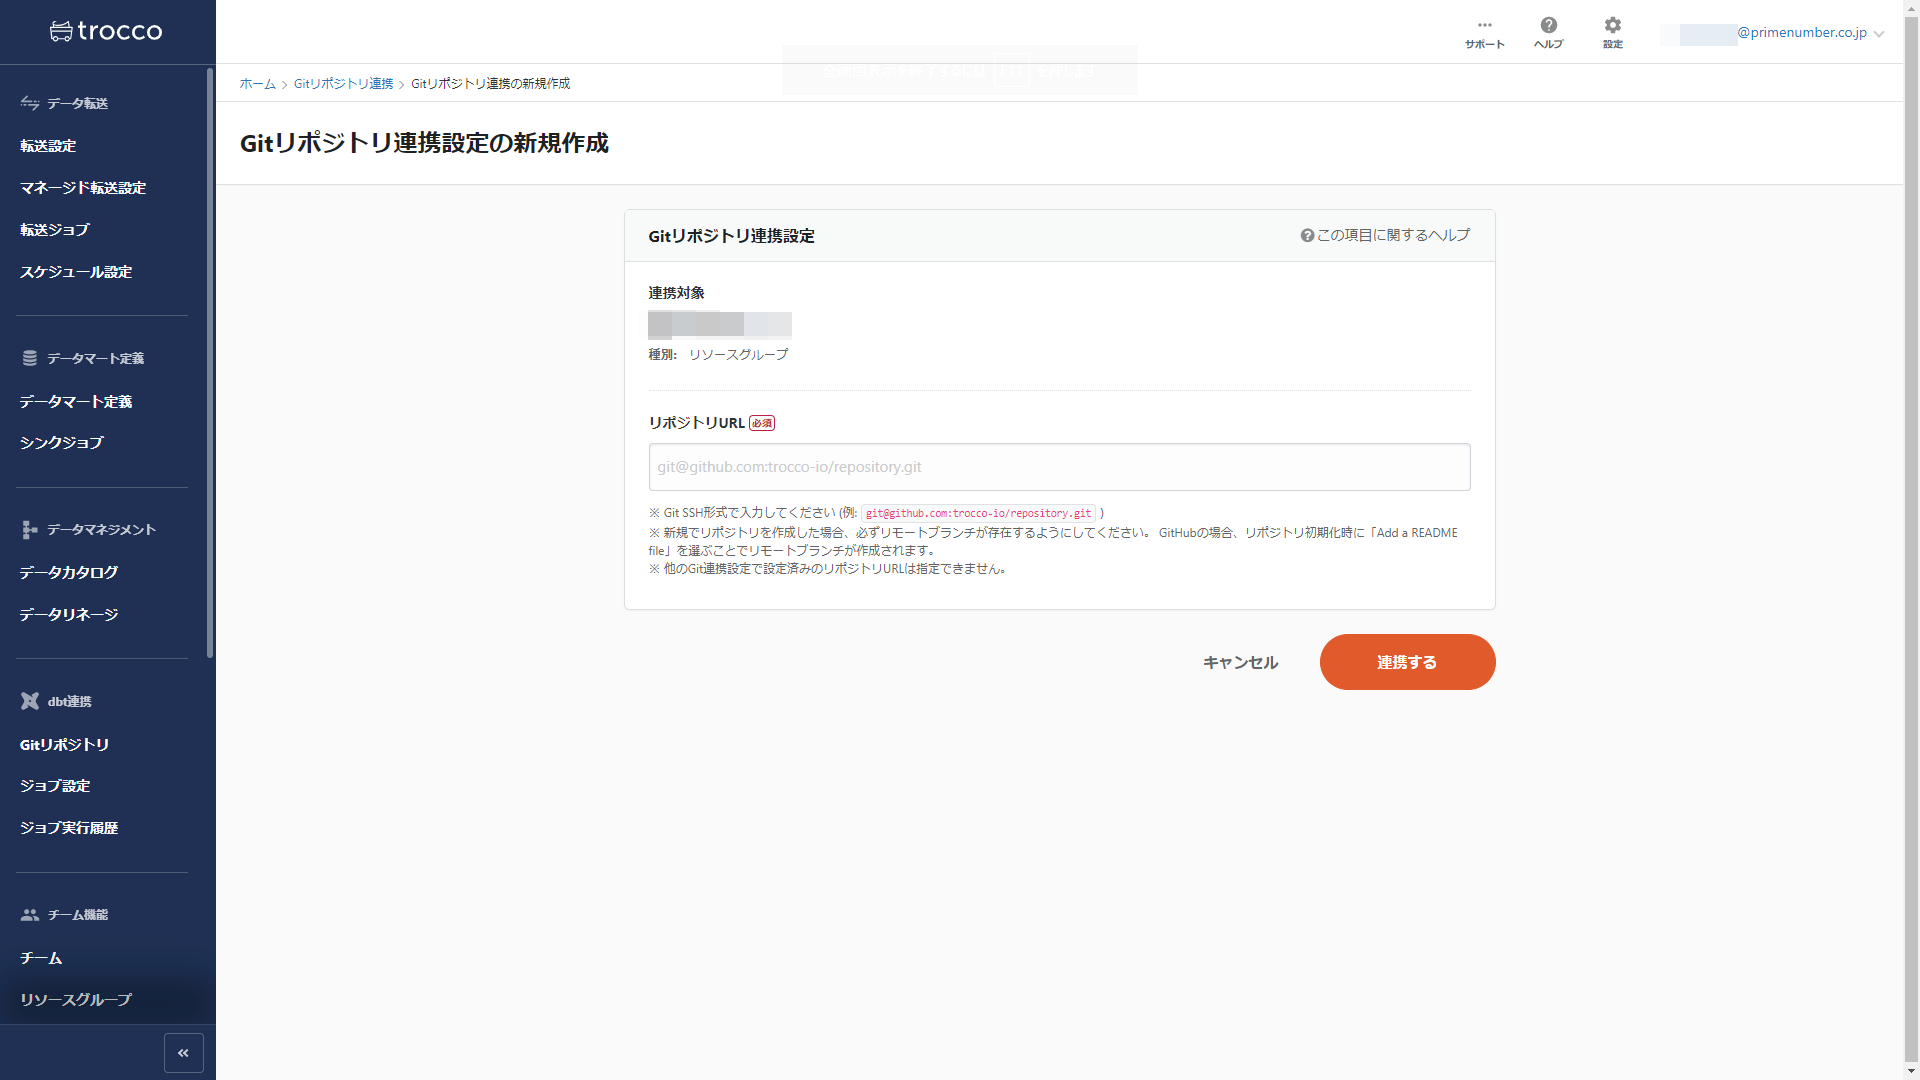
On the Git Integration screen, click New.
-
Enter the Git server repository URL and click on " Git Integration".
If you are using GitHub Enterprise or other means to deny access to your Git server from any IP address other than the specific IP address, please Allowed IP Address for the IP address that TROCCO uses for communication.
IP addresses that need to be allowed by security groups, firewalls, etc.
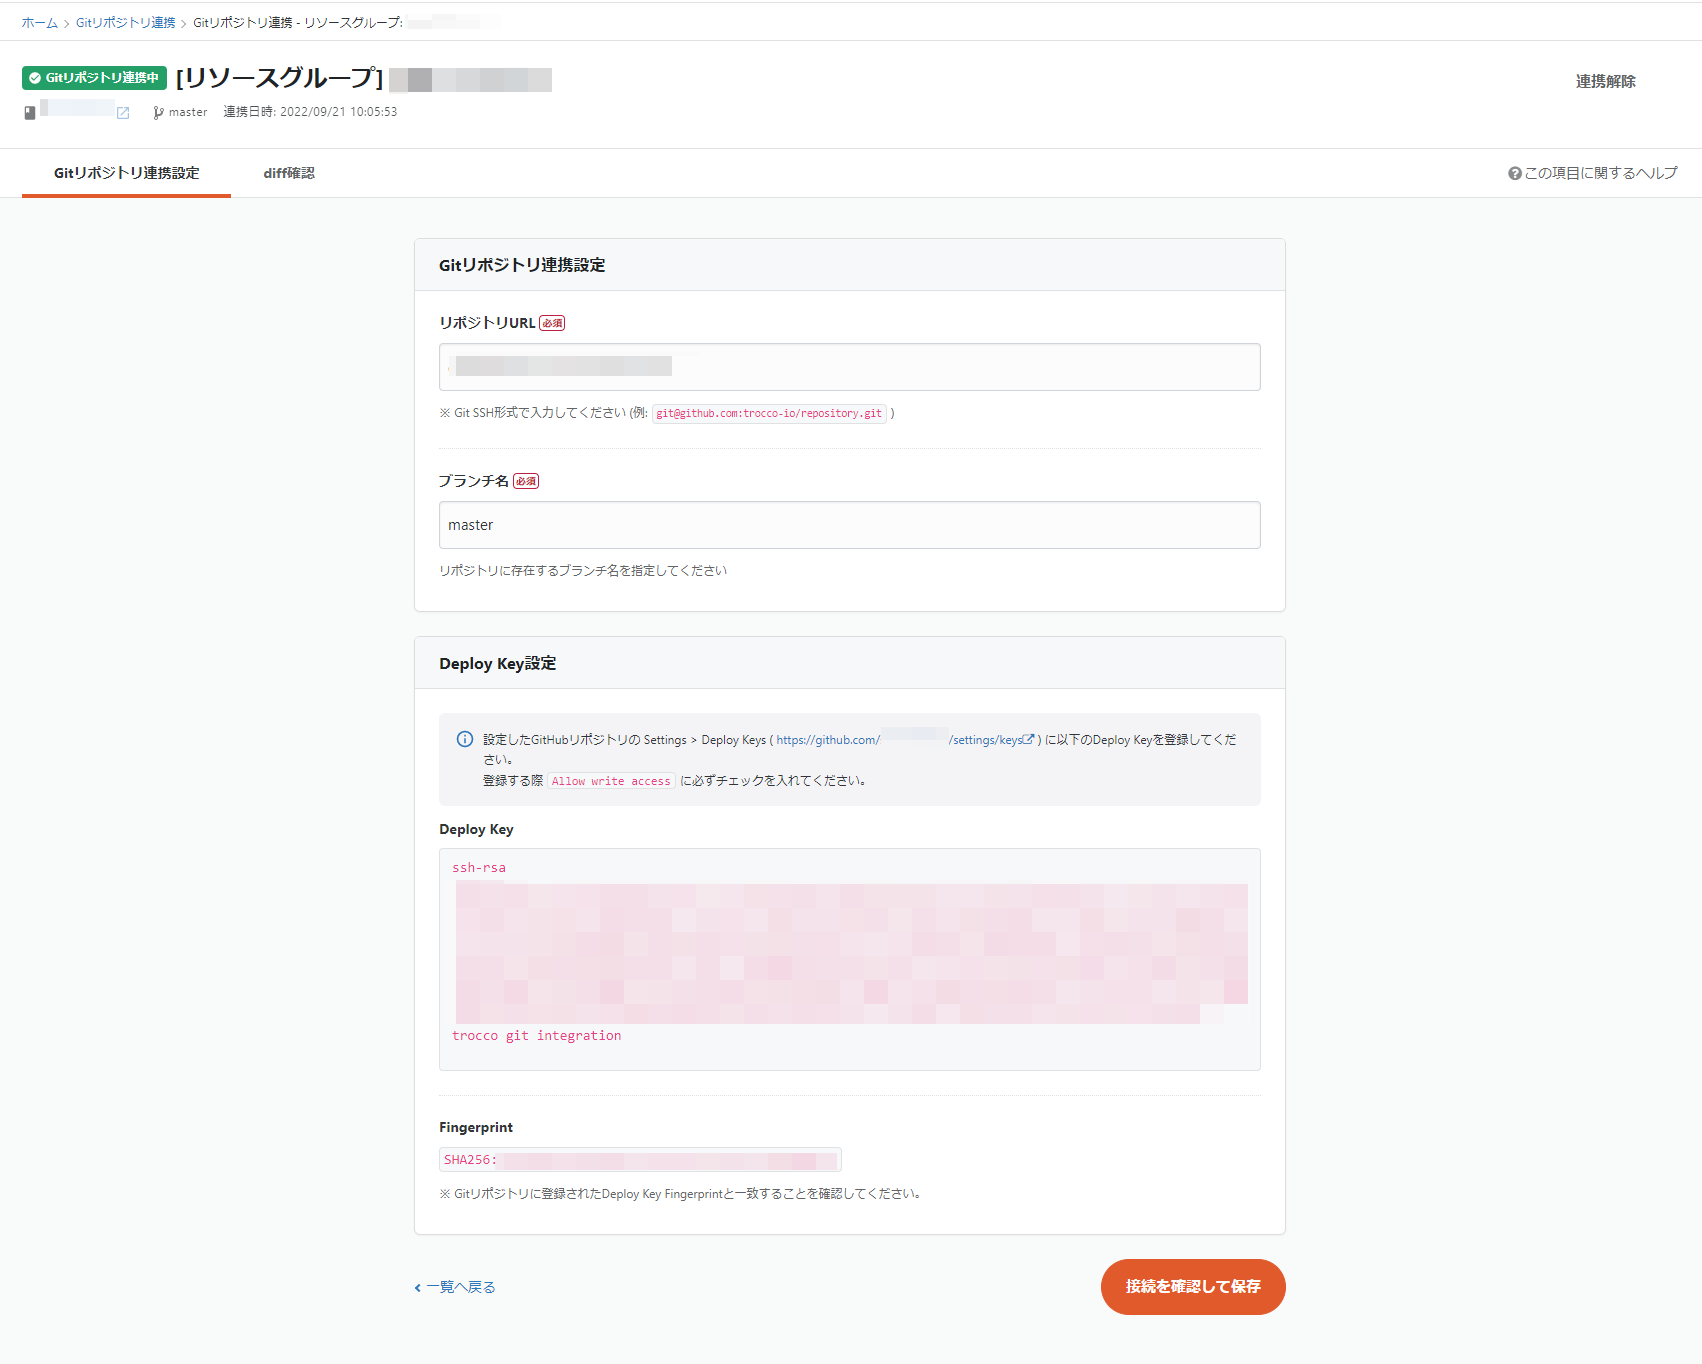
- Specify a branch name, register the Deploy Key with the Git server, confirm the connection, and click Save.
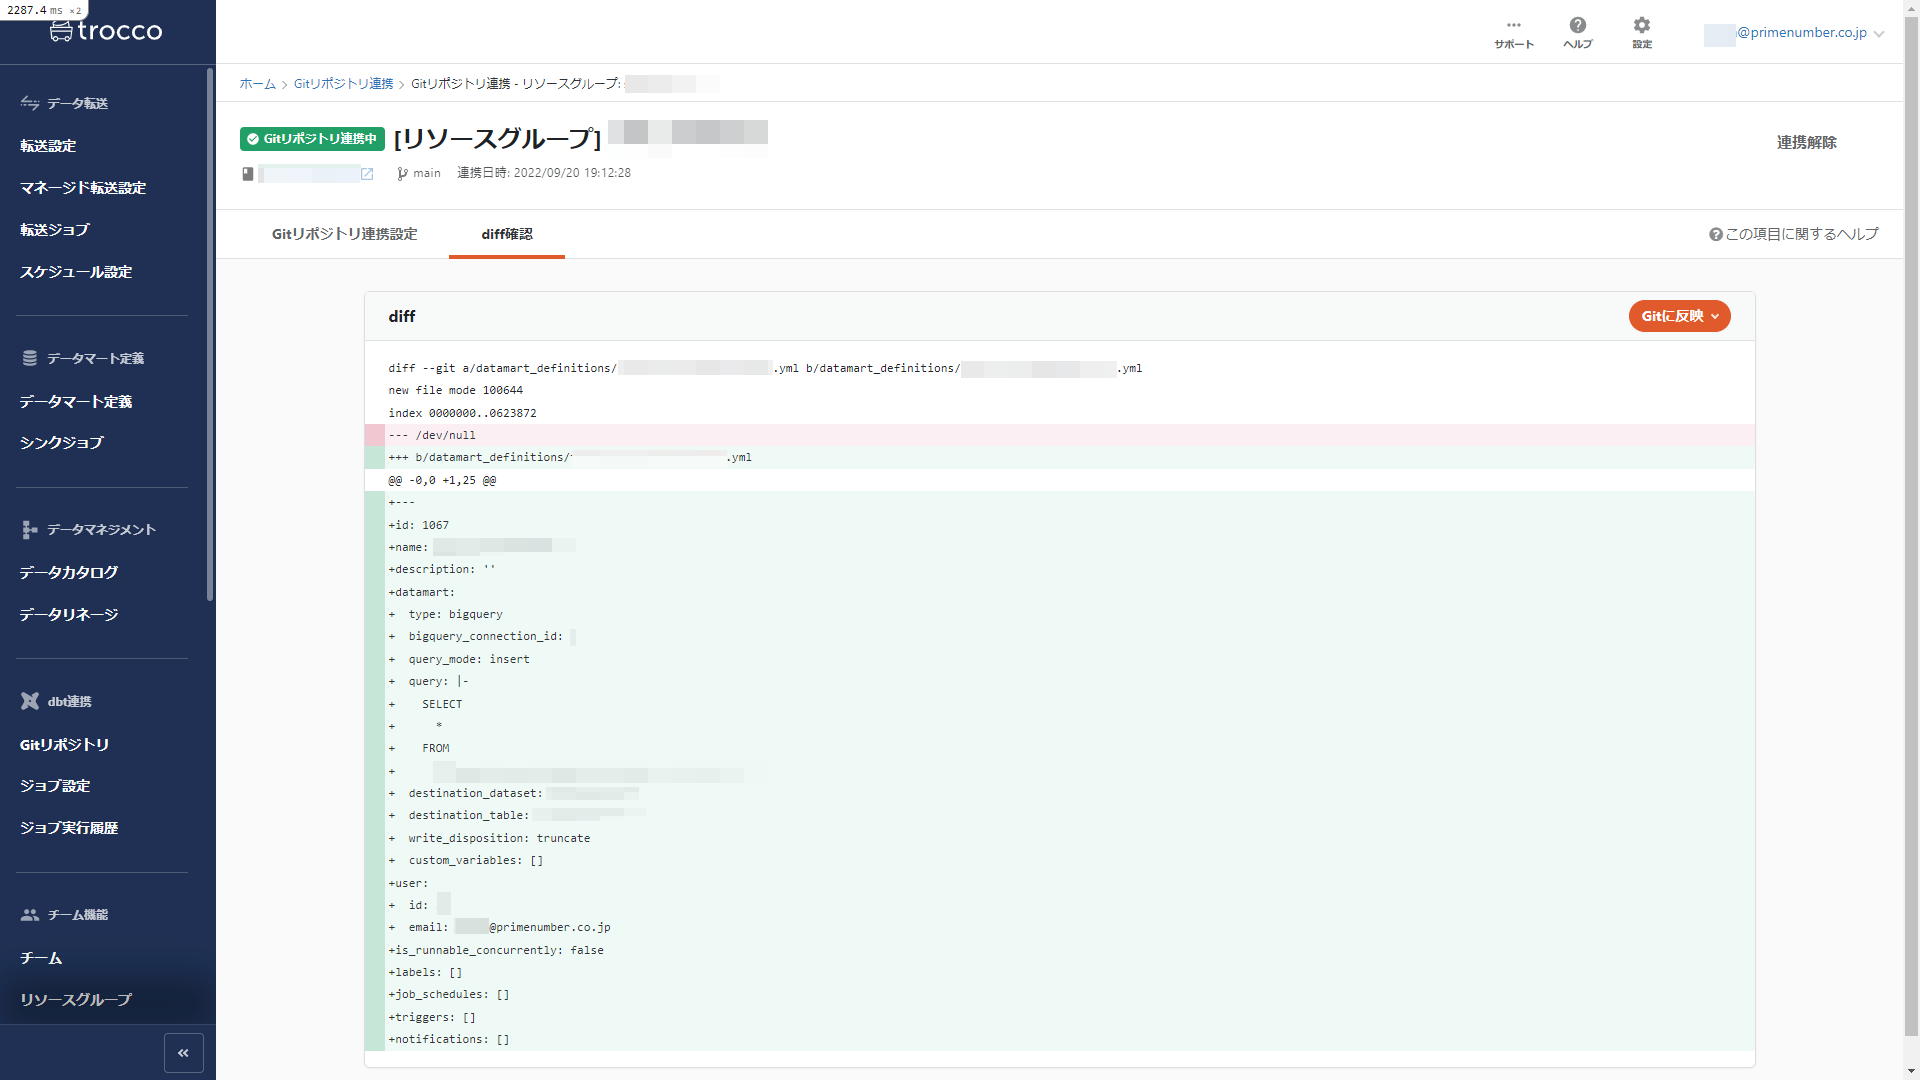
Diff (diff) confirmation
You can view diffs from the Git repository below.
- From the list of Git Integration, click Check All Differences.
- Click on " Reflect to Git (Confirm)" on the detail screen of each ETL Configuration and on the detail screen of each Data Mart Configuration.
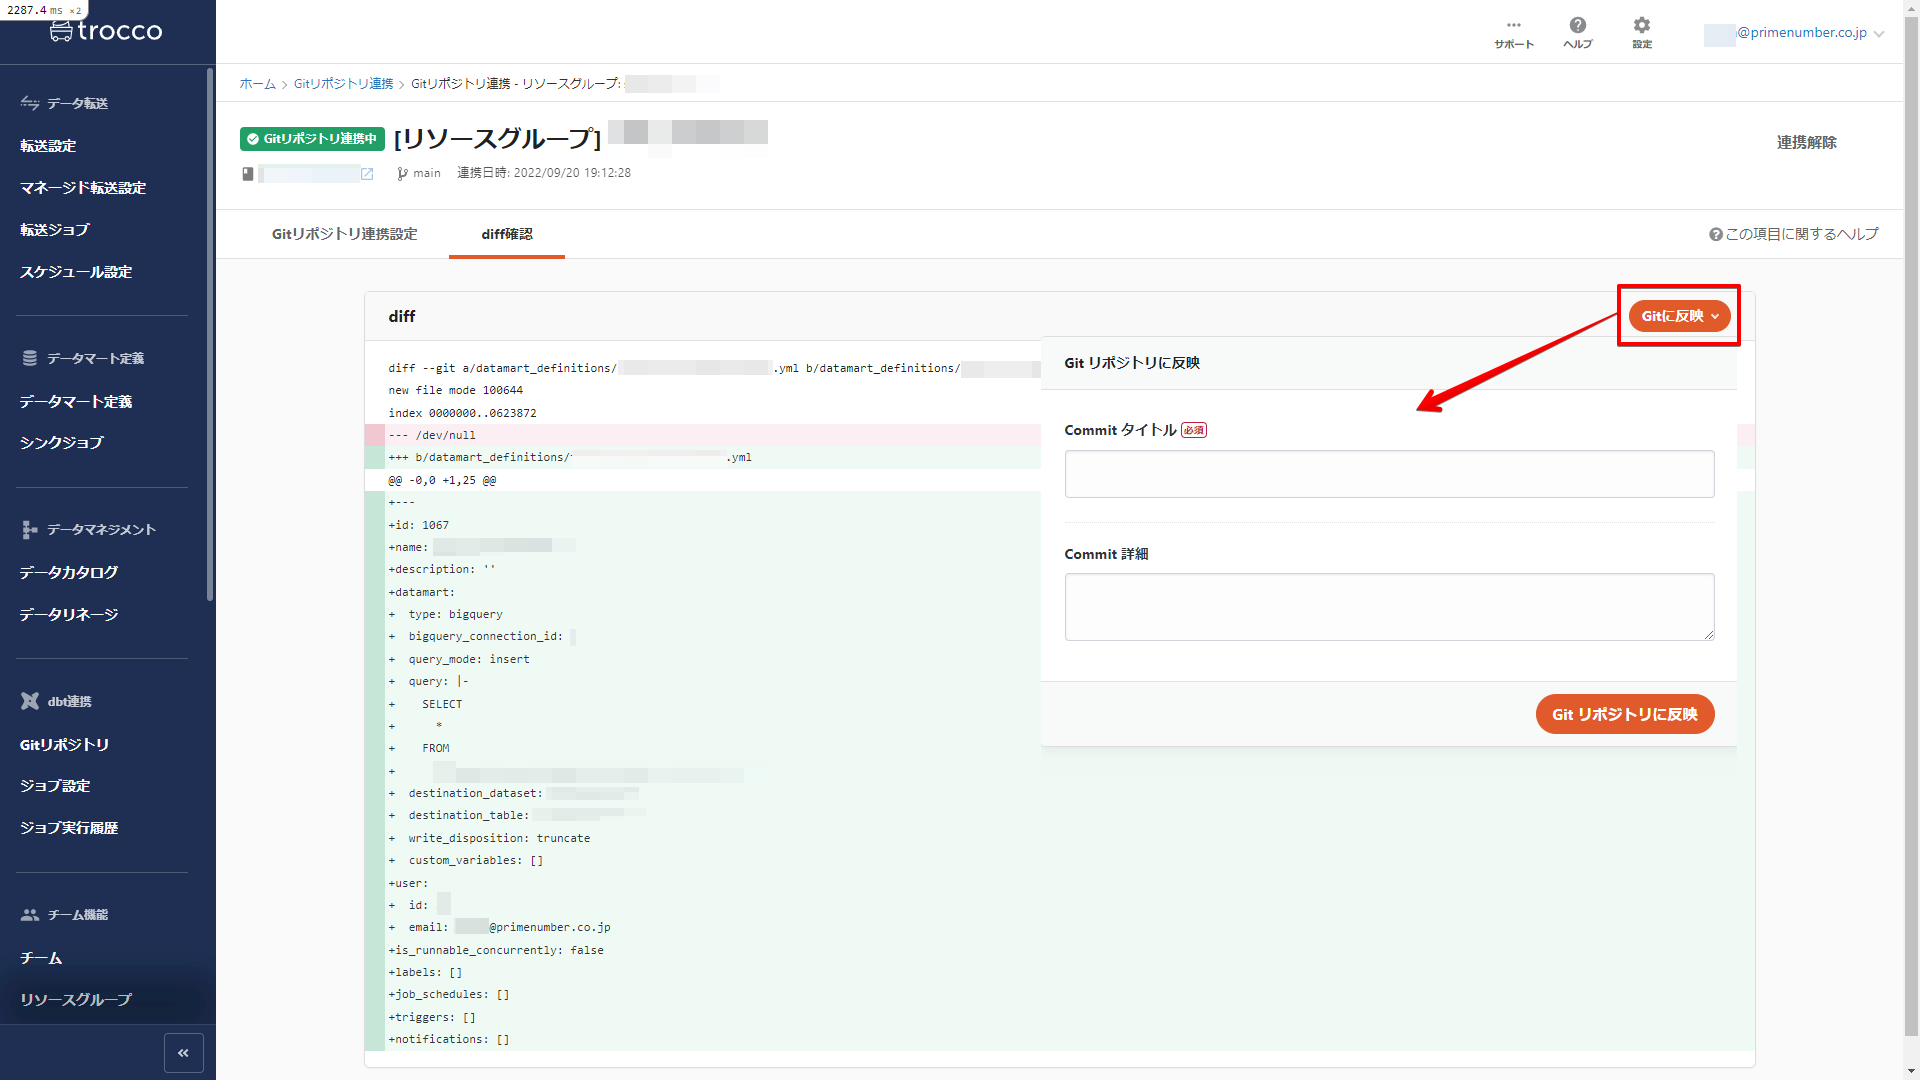
Reflect to Git repository (git commit & push)
On the diff confirmation screen, click Reflect in Git.
Enter the Commit Title and Commit Details and click Reflect in Git Repository.
The configuration information in YAML format is reflected in the target Git repository.