Welcome to TROCCO!
TROCCO provides ETL, transformation, workflow orchestration, and data platform operation capabilities.
To help you get a clear idea of how to utilize TROCCO, we’ve prepared three simple steps to help you get started.
By completing these steps, you can smoothly create ETL Configurations and gain a clearer understanding of how to use TROCCO effectively.
Preparation 1 Be clear about the issue you want to resolve
Let's identify the issues you are currently facing.
What issues can be solved using data, and what kind of data is needed to analyze them?
For example, the following issues and goals can be considered.
Examples of issues and goals
- Issue example 1: The sales department uses Salesforce, and the customer support department uses HubSpot, so customer data is scattered.
- 🏁 Goal: Establish an environment where customer data can be integrated and analyzed.
- Issue example 2: Multiple advertising media are used, and the work of analyzing advertising data is time-consuming.
- 🏁 Goal: Automate the integration of advertising data and improve the market measures continuously.
- Issue example 3: Sales data and customer data are stored in different systems, making integration difficult.
- 🏁 Goal: Build a pipeline to integrate data, analyze customer purchasing behavior, and use it for marketing and product development.
Preparation 2 Identify data sources related to the problem
Next, identify the necessary data sources.
TROCCO can extract data from a variety of services. Below are some examples of data sources.
Examples of supported services for extracting data
- Advertising platforms
- Google Ads
- Facebook Ads
- TikTok Ads
- ...
- CRM / MA tools
- Salesforce
- HubSpot
- ...
- Cloud Storage services
- Amazon S3
- Google Cloud Storage
- ...
- Business applications
- Razorpay
- Zoho Books
- ...
- Databases
- MySQL
- Oracle Database
- ...
Preparation 3 Decide where to aggregate data
Finally, decide on a service to store the data to be used for analysis.
TROCCO can aggregate data into a variety of services.
Below are some of the supported services.
Examples of supported data aggregation services
- Database services
- MySQL
- PostgreSQL
- ...
- DWH services
- Google BigQuery
- Databricks
- Snowflake
- ...
- Cloud applications
- HubSpot
- Salesforce
- ...
- File and storage services
- Google Sheets
- Amazon S3
- ...
This completes the preparations. Next, let's actually transfer the data.
Transferring data
As an example, the following explains the process of uploading the file to be transferred directly to TROCCO and transferring that file to Google Sheets.
We will use Local File as the source and Google Sheets as the destination.
Both are easy to handle.
For those who do not have a data source at hand or cannot think of one right away, we have prepared a sample of sales activity data.
You can download it and try transferring data later.
-
Click "Add New" in the ETL Configurations on the dashboard.

-
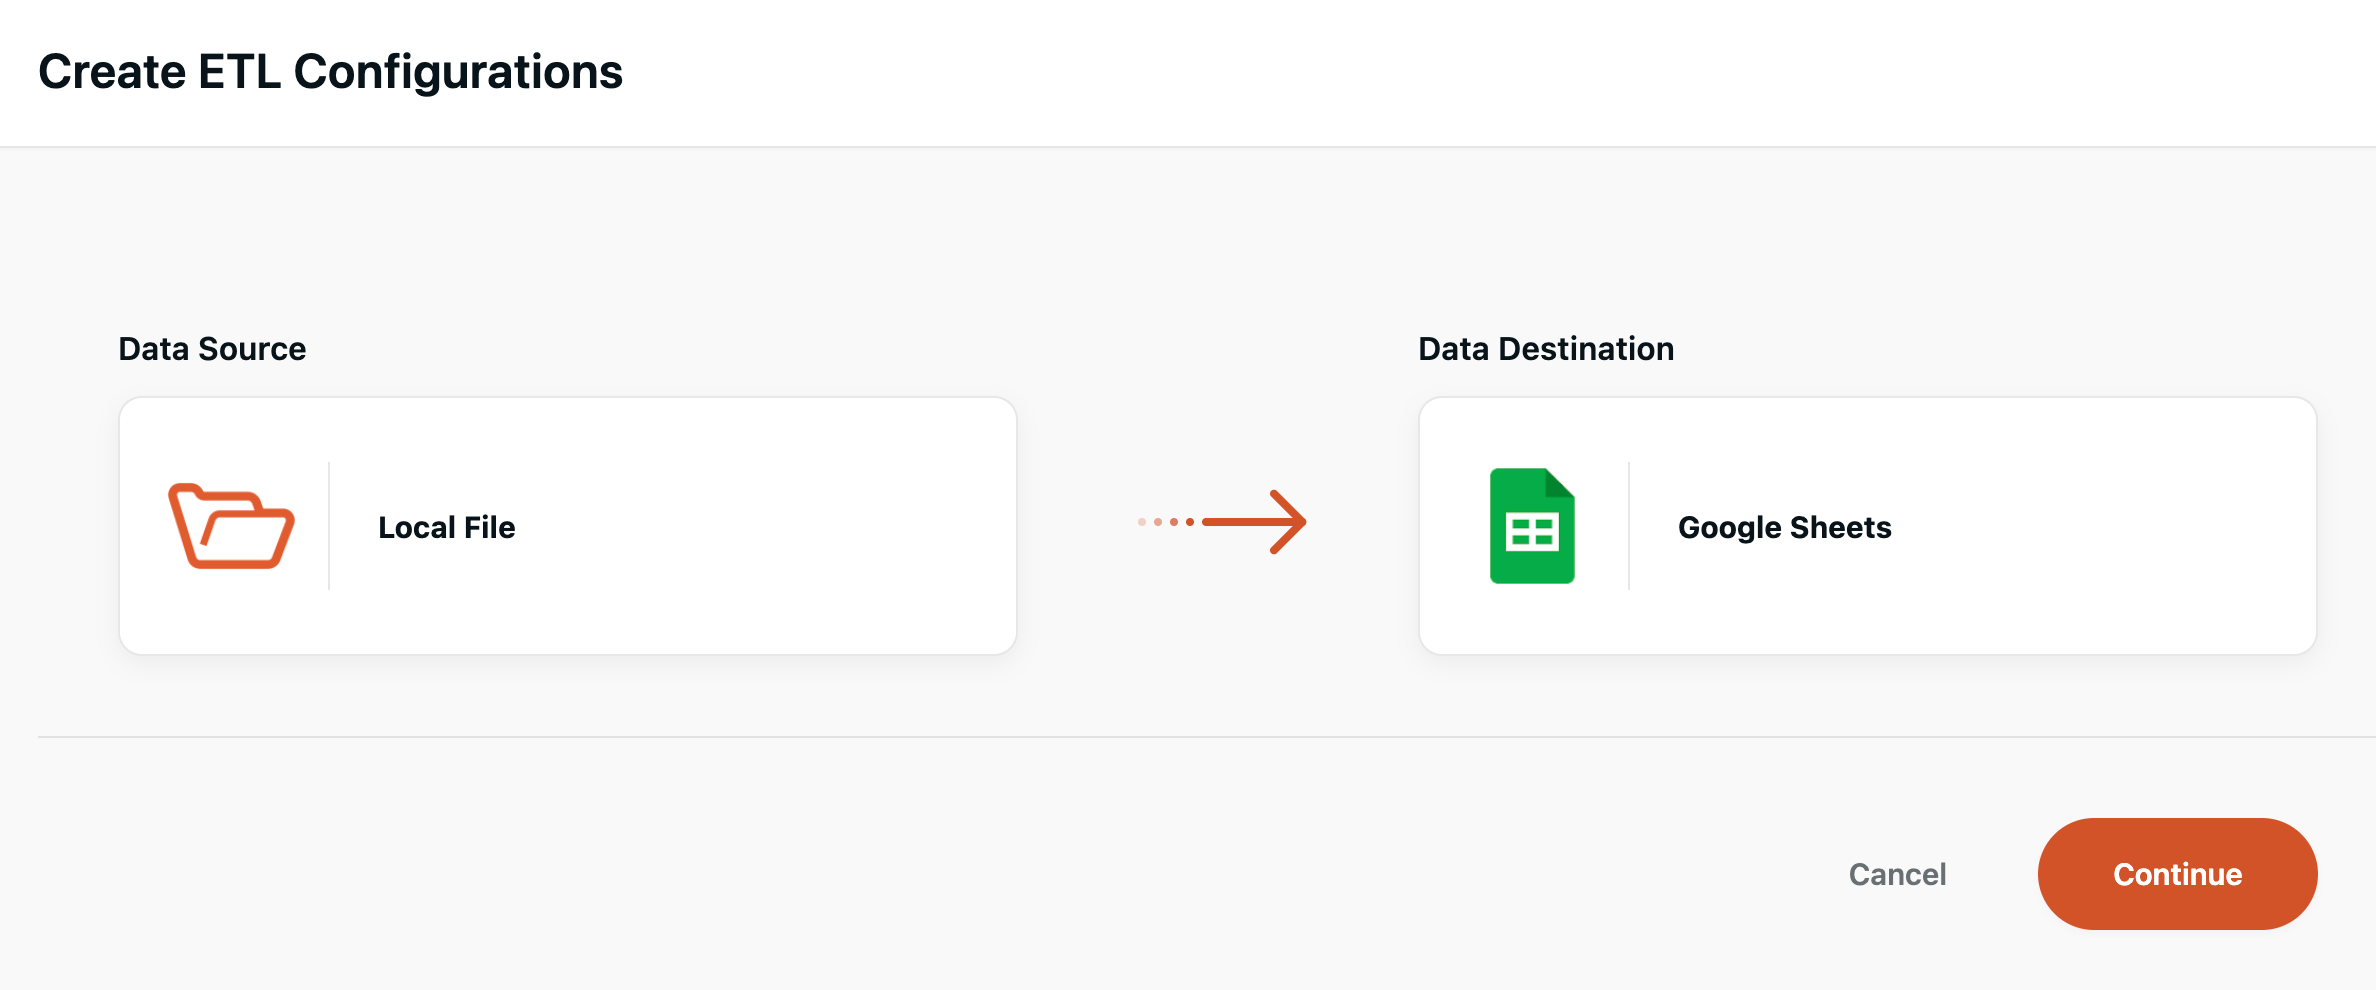
Select the source and destination services.
Choose Local File as the source and Google Sheets as the destination. Click "Continue".
-
Set up the ETL Configuration in 3 steps.
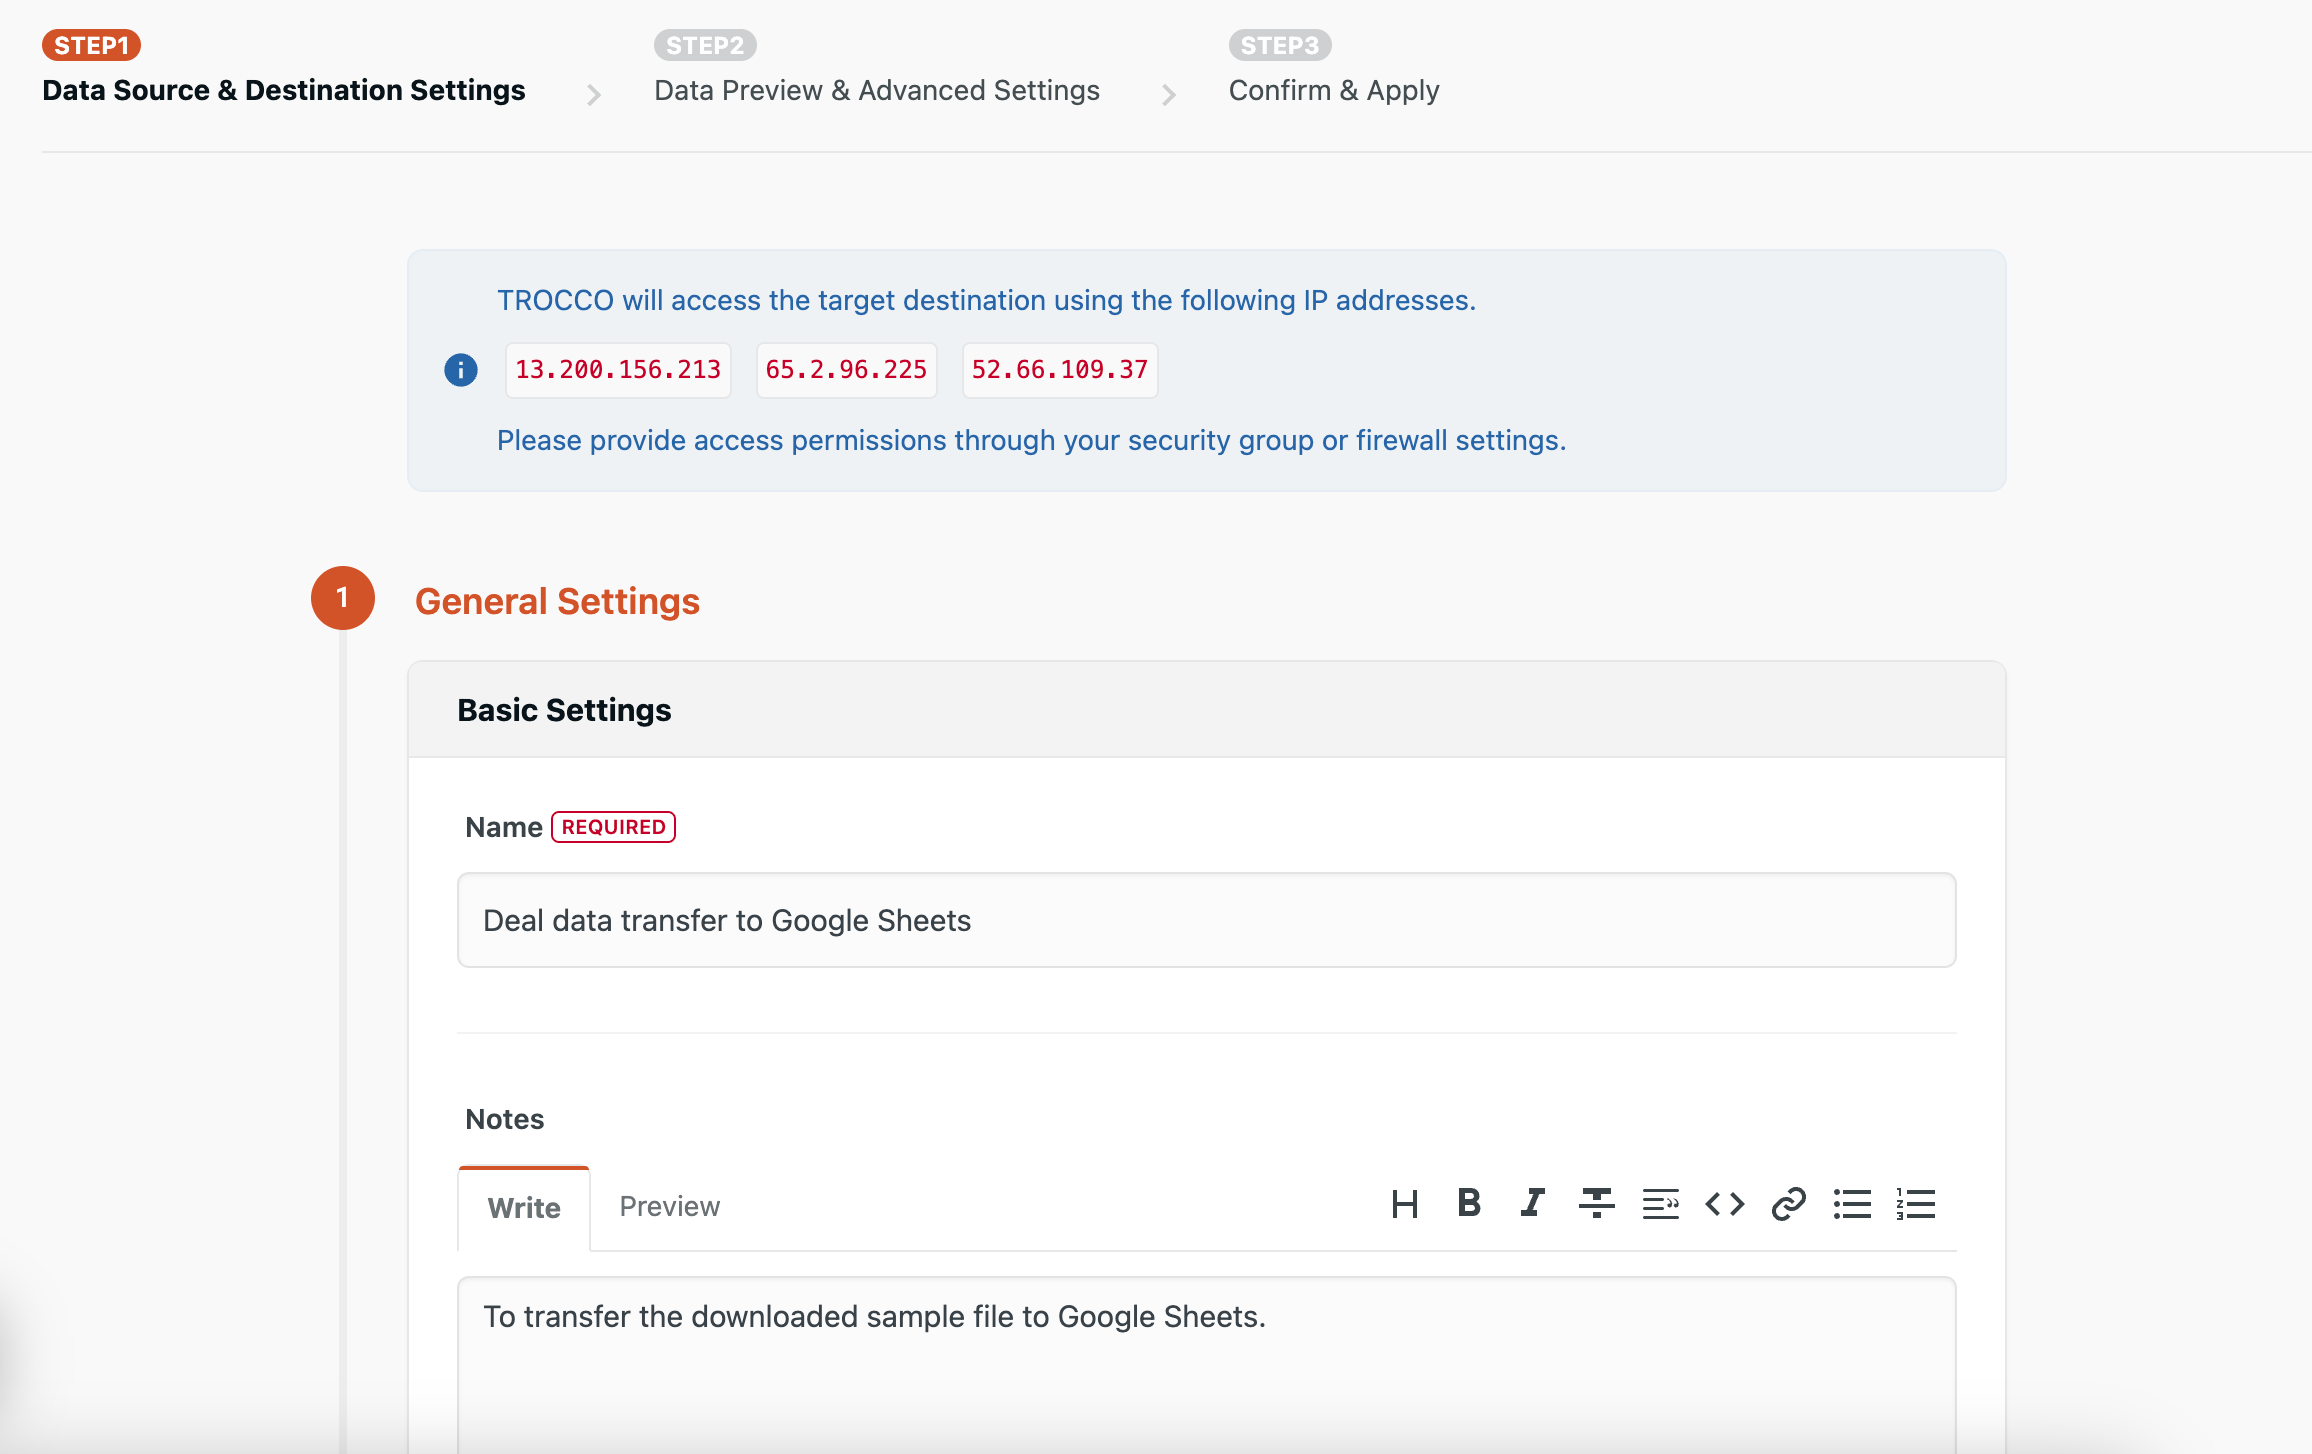
STEP1 Setting the source and destination
- "General Settings"
- Name: Enter any name
- Notes: You may leave it blank.
- It is recommended to write down the purpose of use and the details of the forwarding settings. If you are using the team function, it will be easier for other members to understand the intent of the settings.
- It is recommended to write down the purpose of use and the details of the forwarding settings. If you are using the team function, it will be easier for other members to understand the intent of the settings.
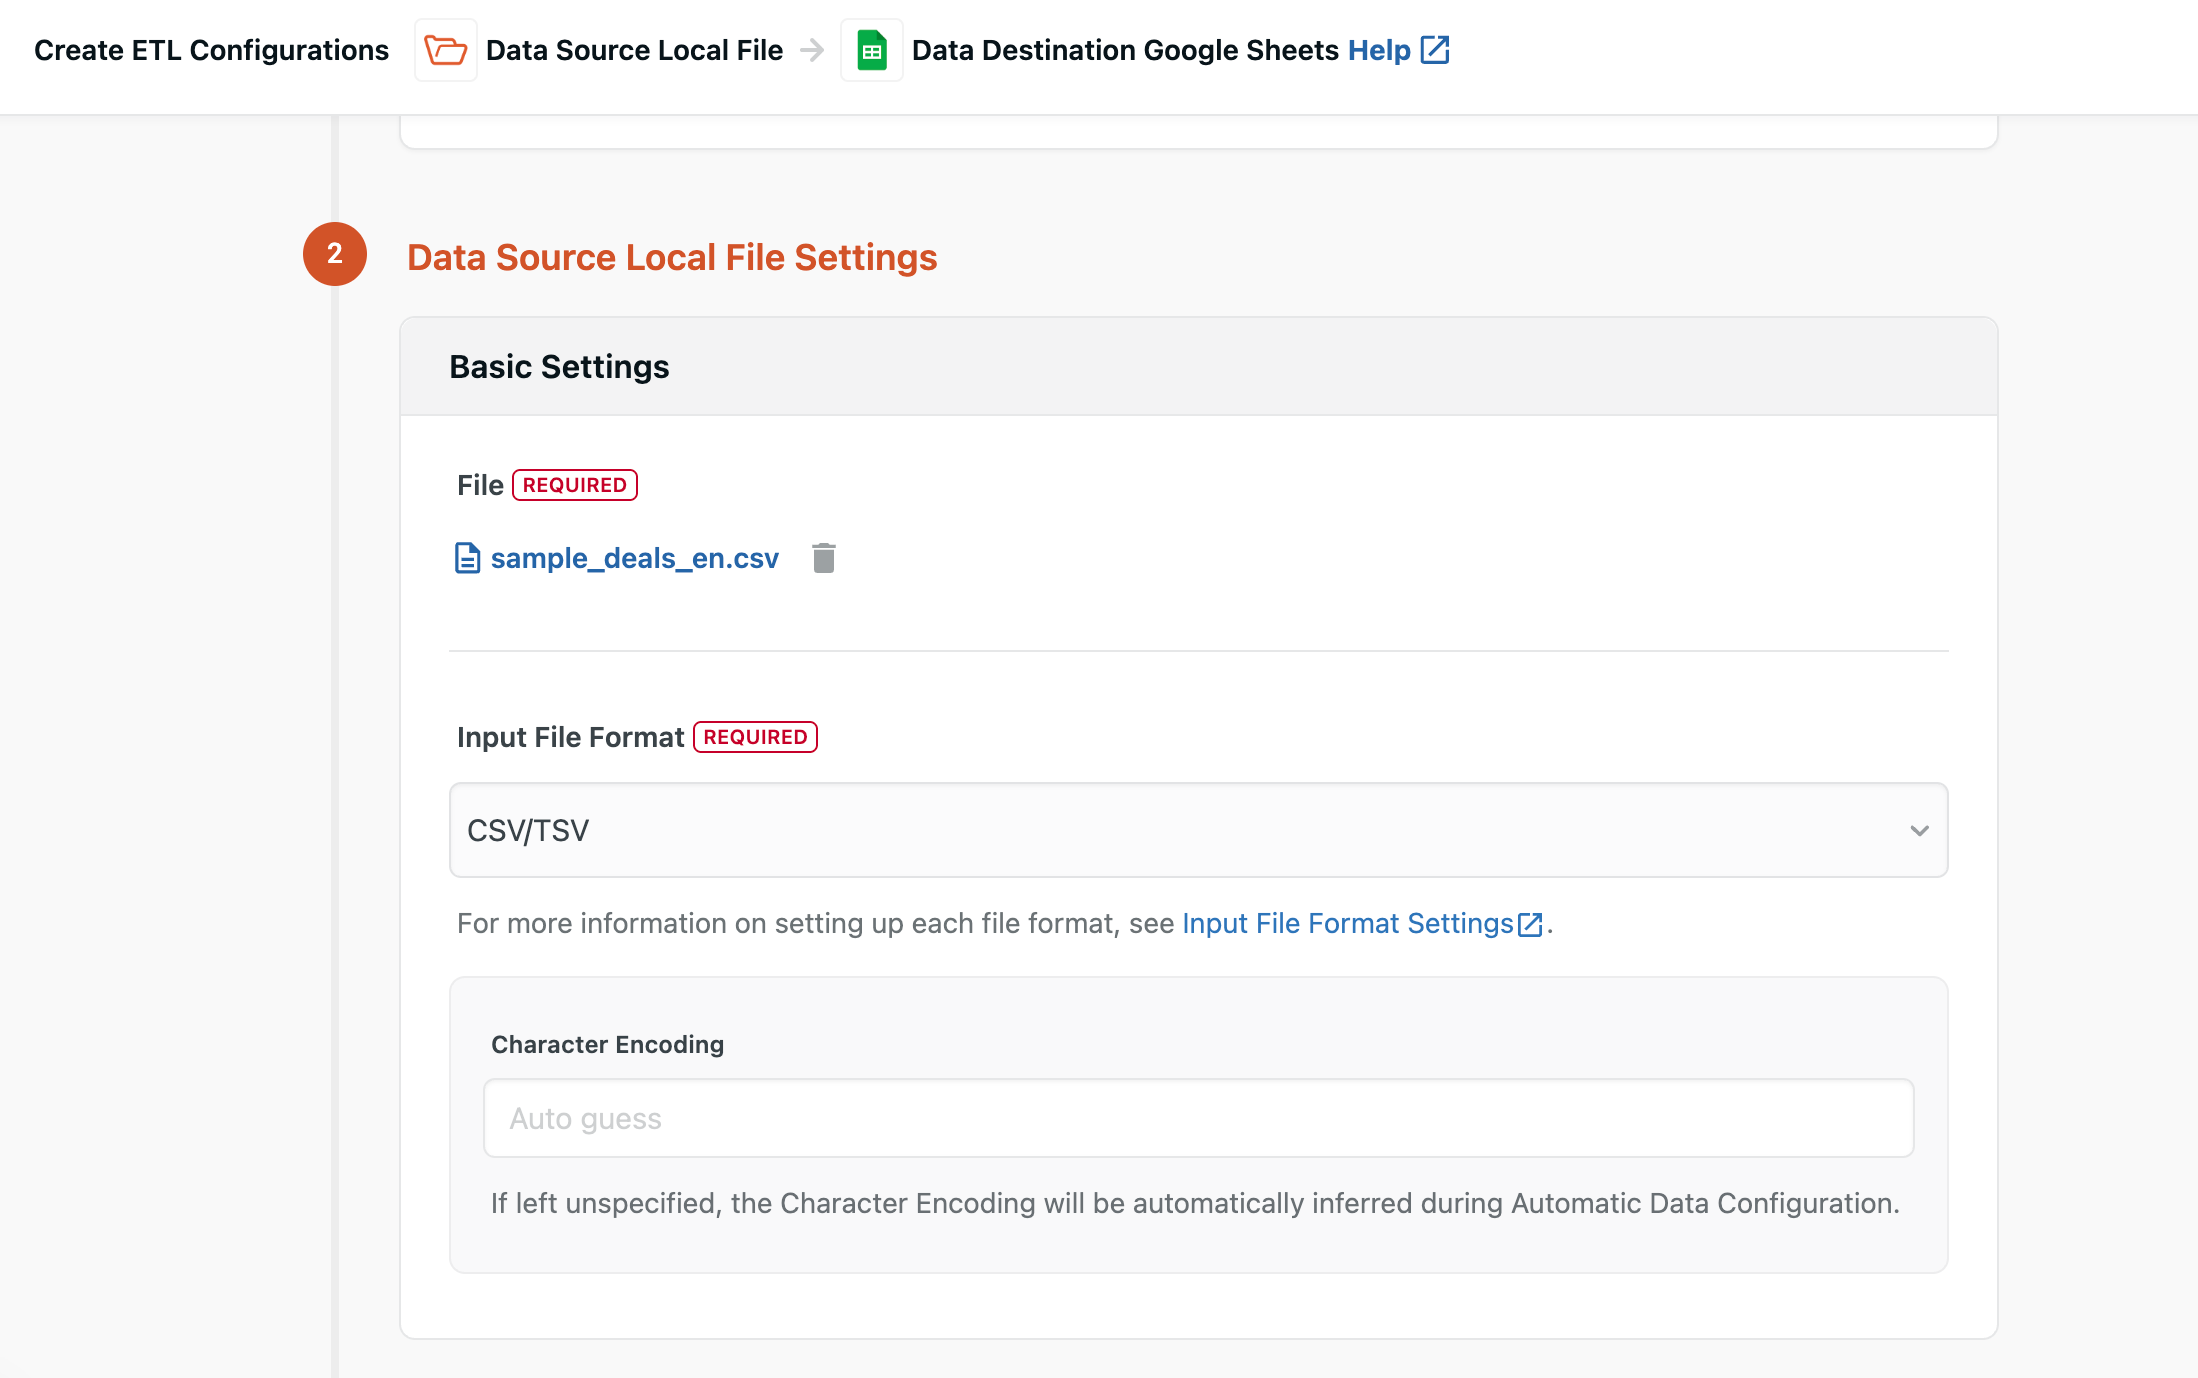
- "Data Source Local File Settings"
- File: Upload the sample file of sales activity data mentioned above.
- Input File Format: Select CSV/TSV
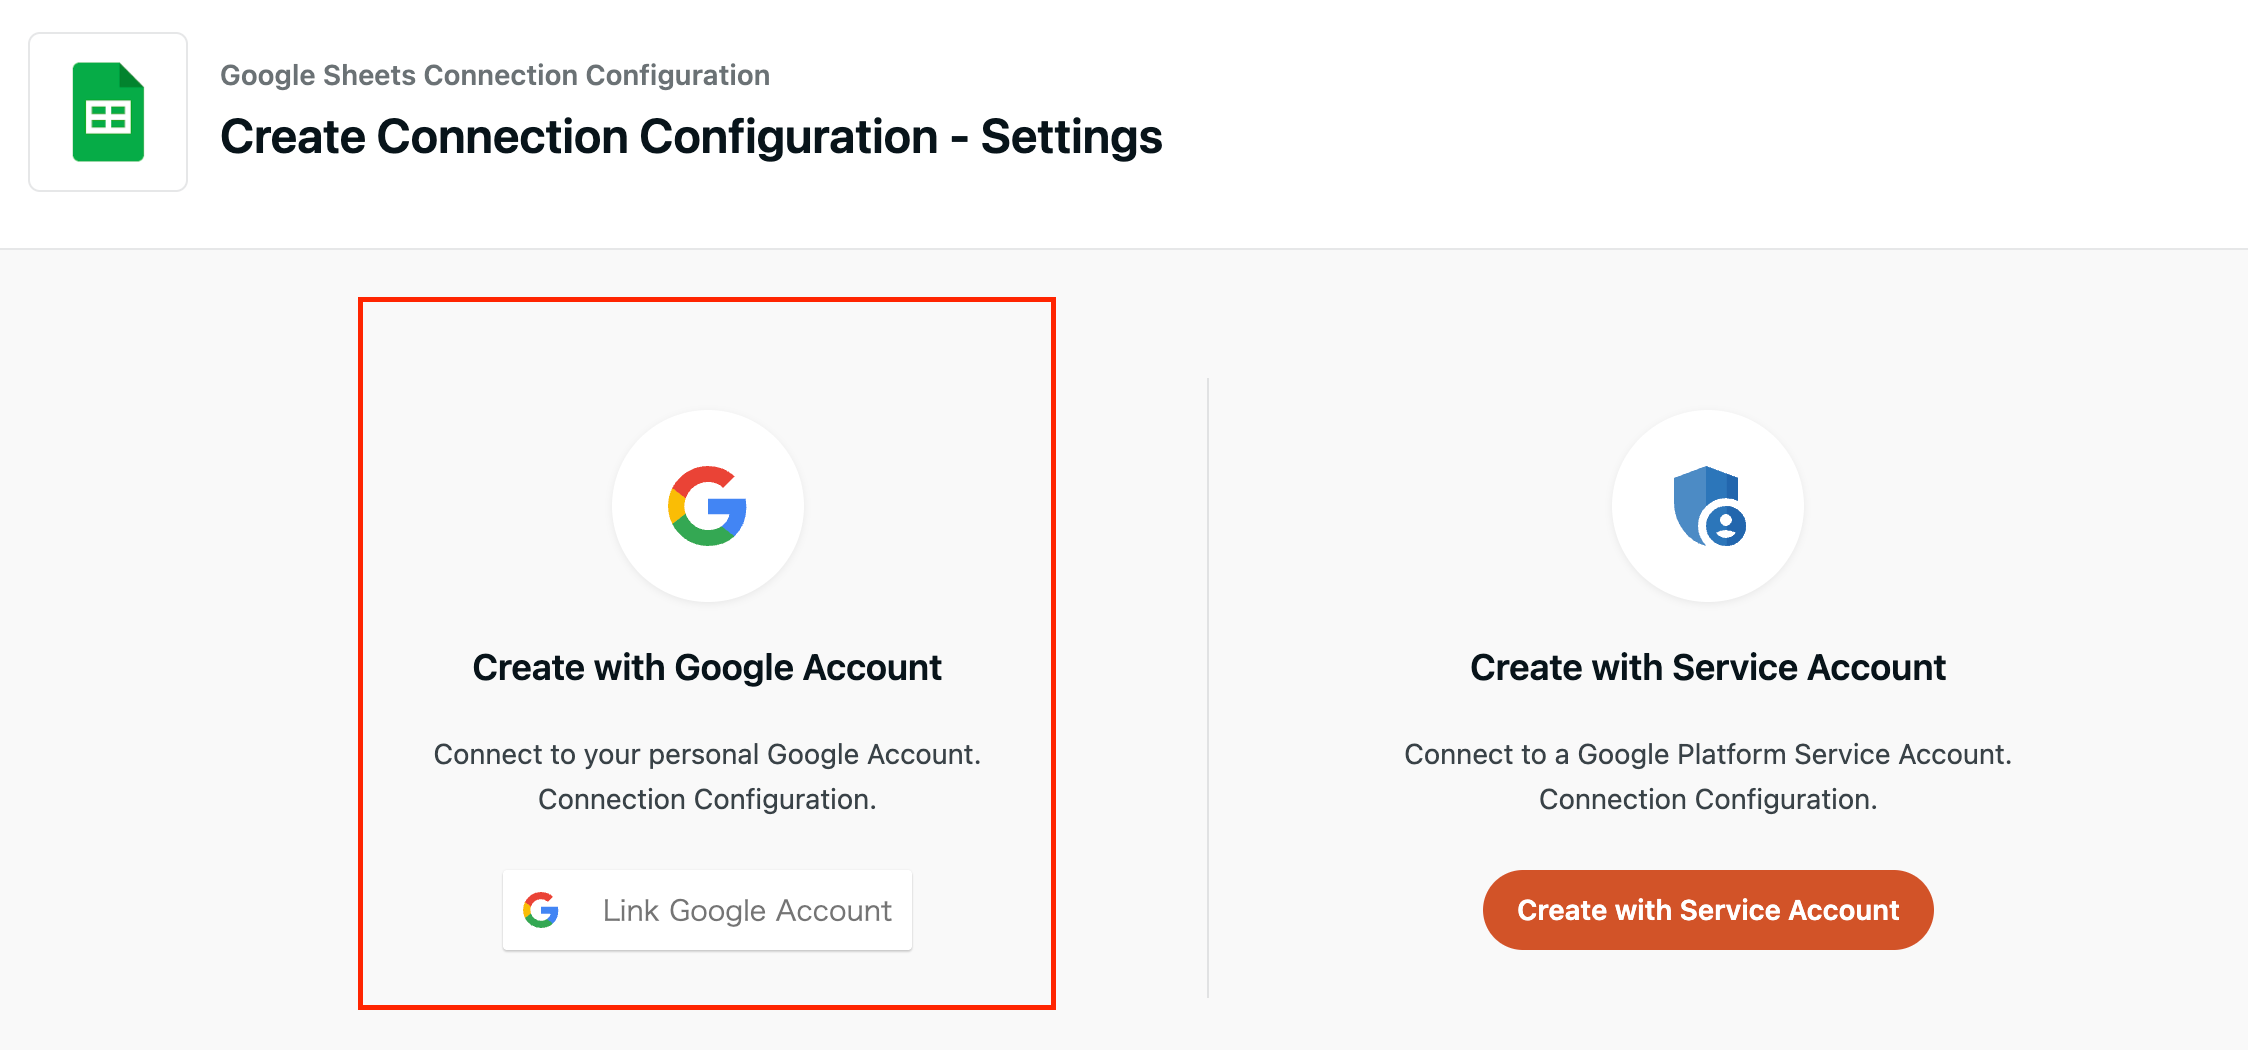
- Before "Data Destination Google Sheets Settings", create a Connection Configuration for Google Sheets. Click "Add Connection Configuration".
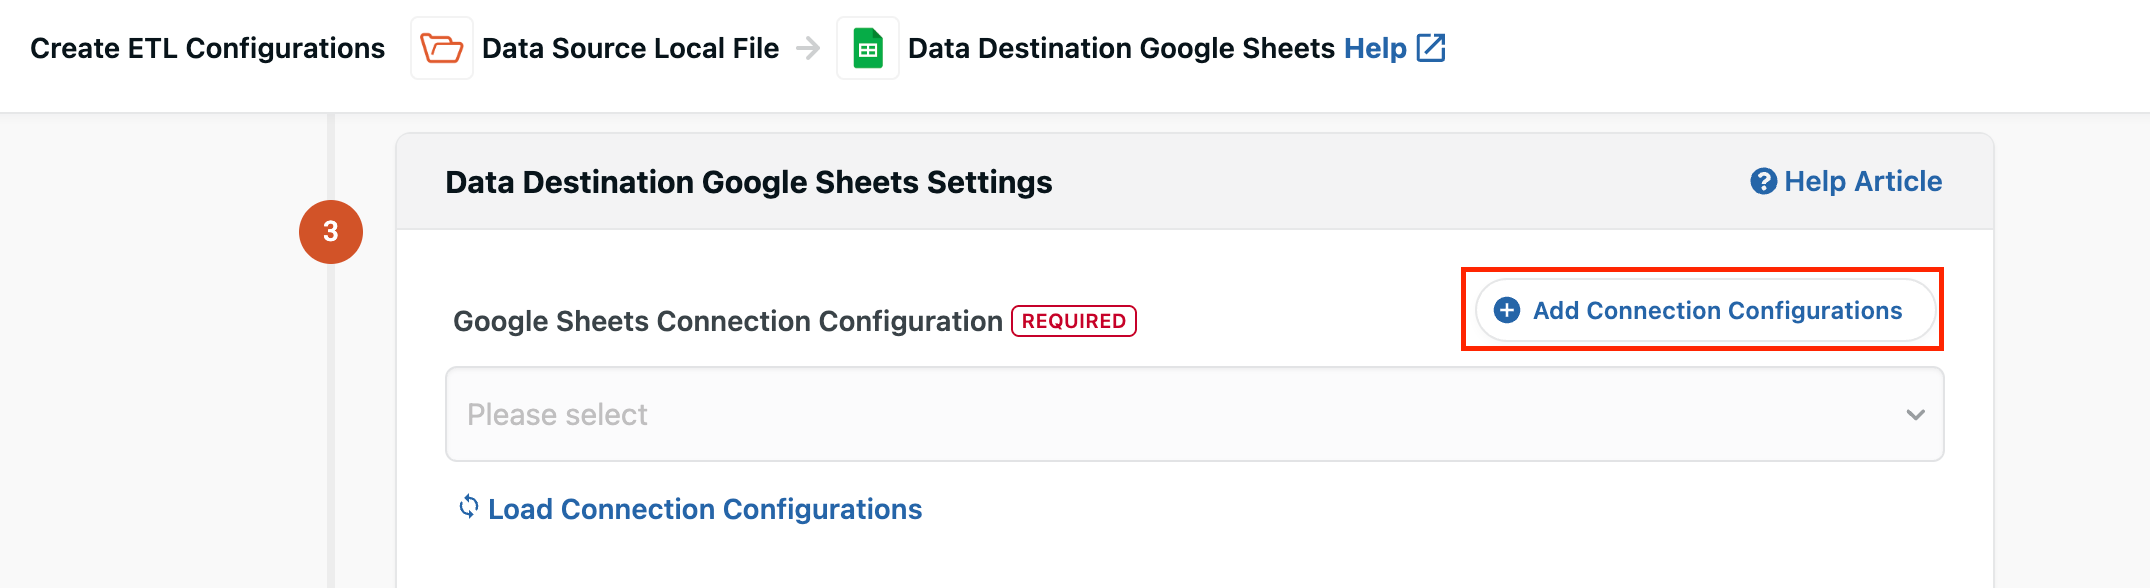
- Click "Link Google Account".
- Log in with the Google account you normally use and allow access from TROCCO.
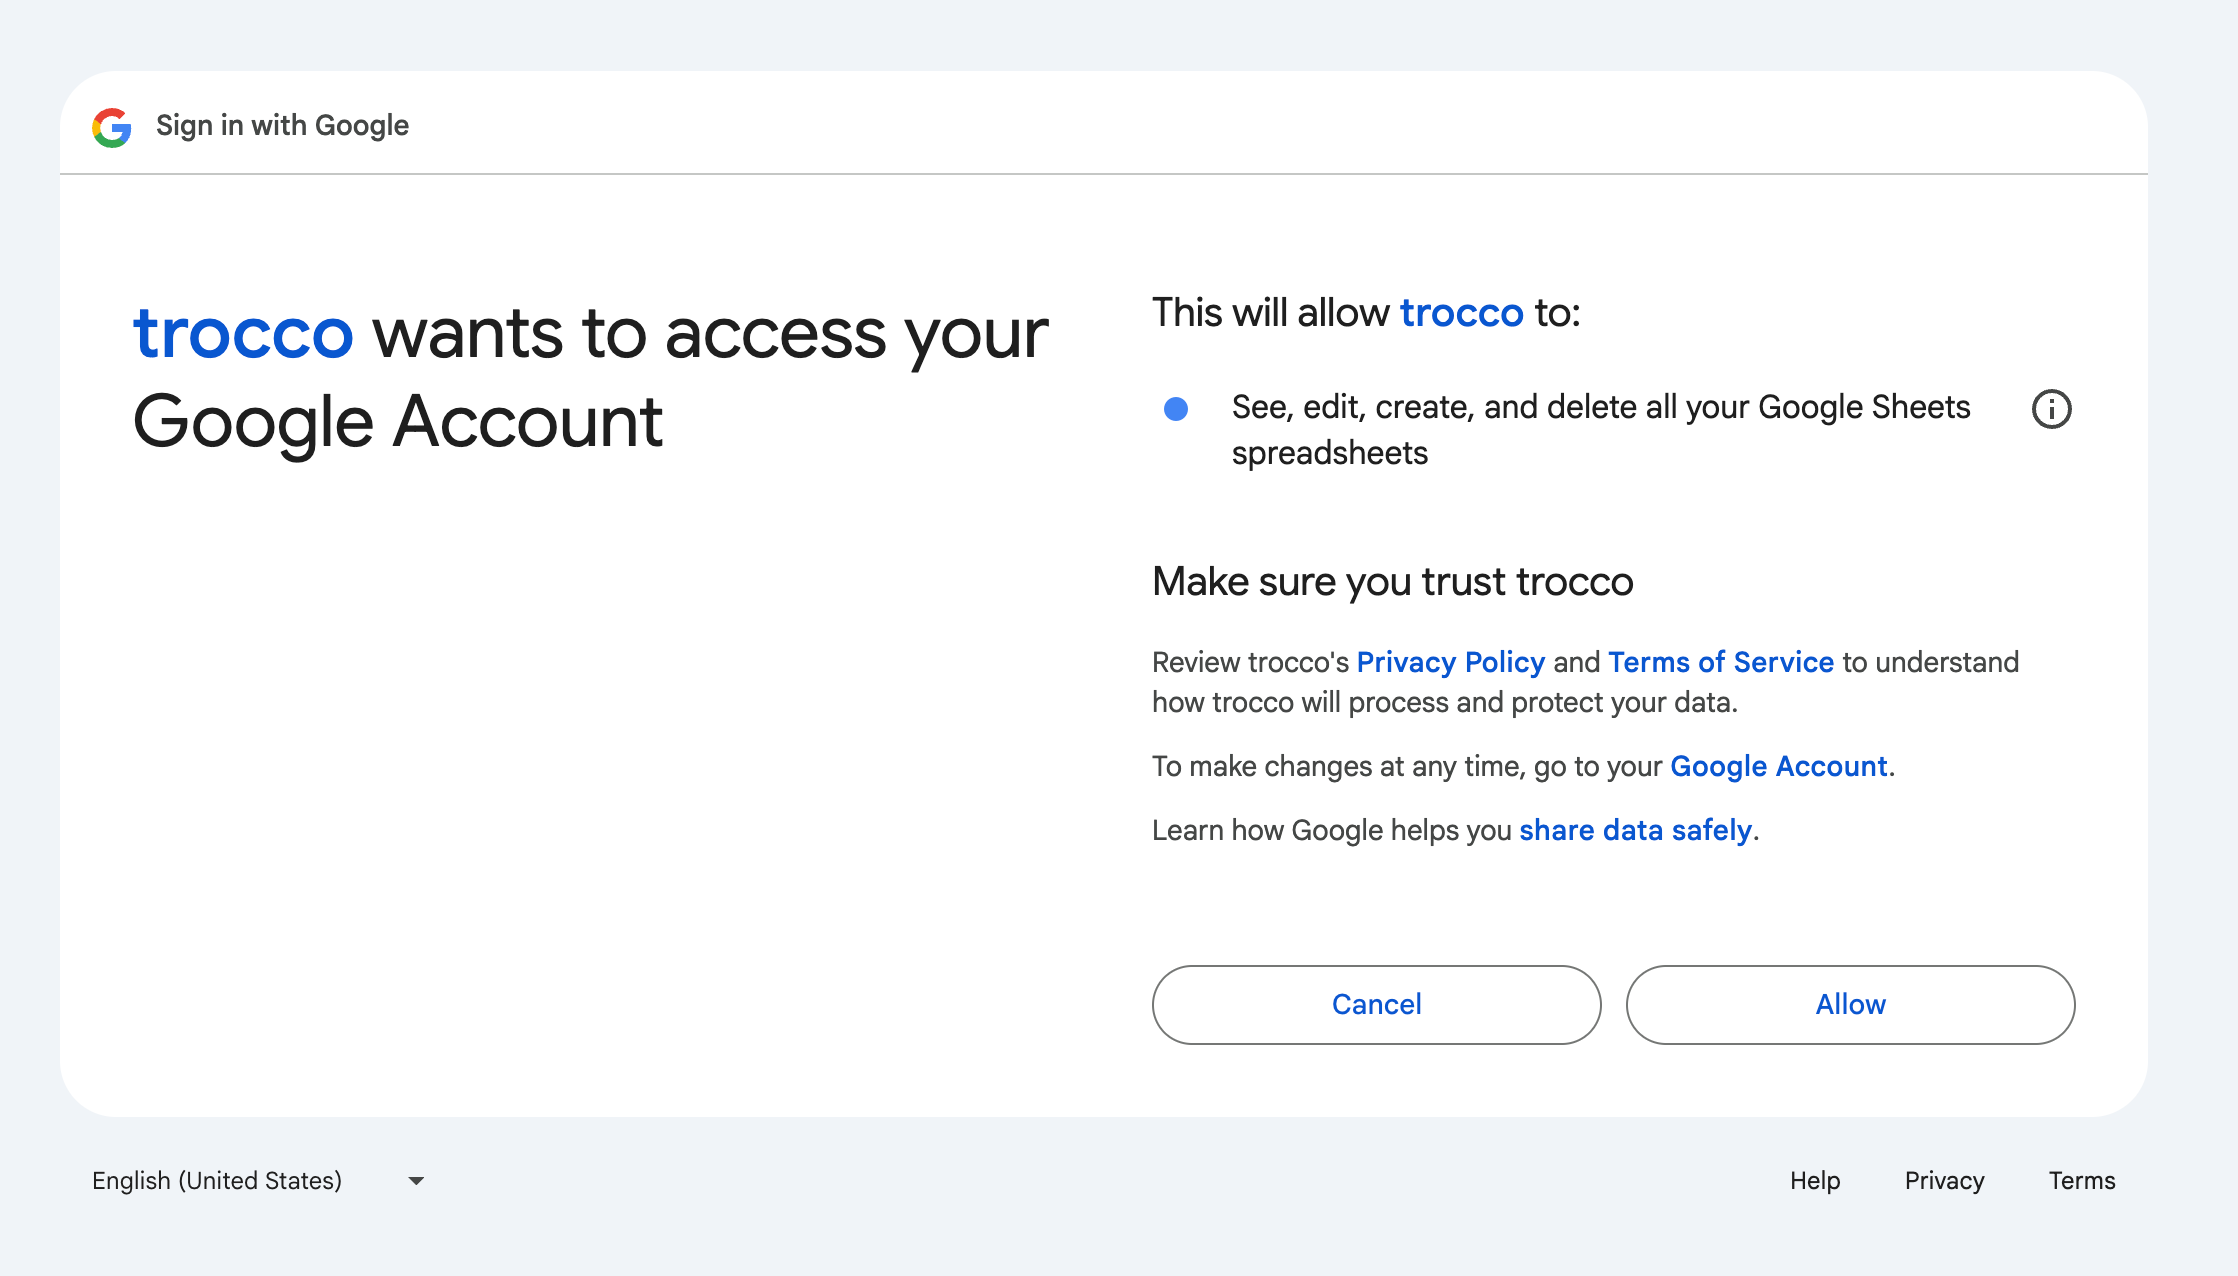
- If you give permission, you will be redirected to the Connection Configuration creation page. Enter any name in the name field, make sure that the email address of the Google account you are using is entered in the Google account field, and save it.

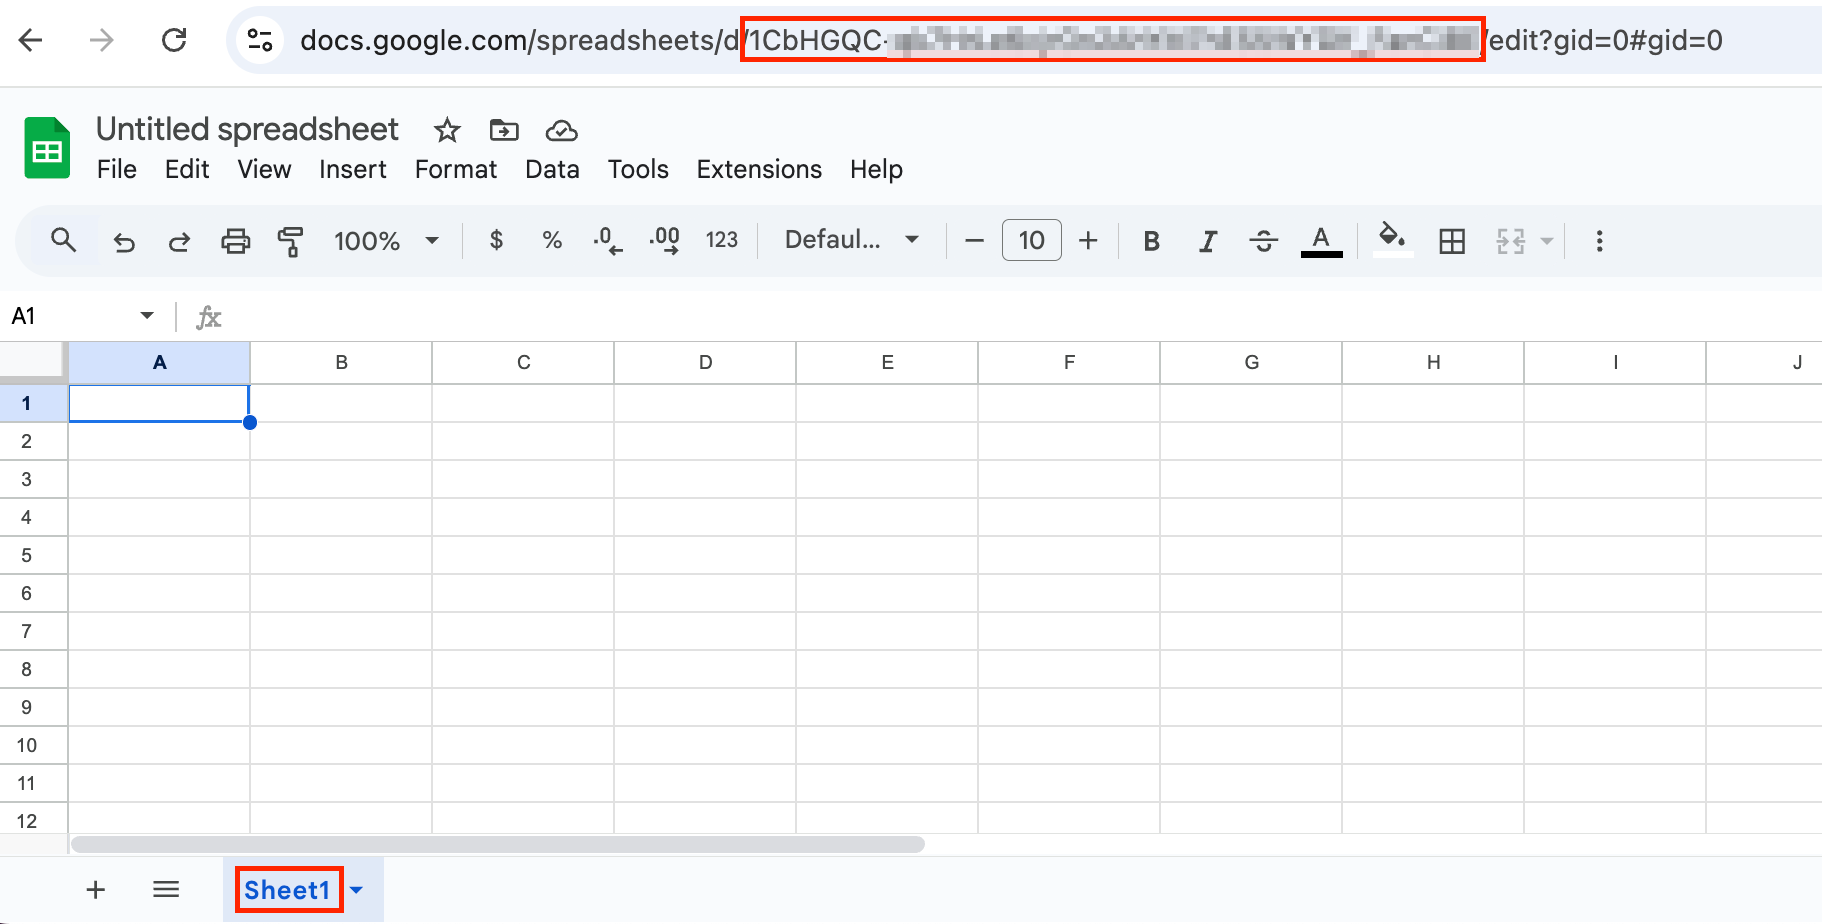
- Create a new sheet in advance using the Google account used in the Connection Configuration. You will need the "Spreadsheet ID" and "Sheet Name" in the URL enclosed in the red frame later.
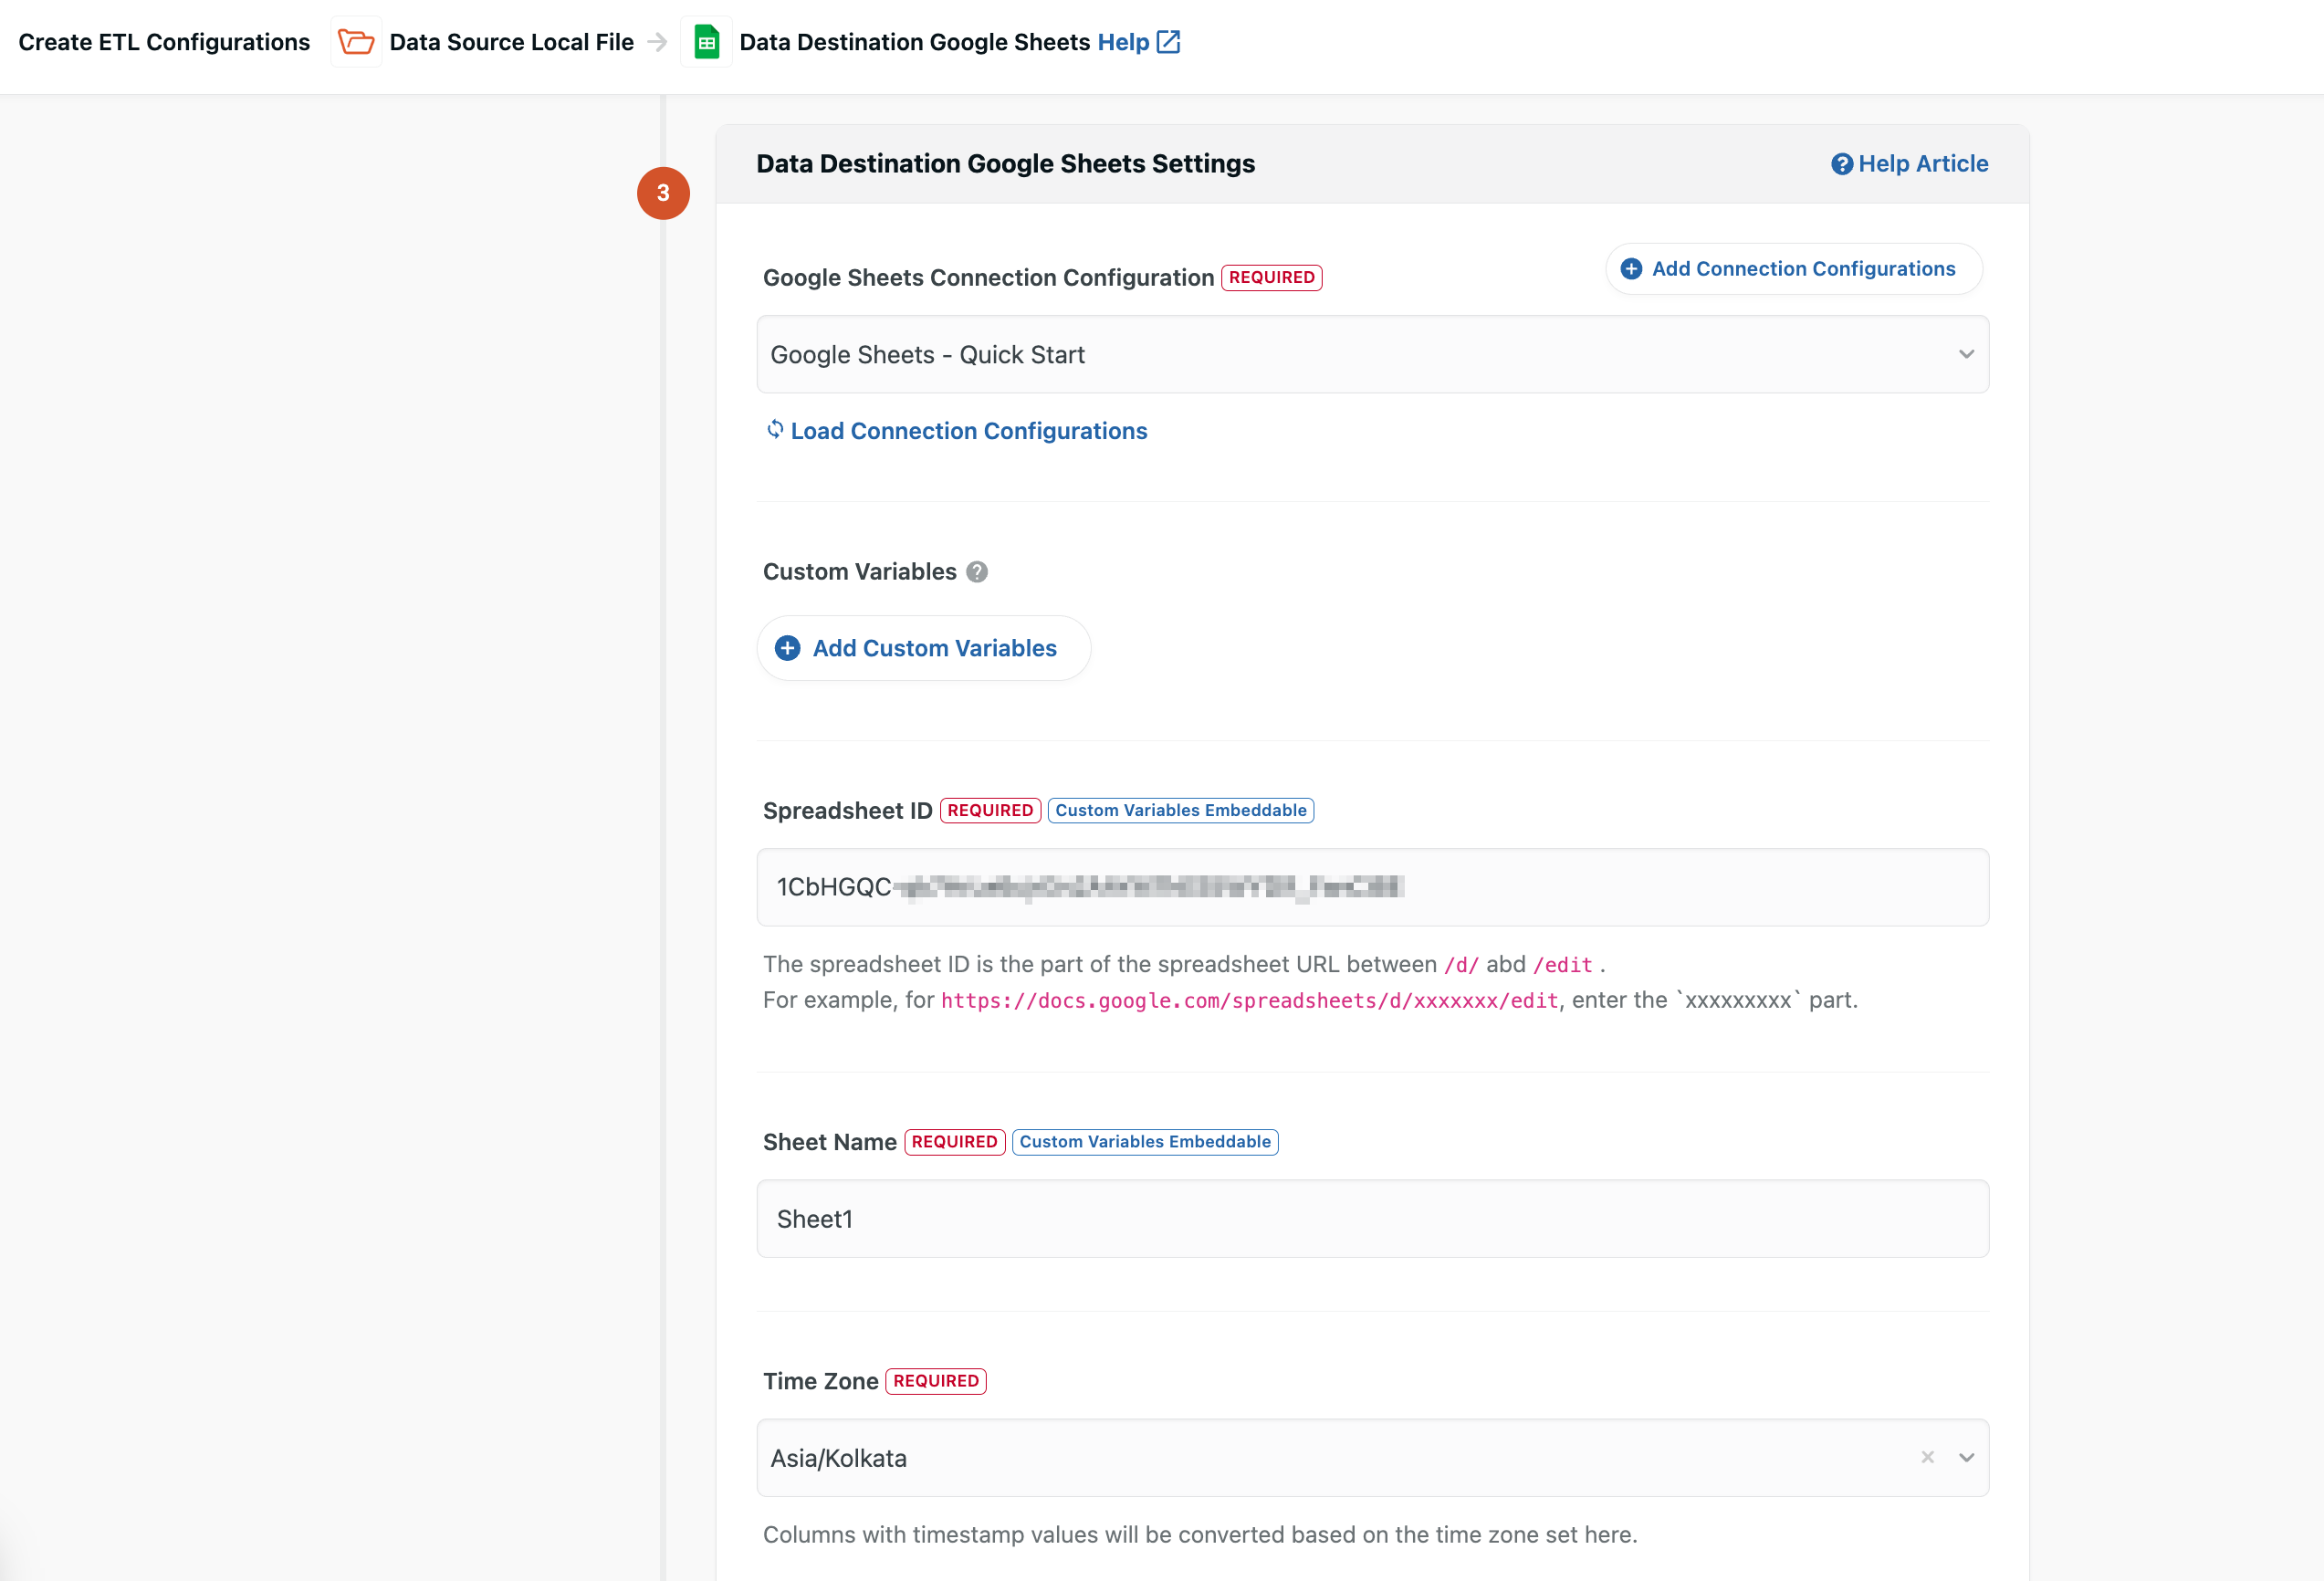
- Return to the ETL Configuration creation page and perform "Data Destination Google Sheets Settings".
- Google Sheets Connection Configuration: Select the Connection Configuration you created earlier from the drop-down menu.
- Spreadsheet ID: Spreadsheet ID you created earlier
- Sheet name: Sheet name of the sheet you created earlier
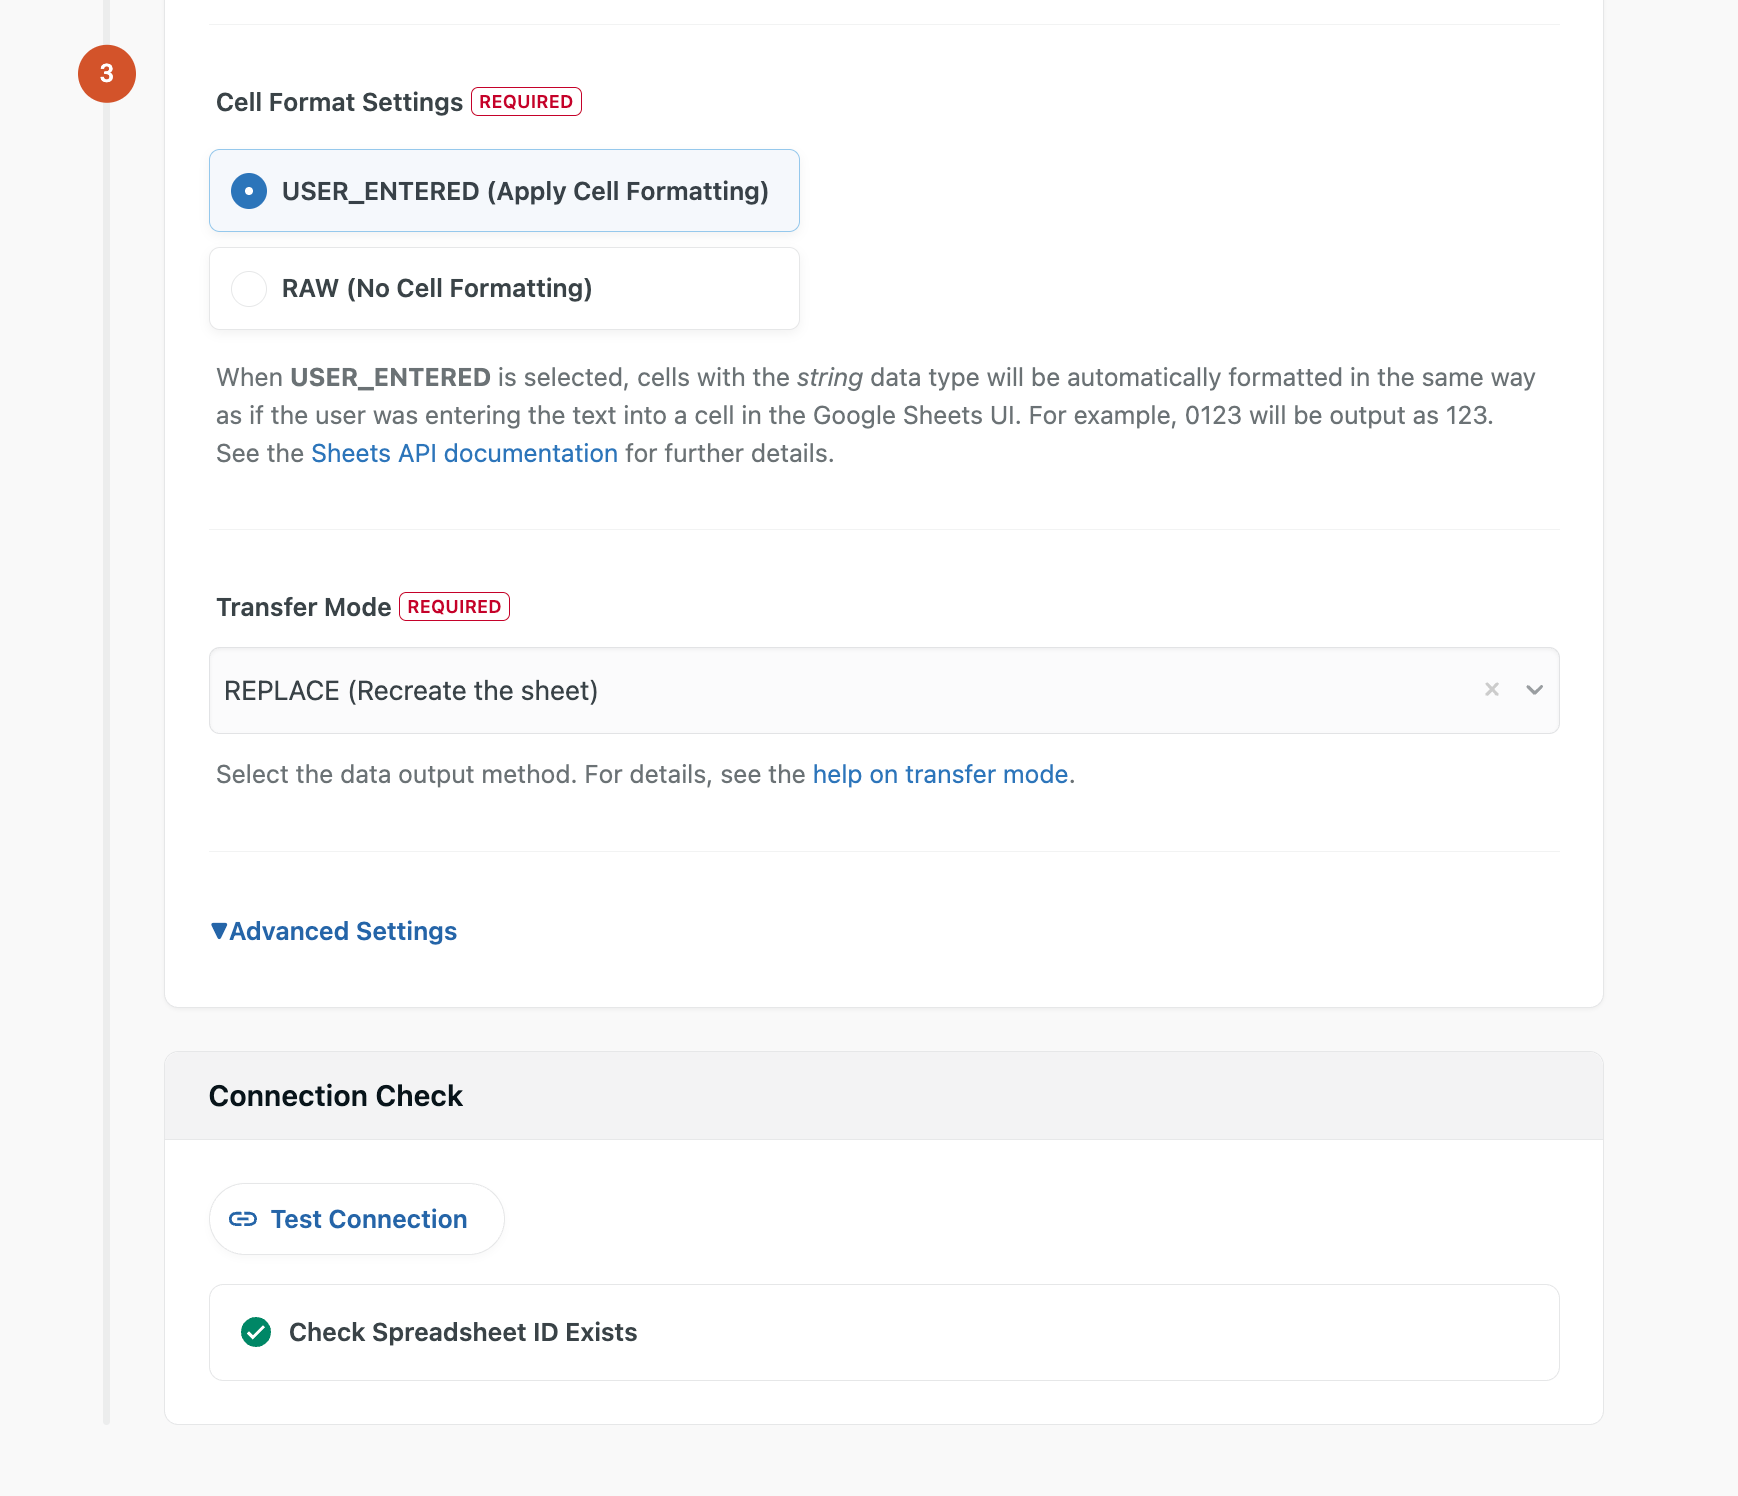
- Other items can be left at the default settings.
- Click "Test Connection" to confirm that TROCCO can access the destination sheet, then proceed to "Next".
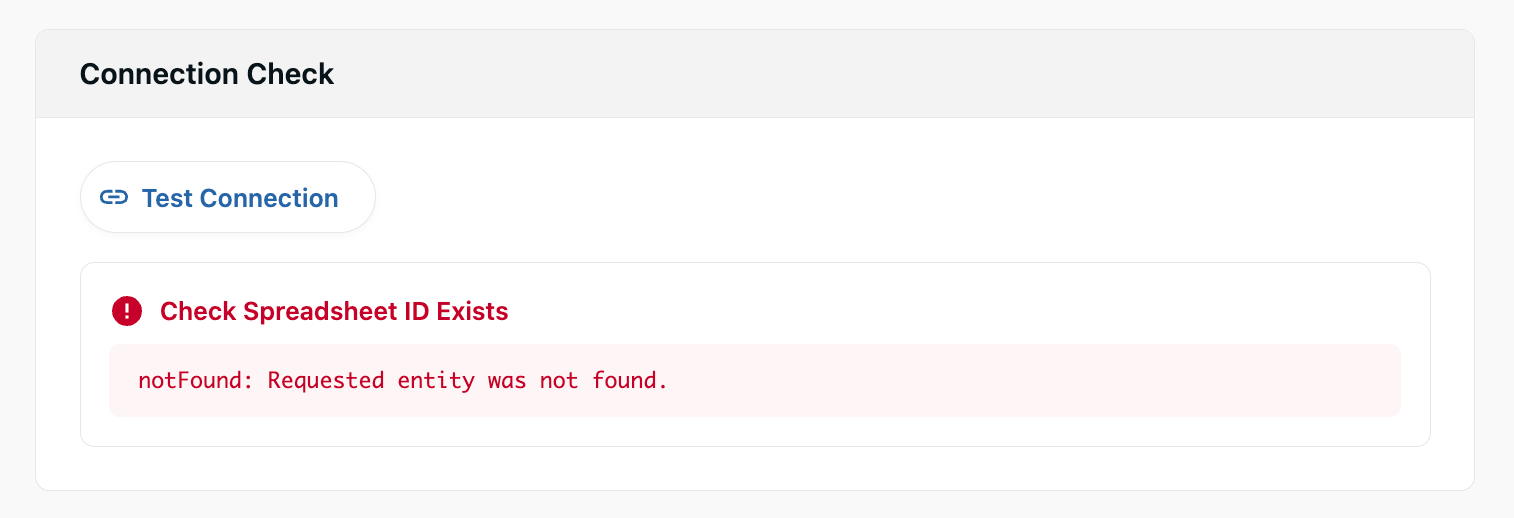
If connection check failsIf the specified spreadsheet ID does not exist, an error will occur when you check the connection.
If an error occurs, please check that the spreadsheet ID is correct.
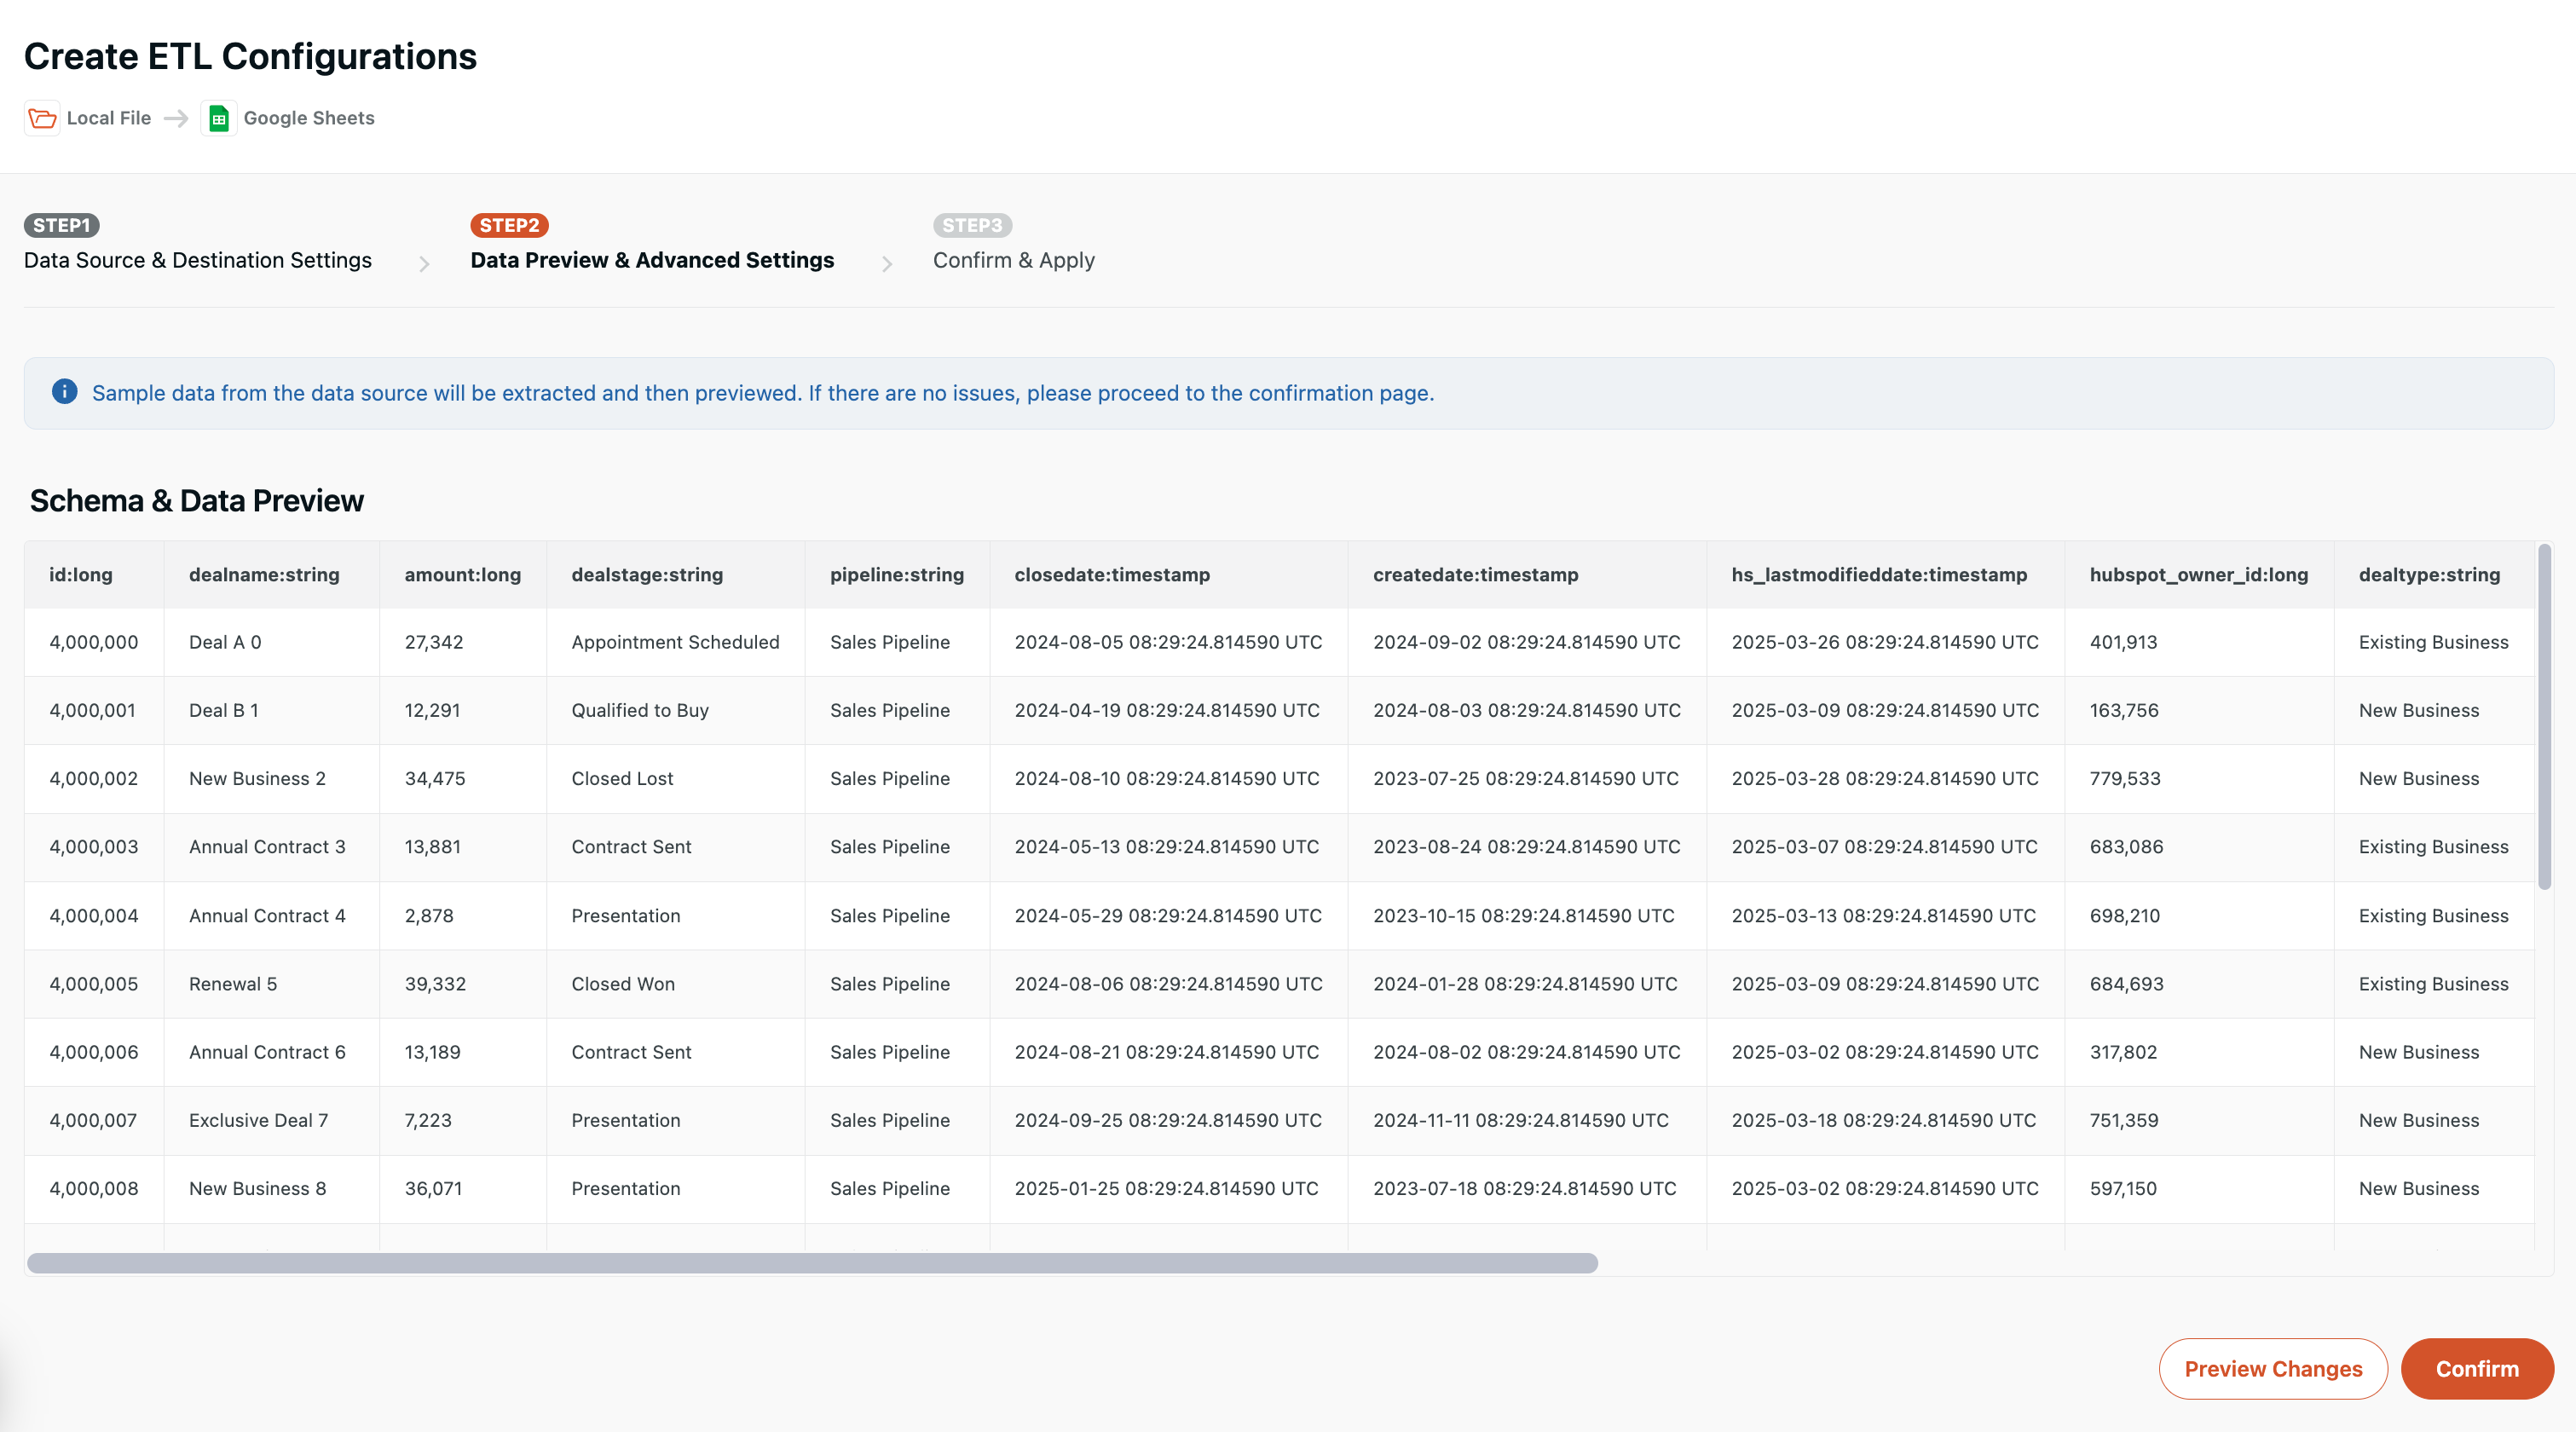
STEP2 Data Preview & Advanced Settings
- TROCCO reads the sample data uploaded at the source settings, automatically identifies the schema, such as data types and column names, and generates a data preview.
- In the "Column Definition" section under the "Data Settings" tab in "Advanced Settings", you can change the column name and data type at the destination and delete columns.
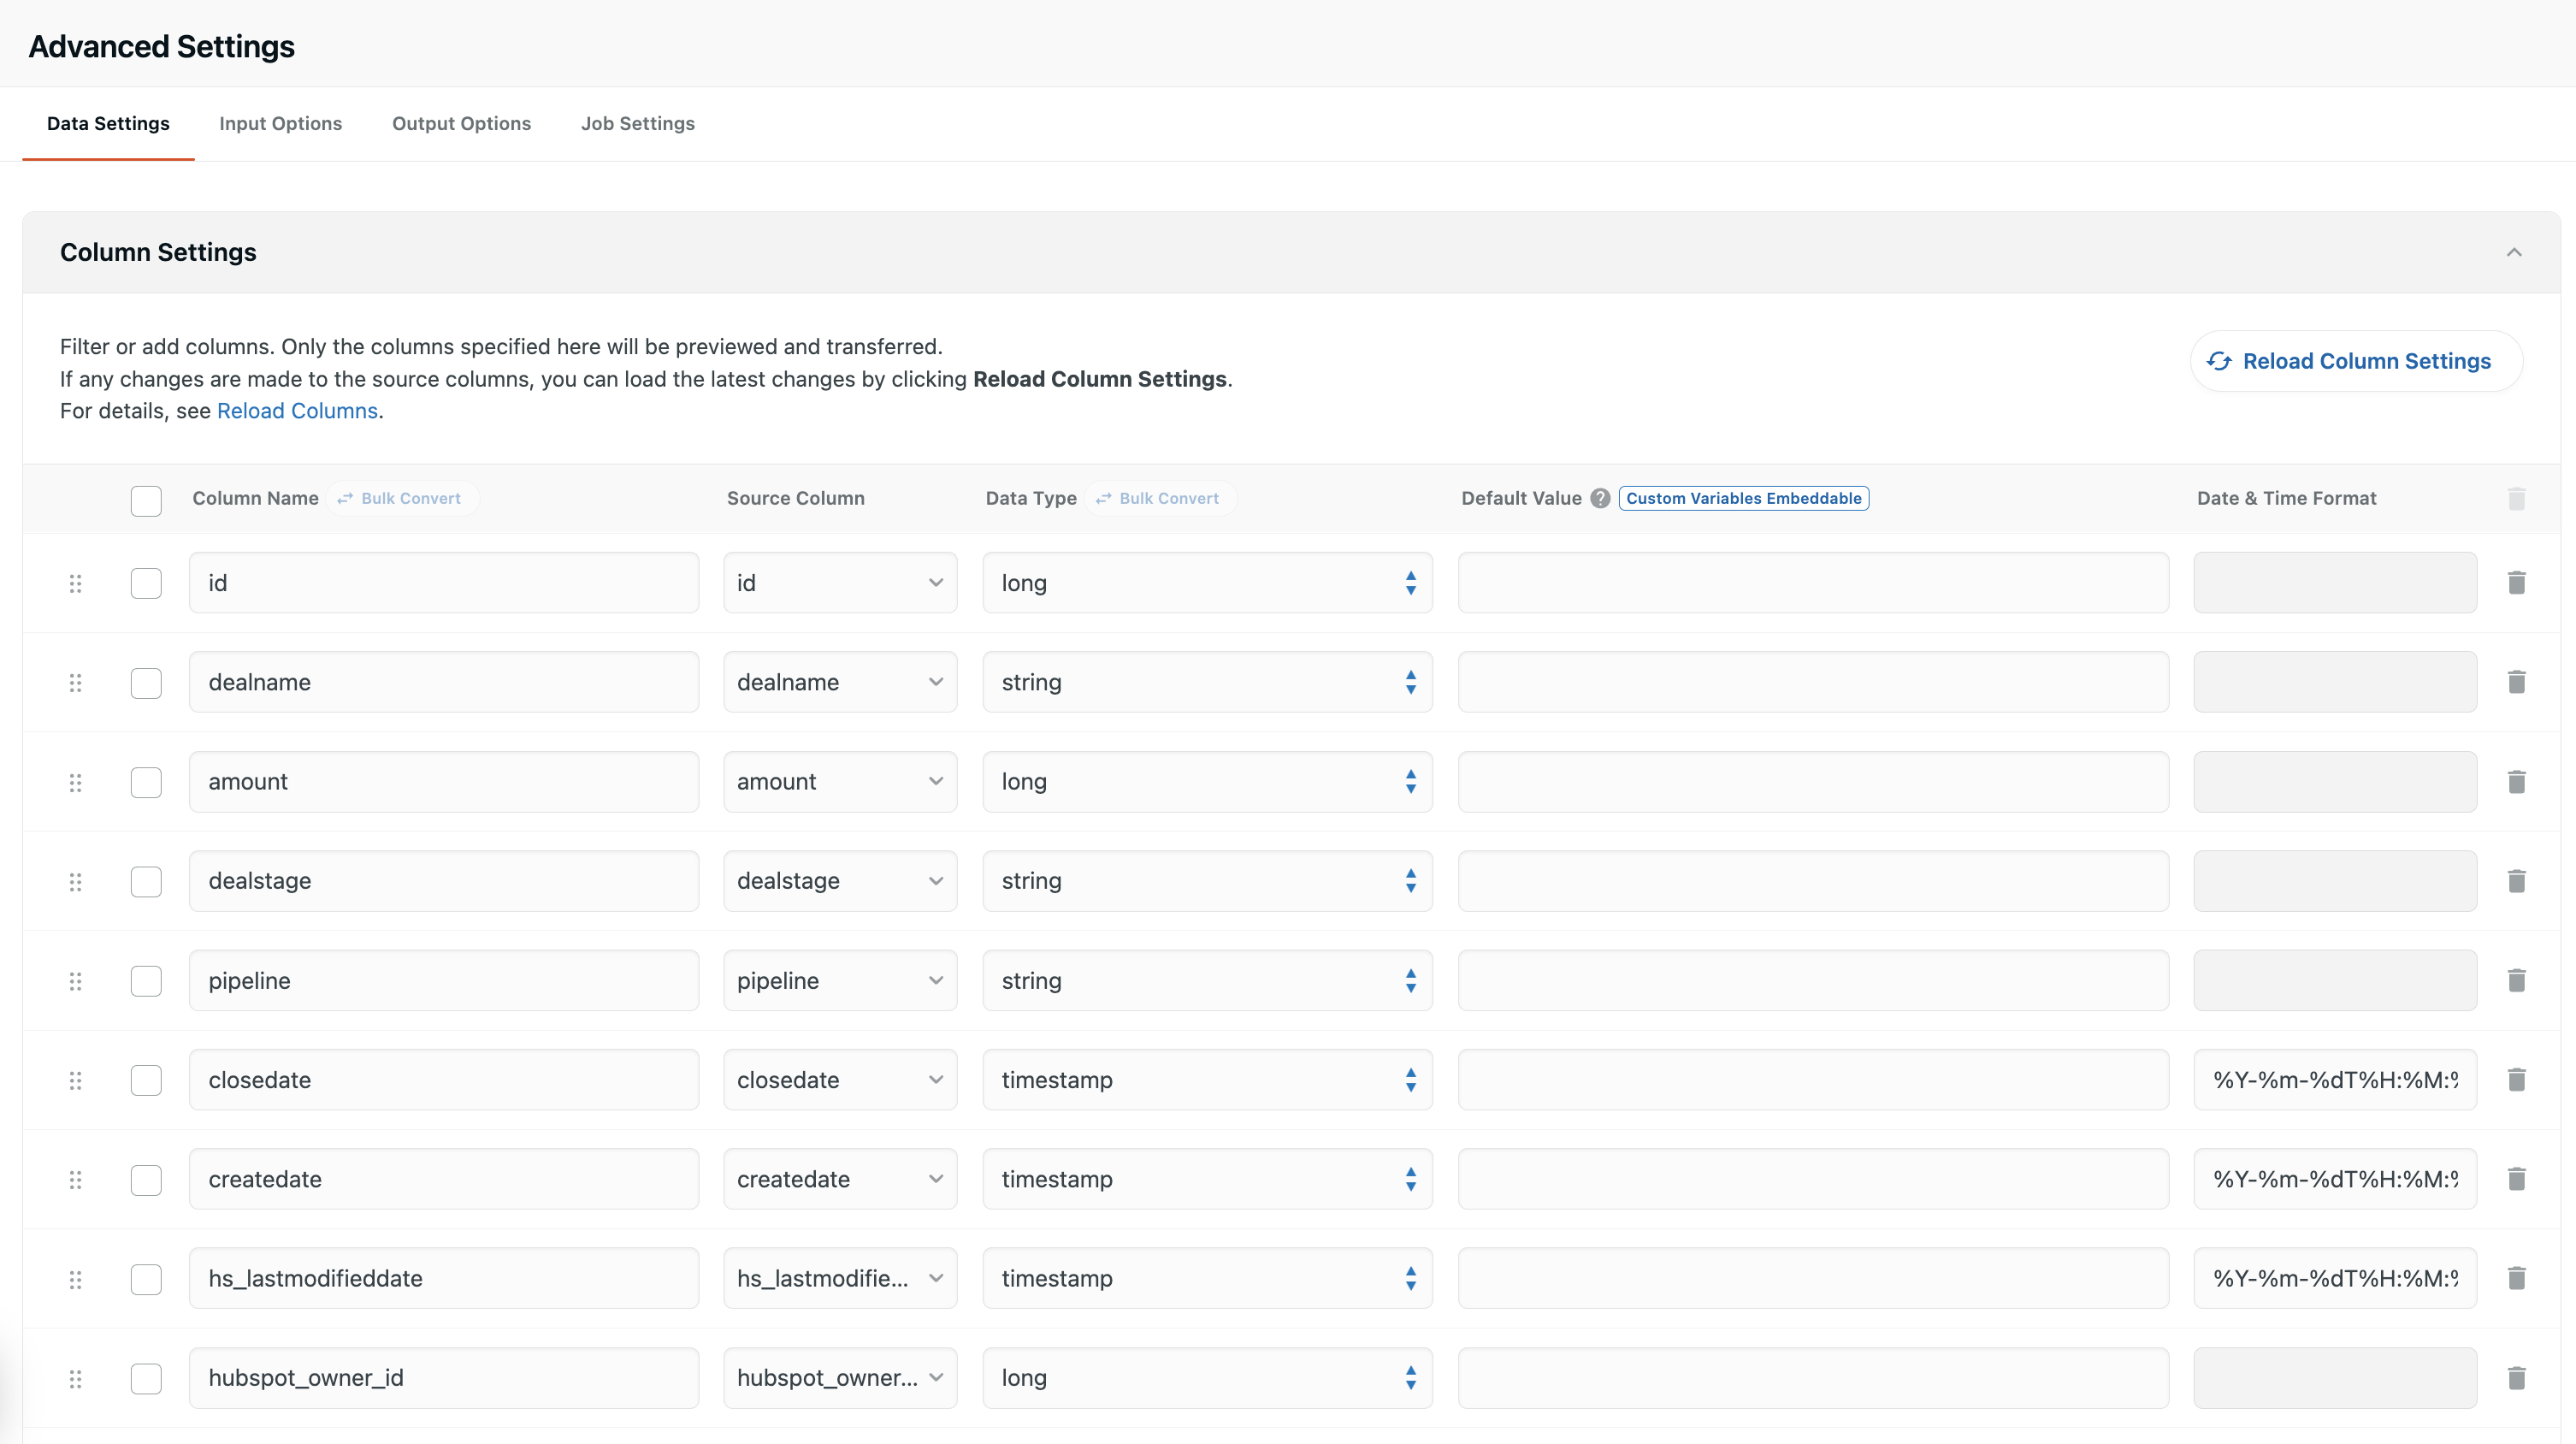
- Click "Confirm" to proceed to "Confirmation Screen" without making any corrections.
Template ETLIn STEP2, you can convert and filter data without programming.
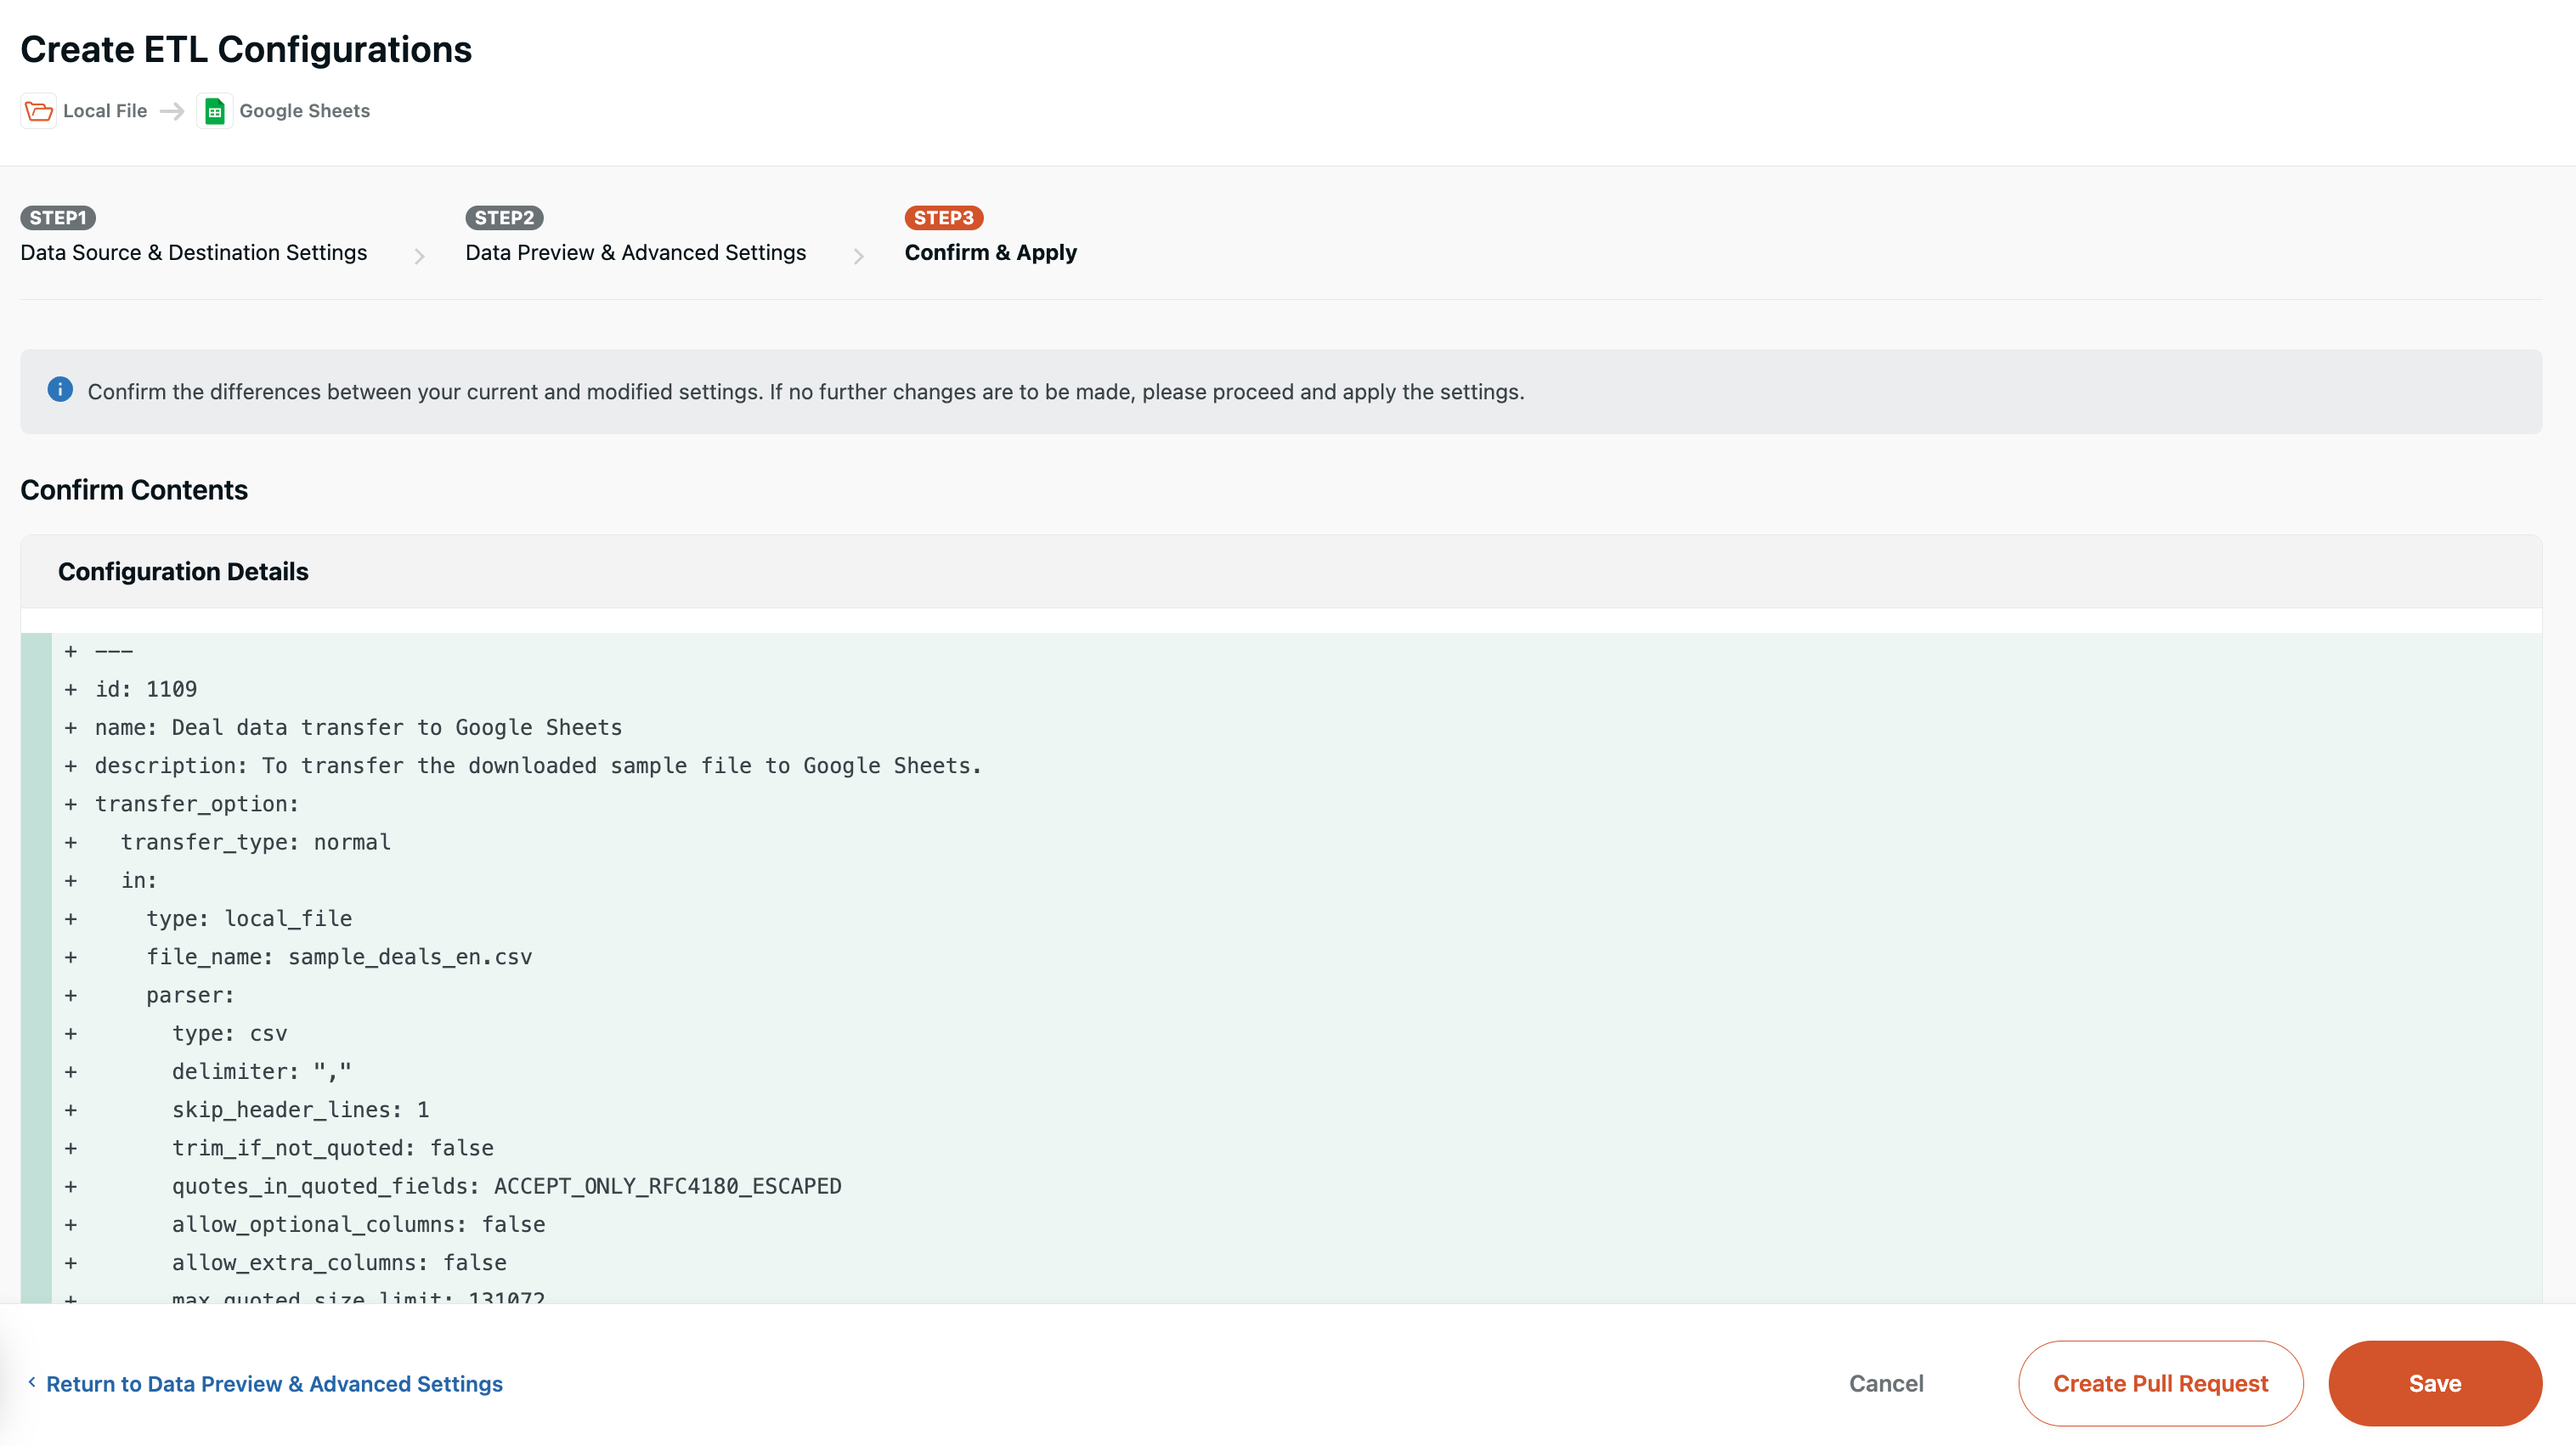
For details, see Template ETL.STEP3 Confirm and Apply
- You can check the settings for STEP1 and STEP2 in YAML format. Click "Save" to proceed.
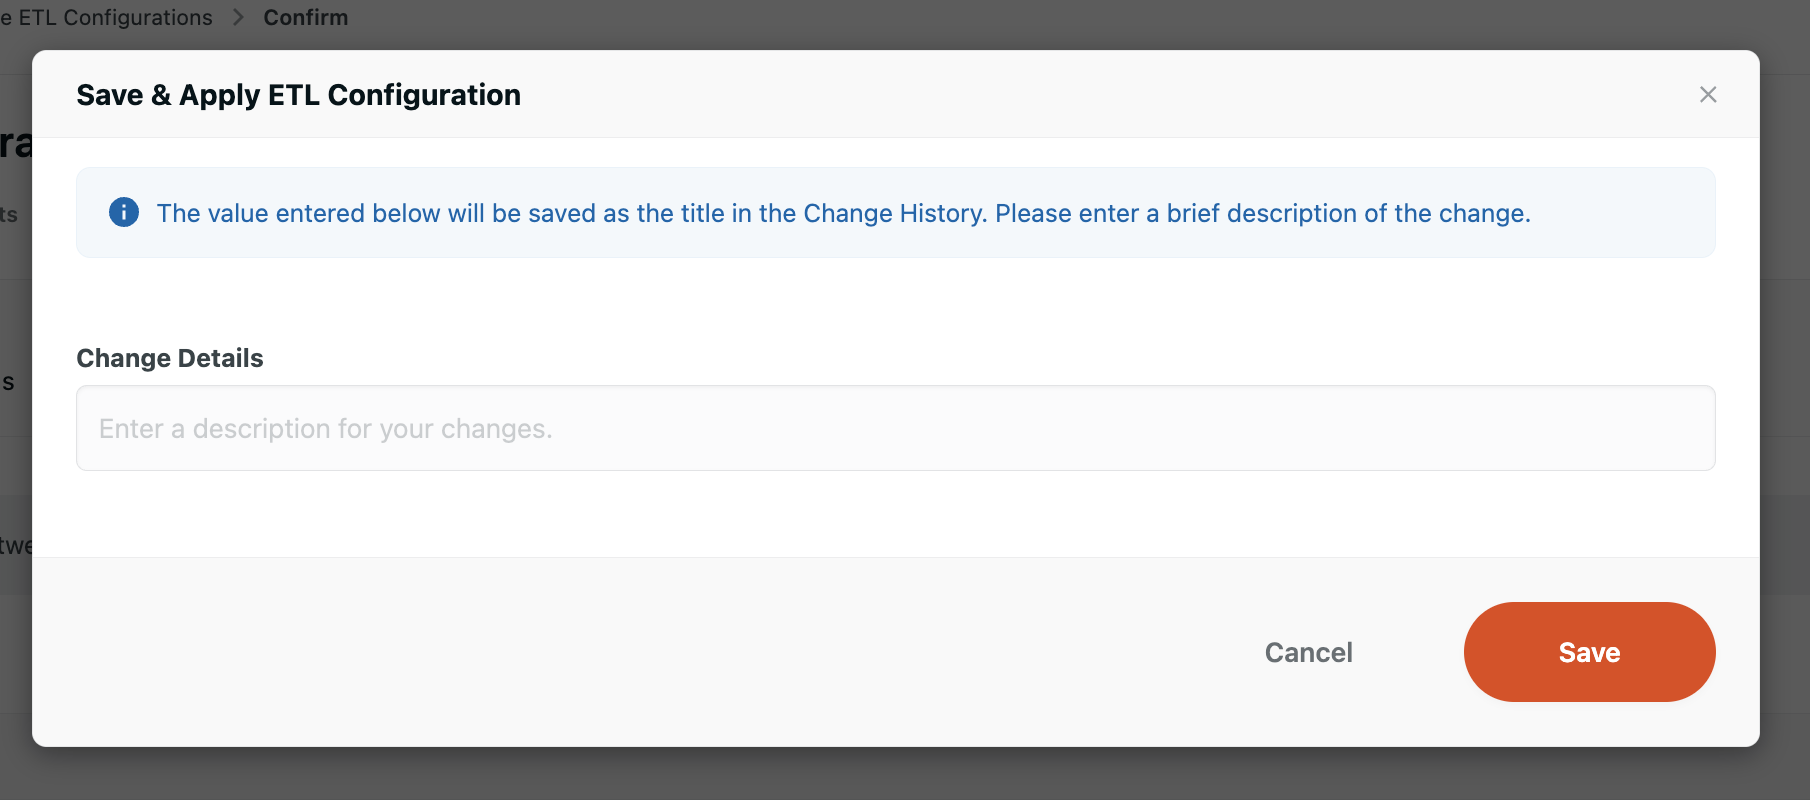
- The modal will appear as below. You may add a note about the changes you made. Click "Save" without entering anything.
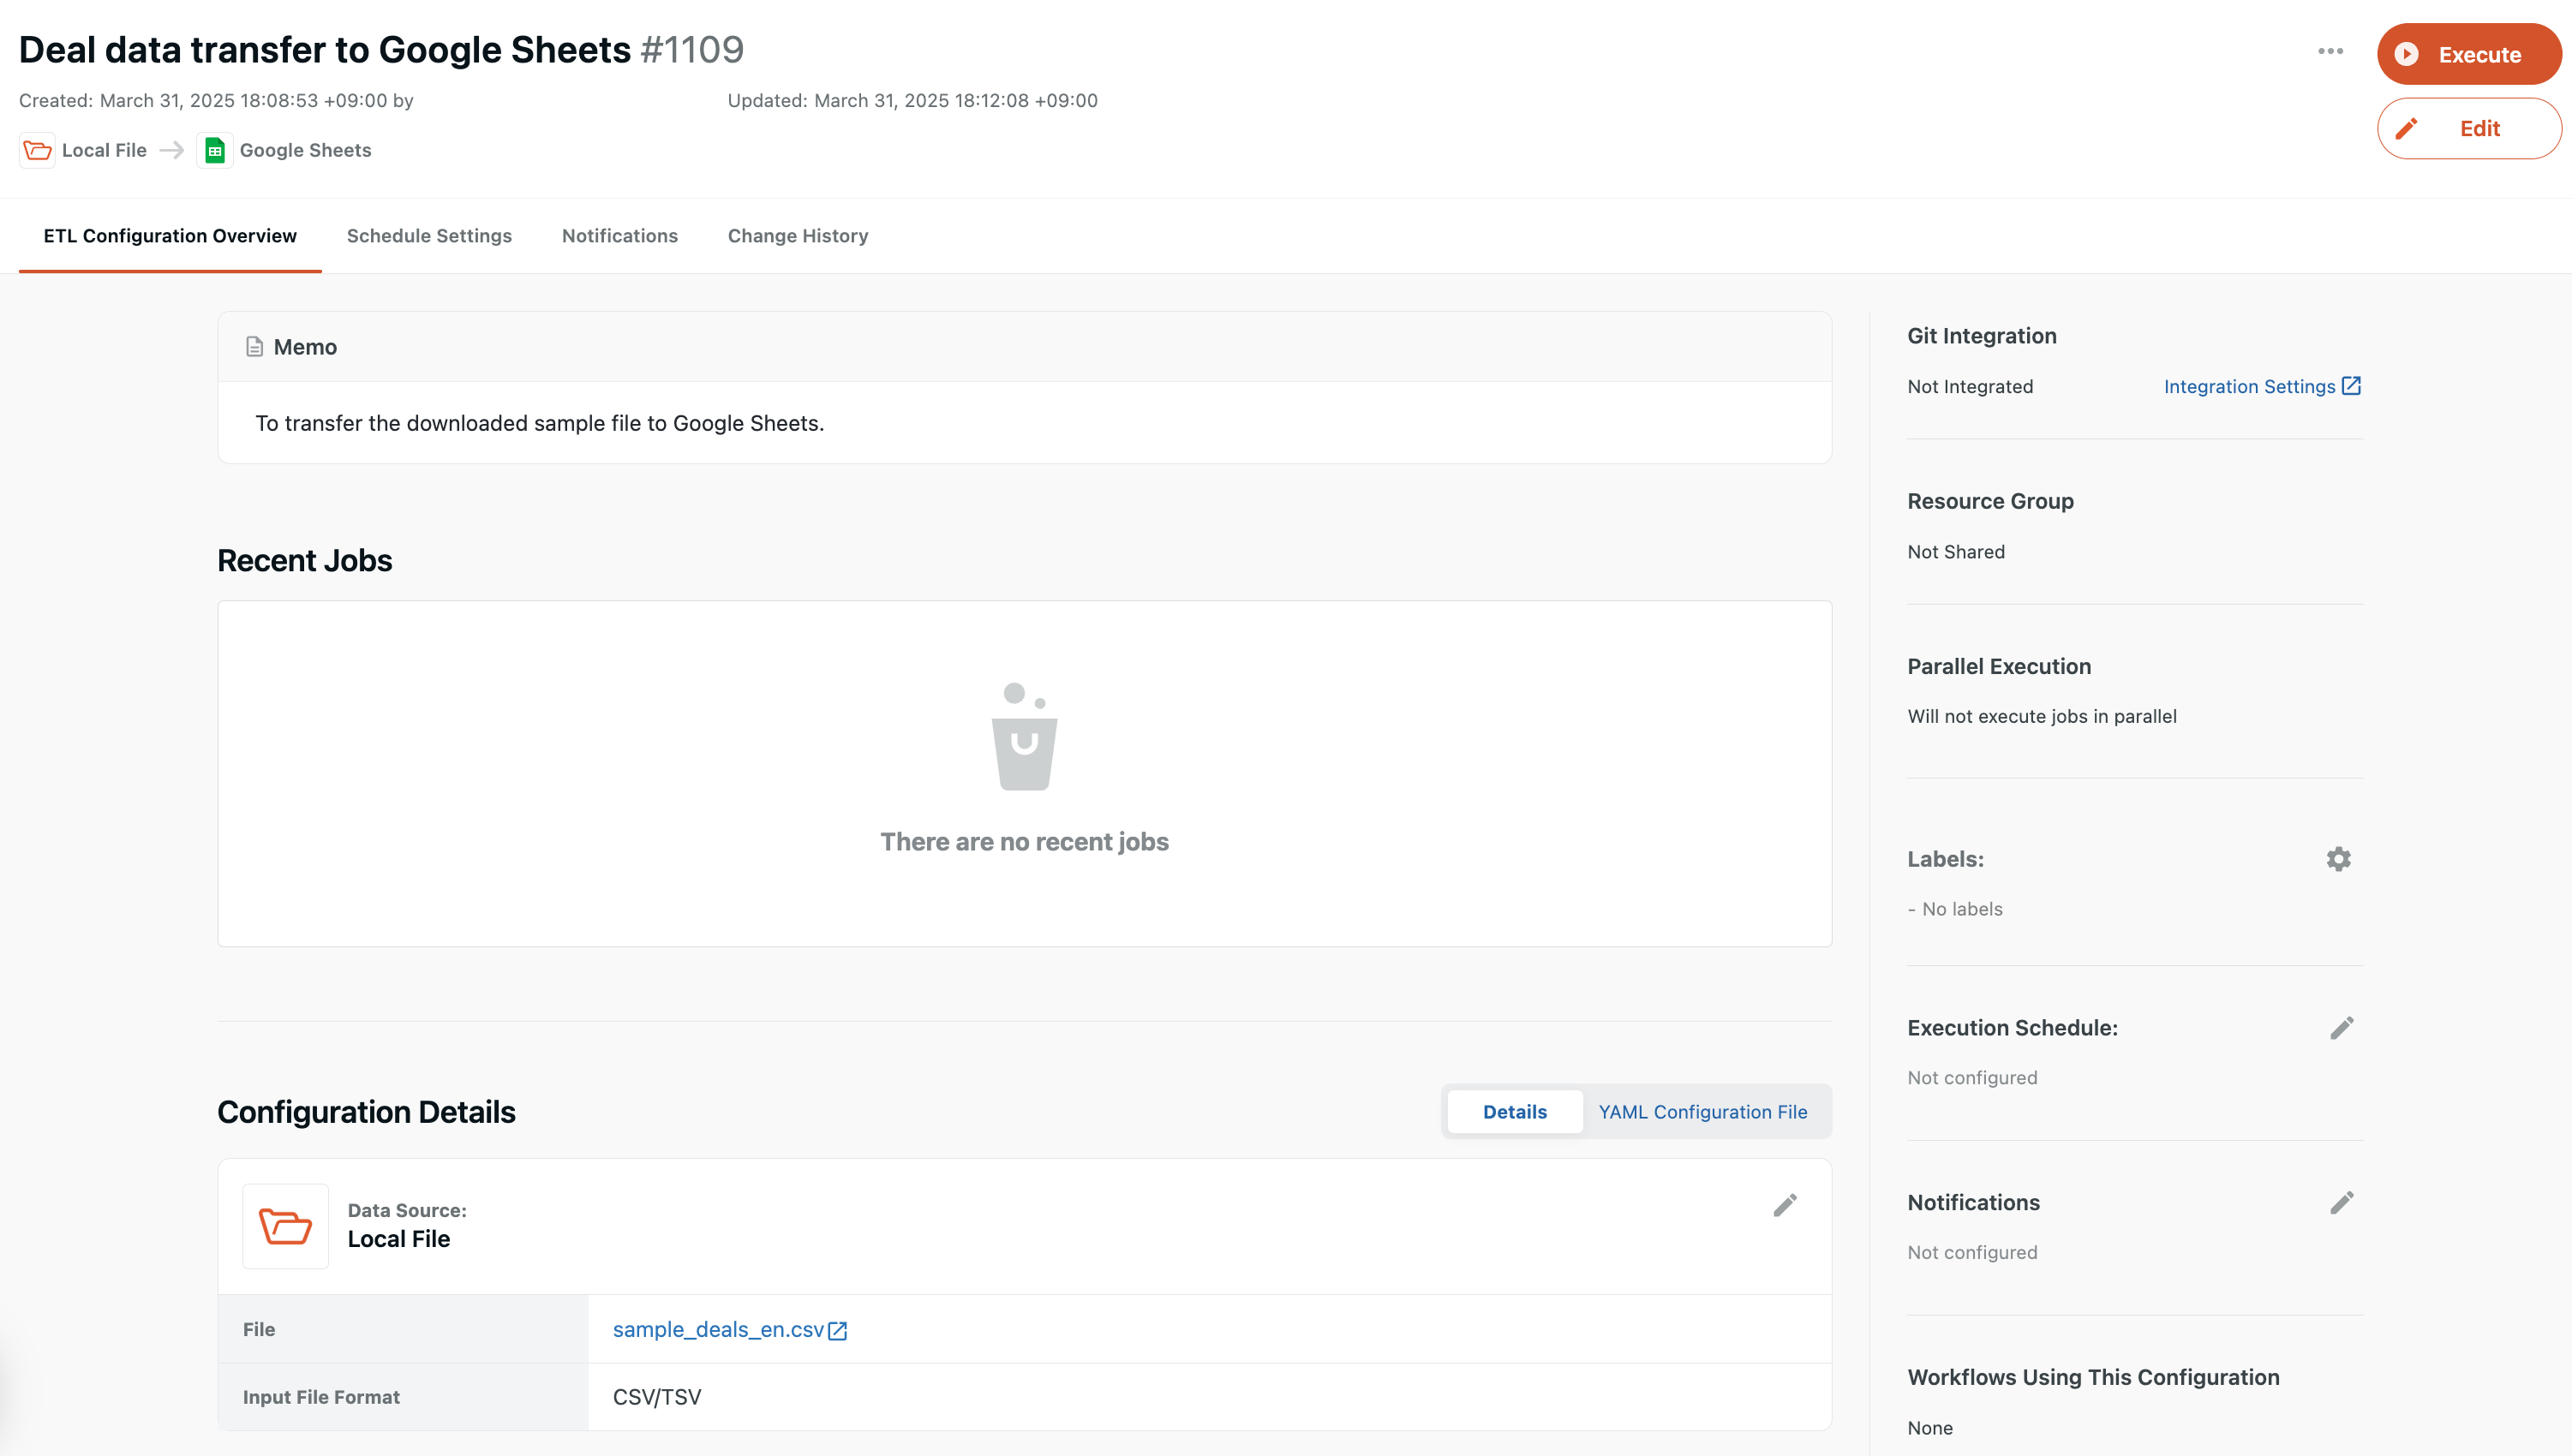
This completes the creation of the ETL Configuration. Next, run the job to actually transfer the data.
-
Click "Execute" in the upper right corner to actually try the transfer.
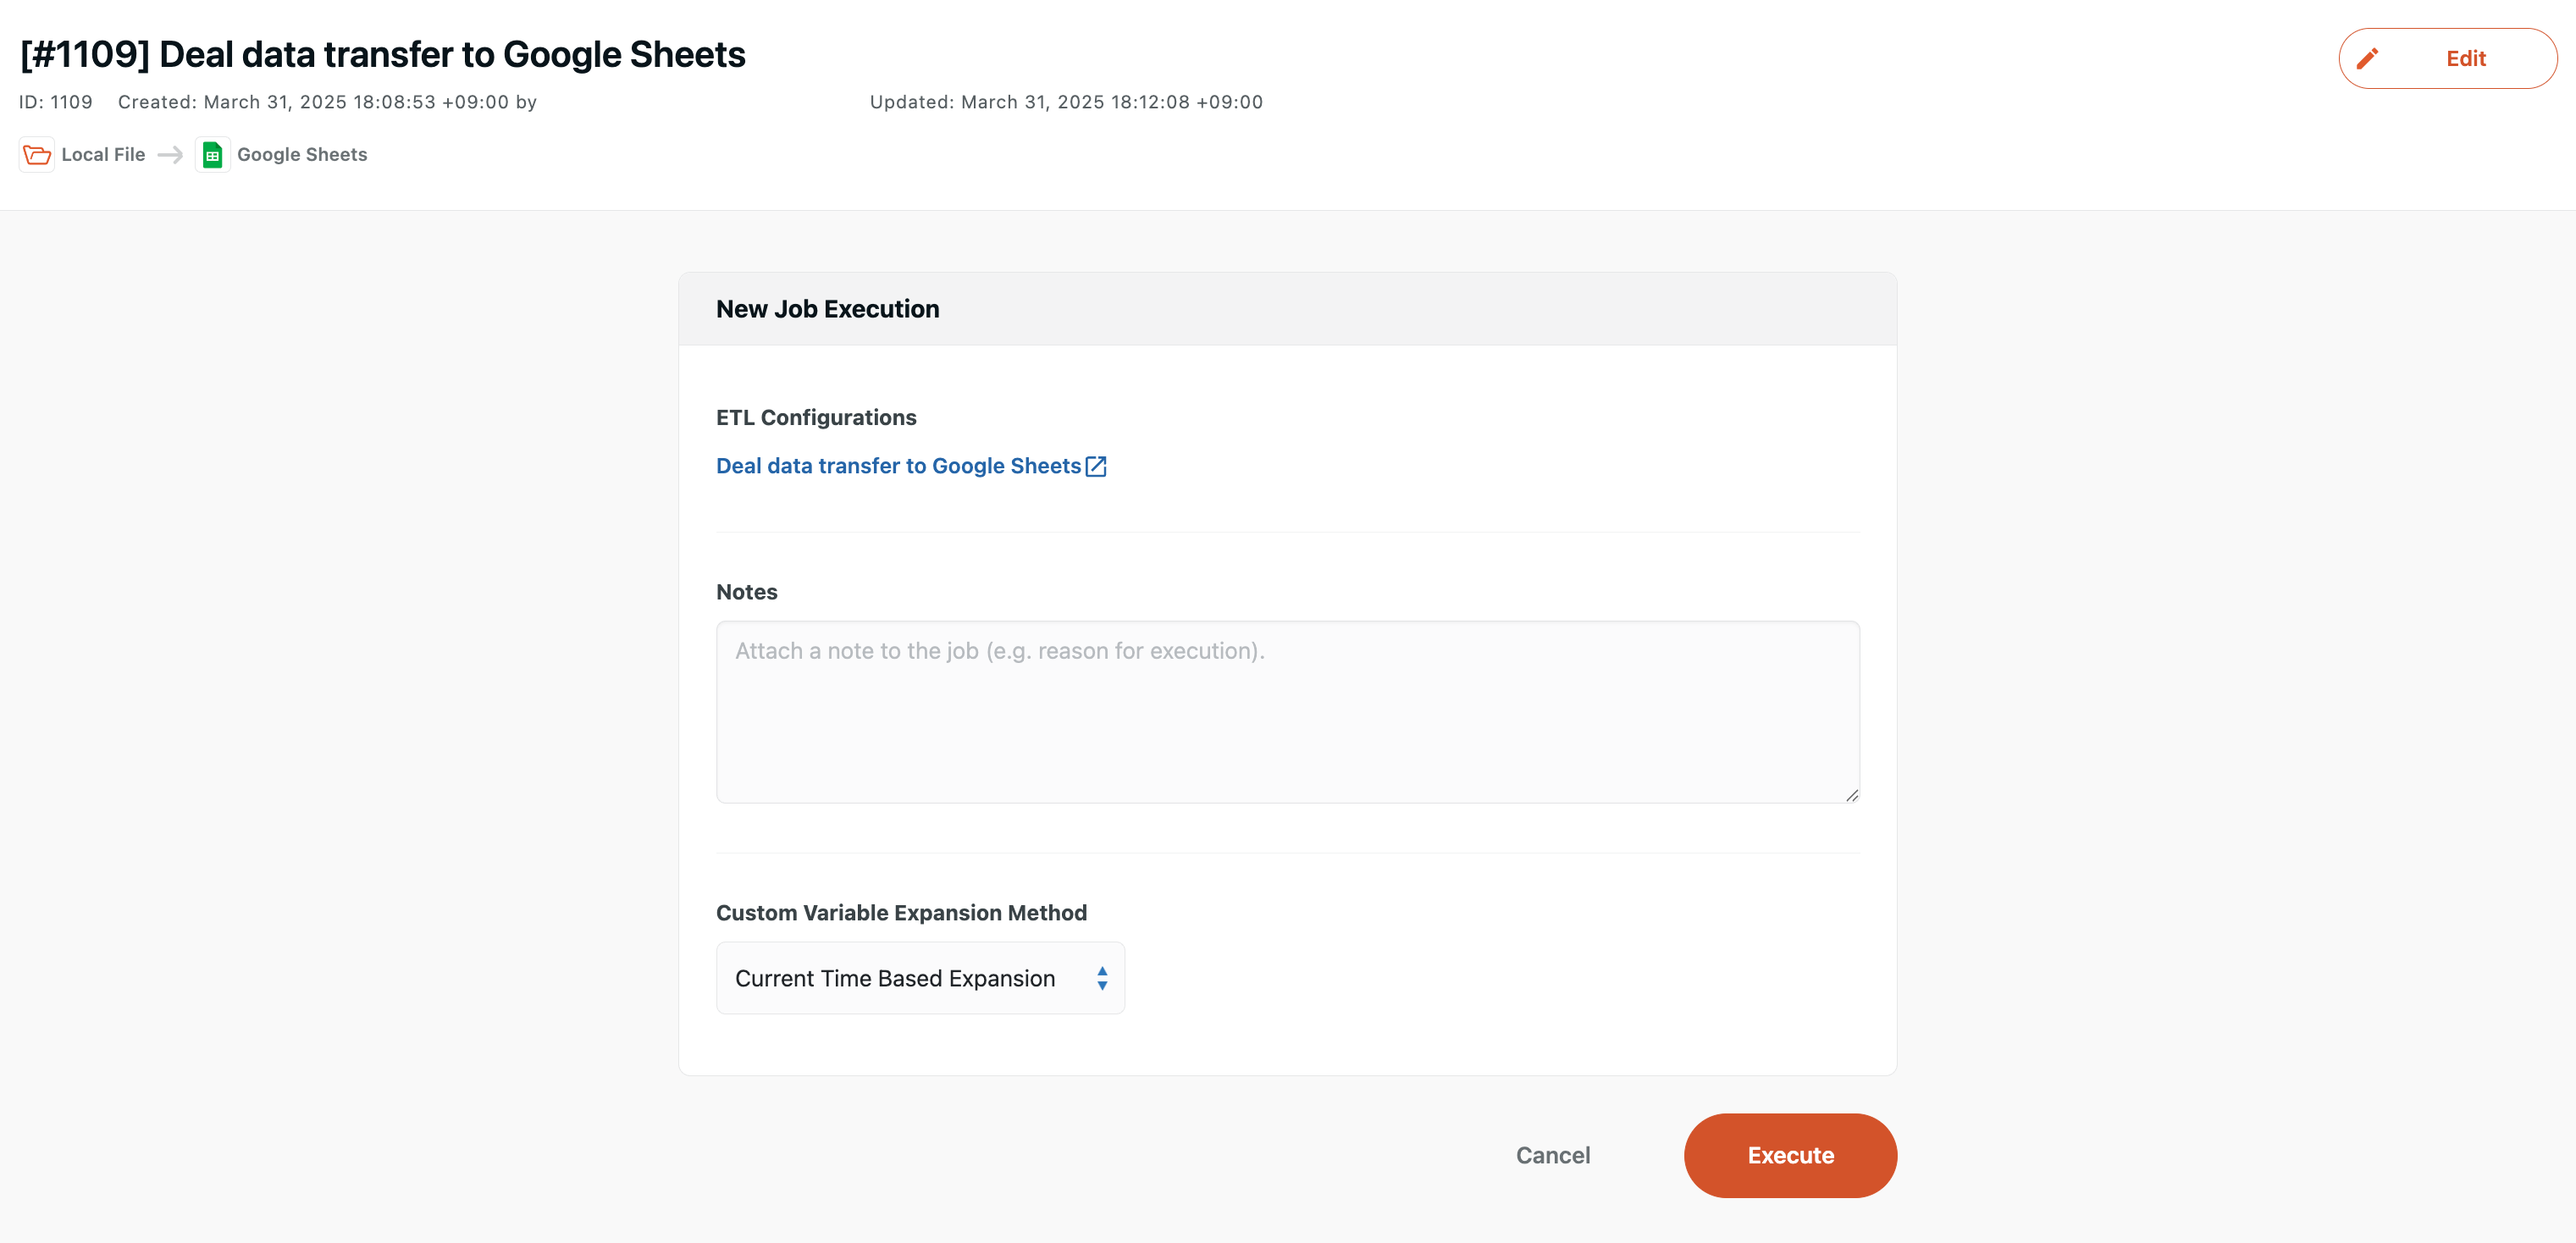
-
Click "Execute".
-
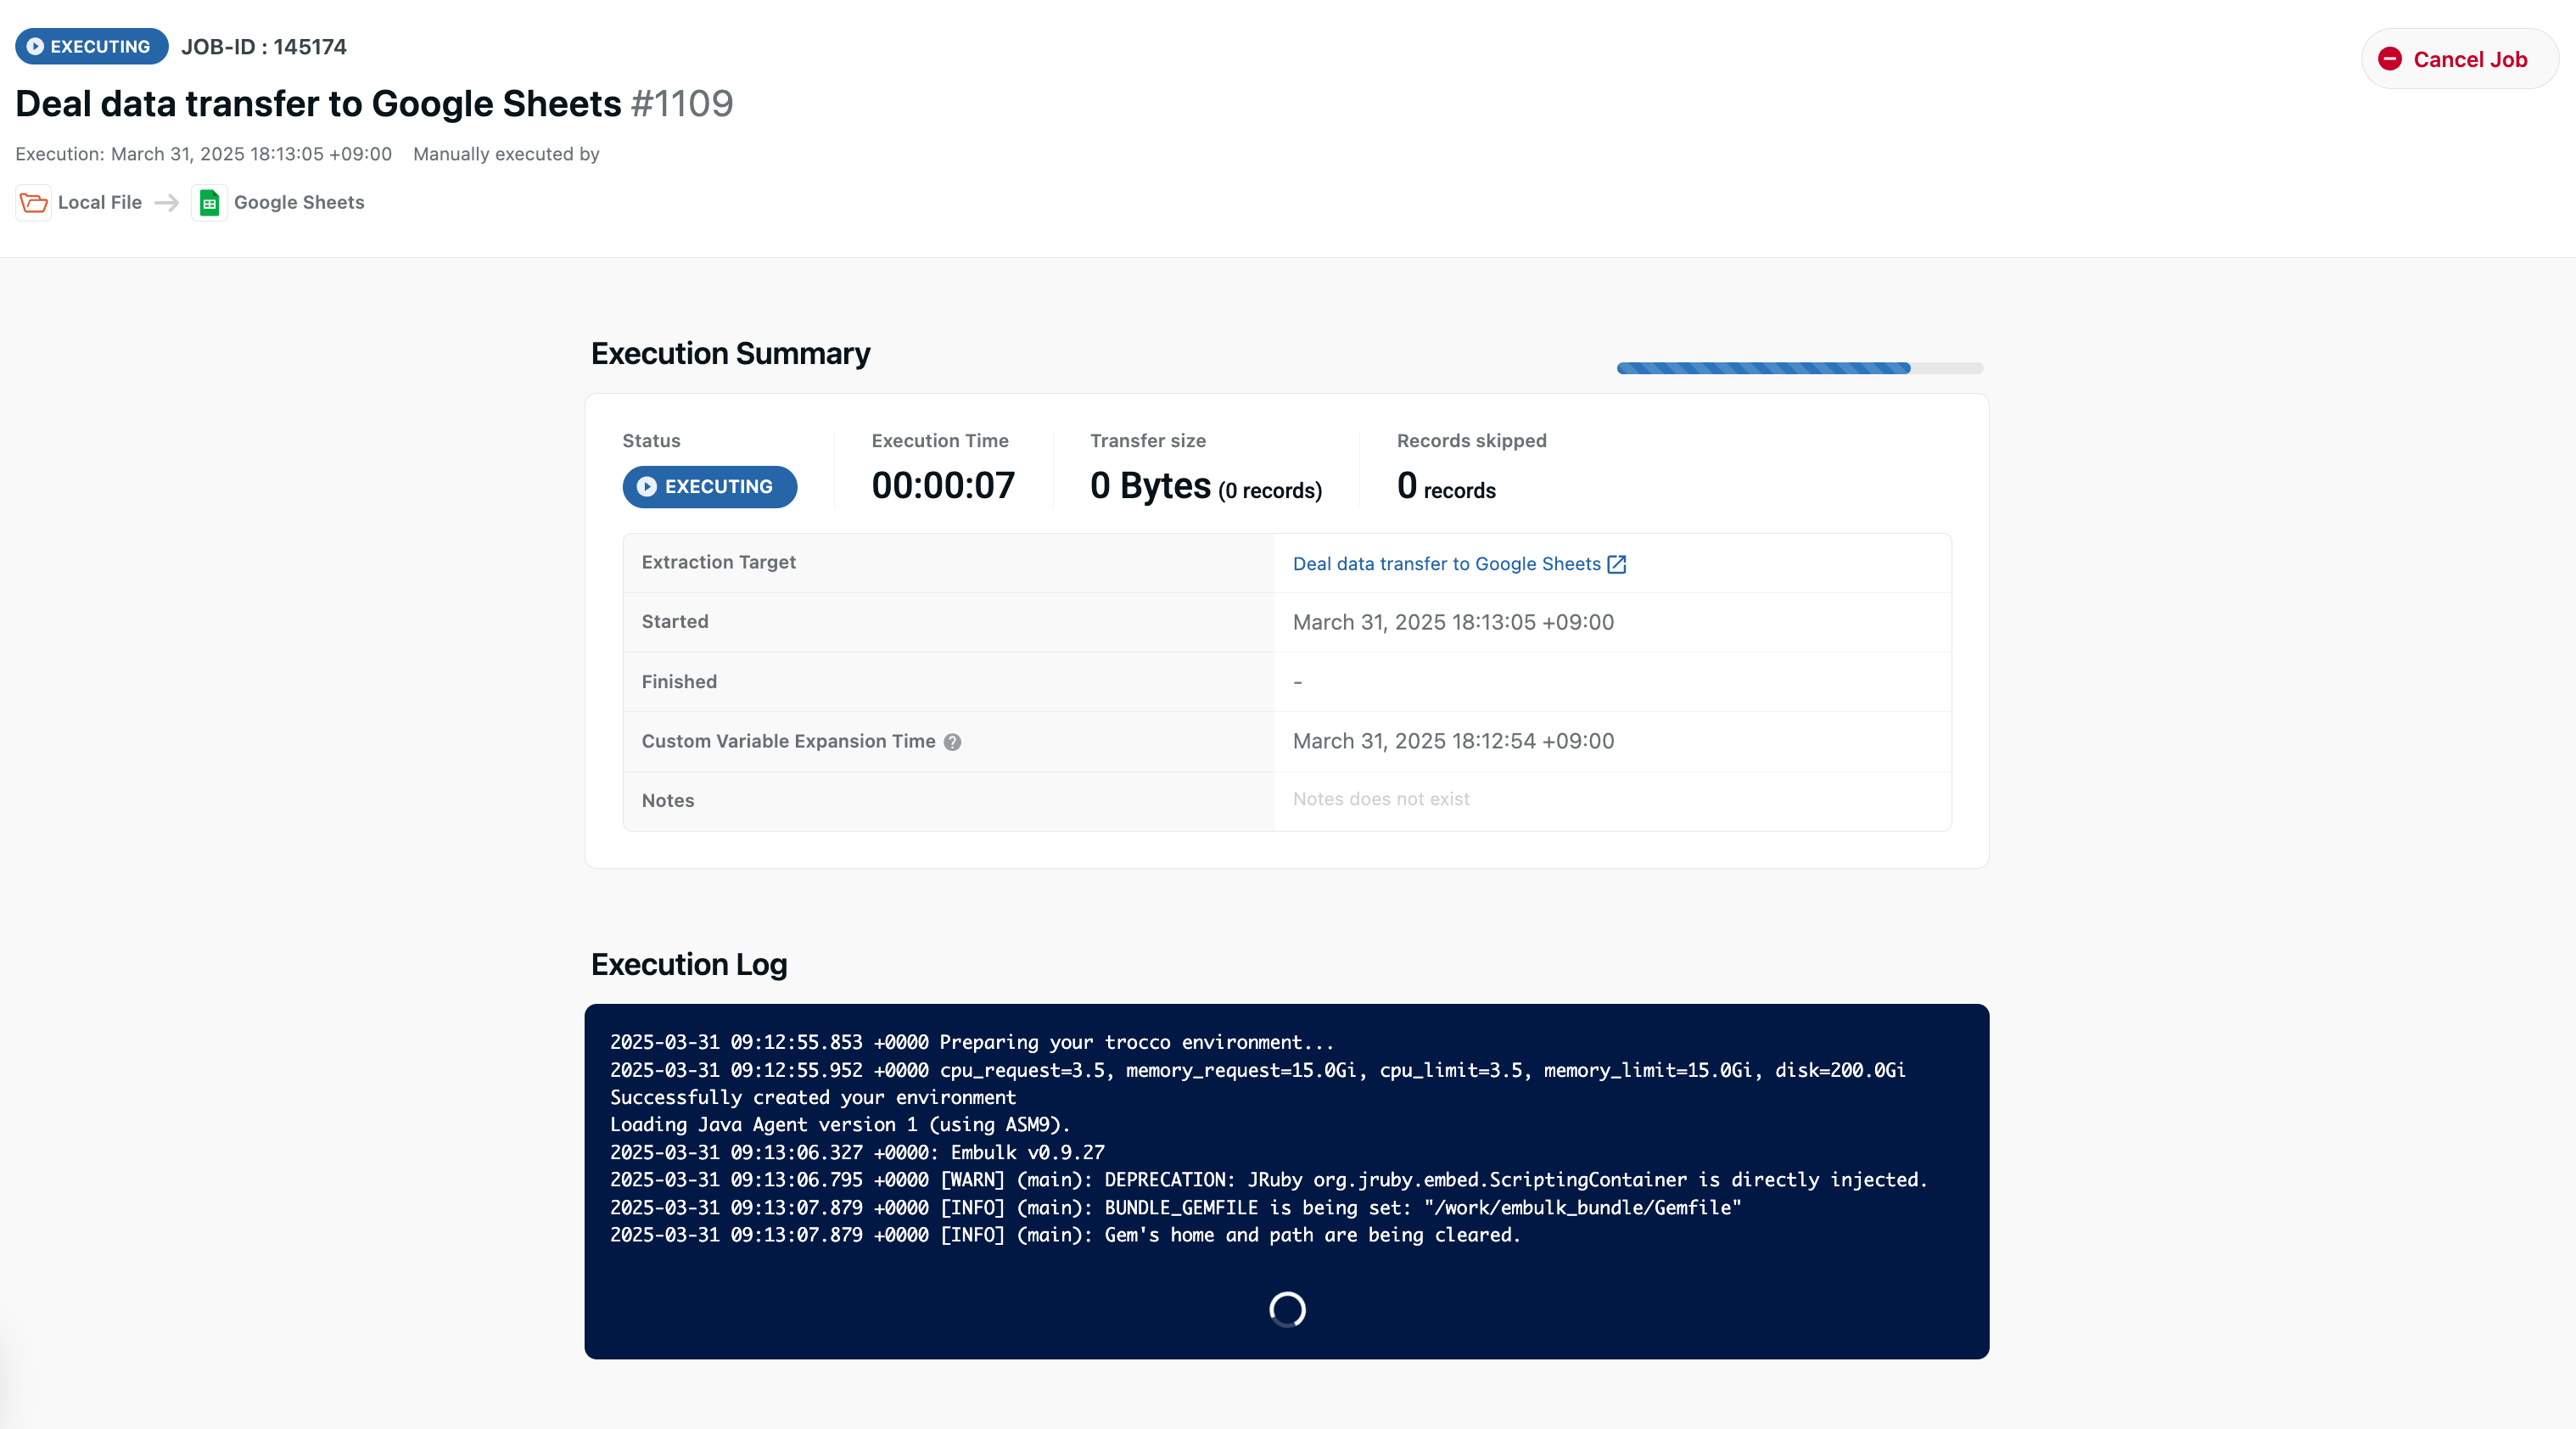
The transfer job will start running.
-
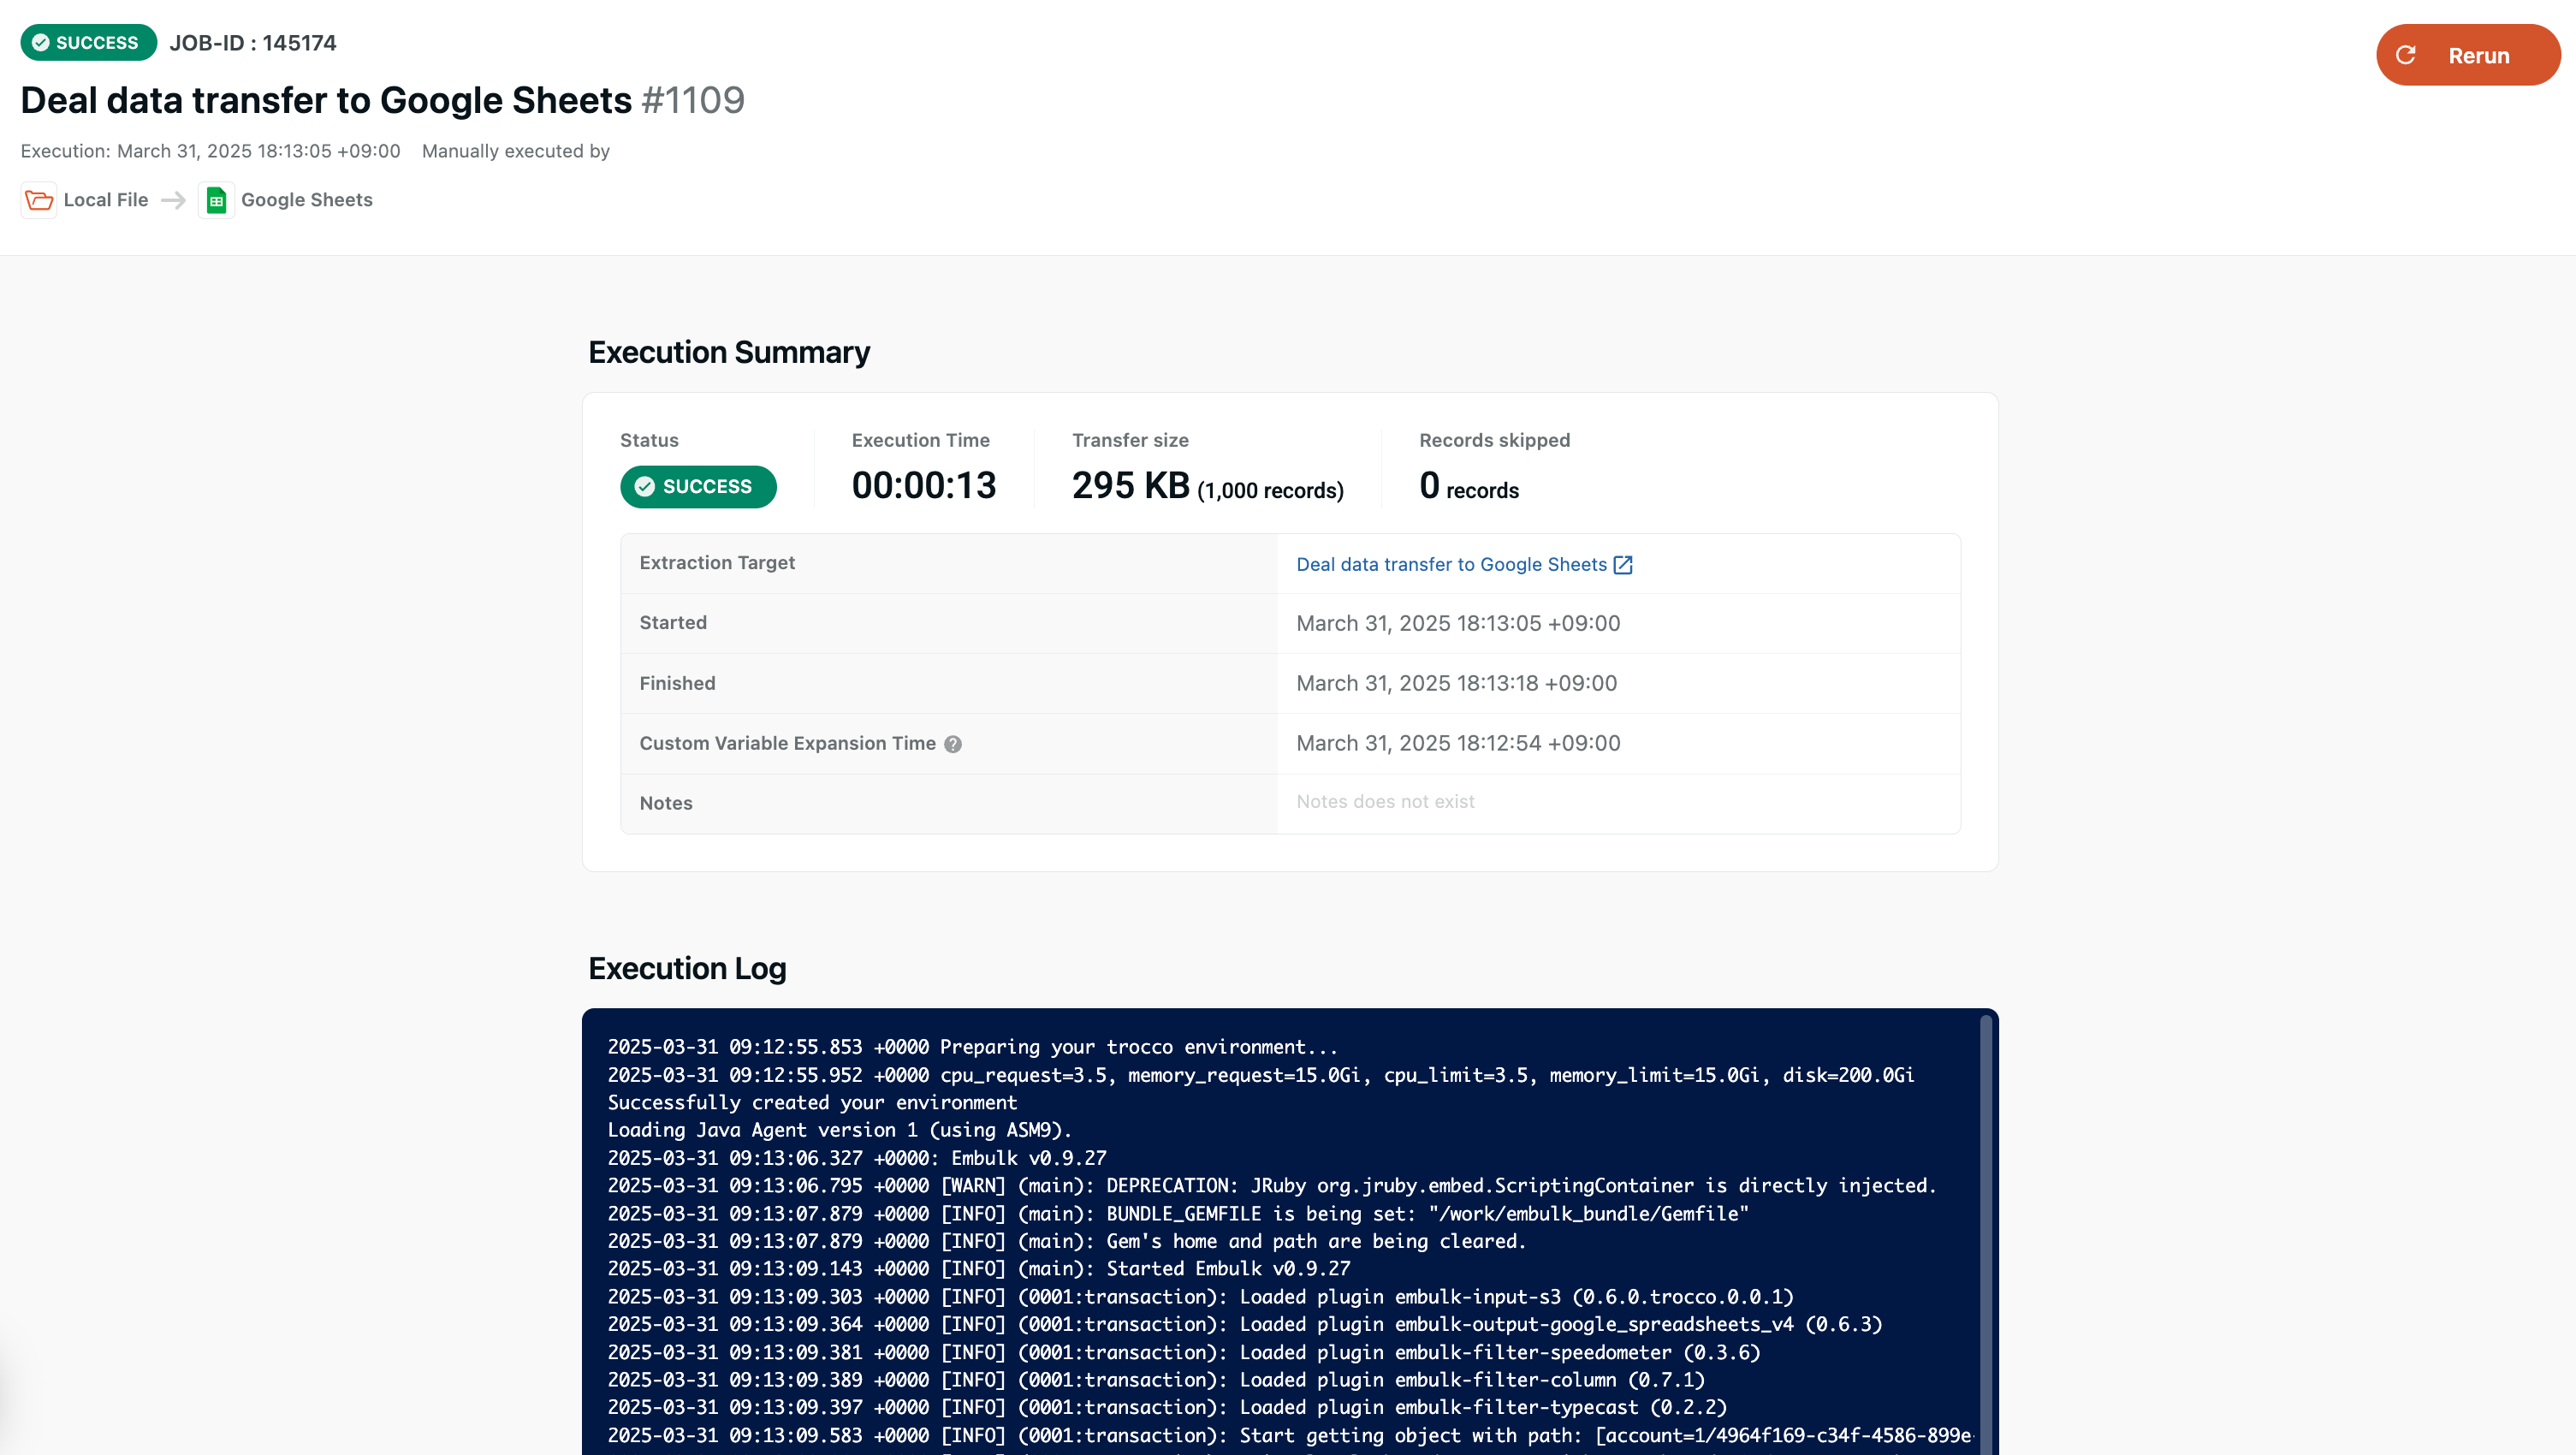
When the transfer is completed successfully, the status will be "SUCCESS".
-
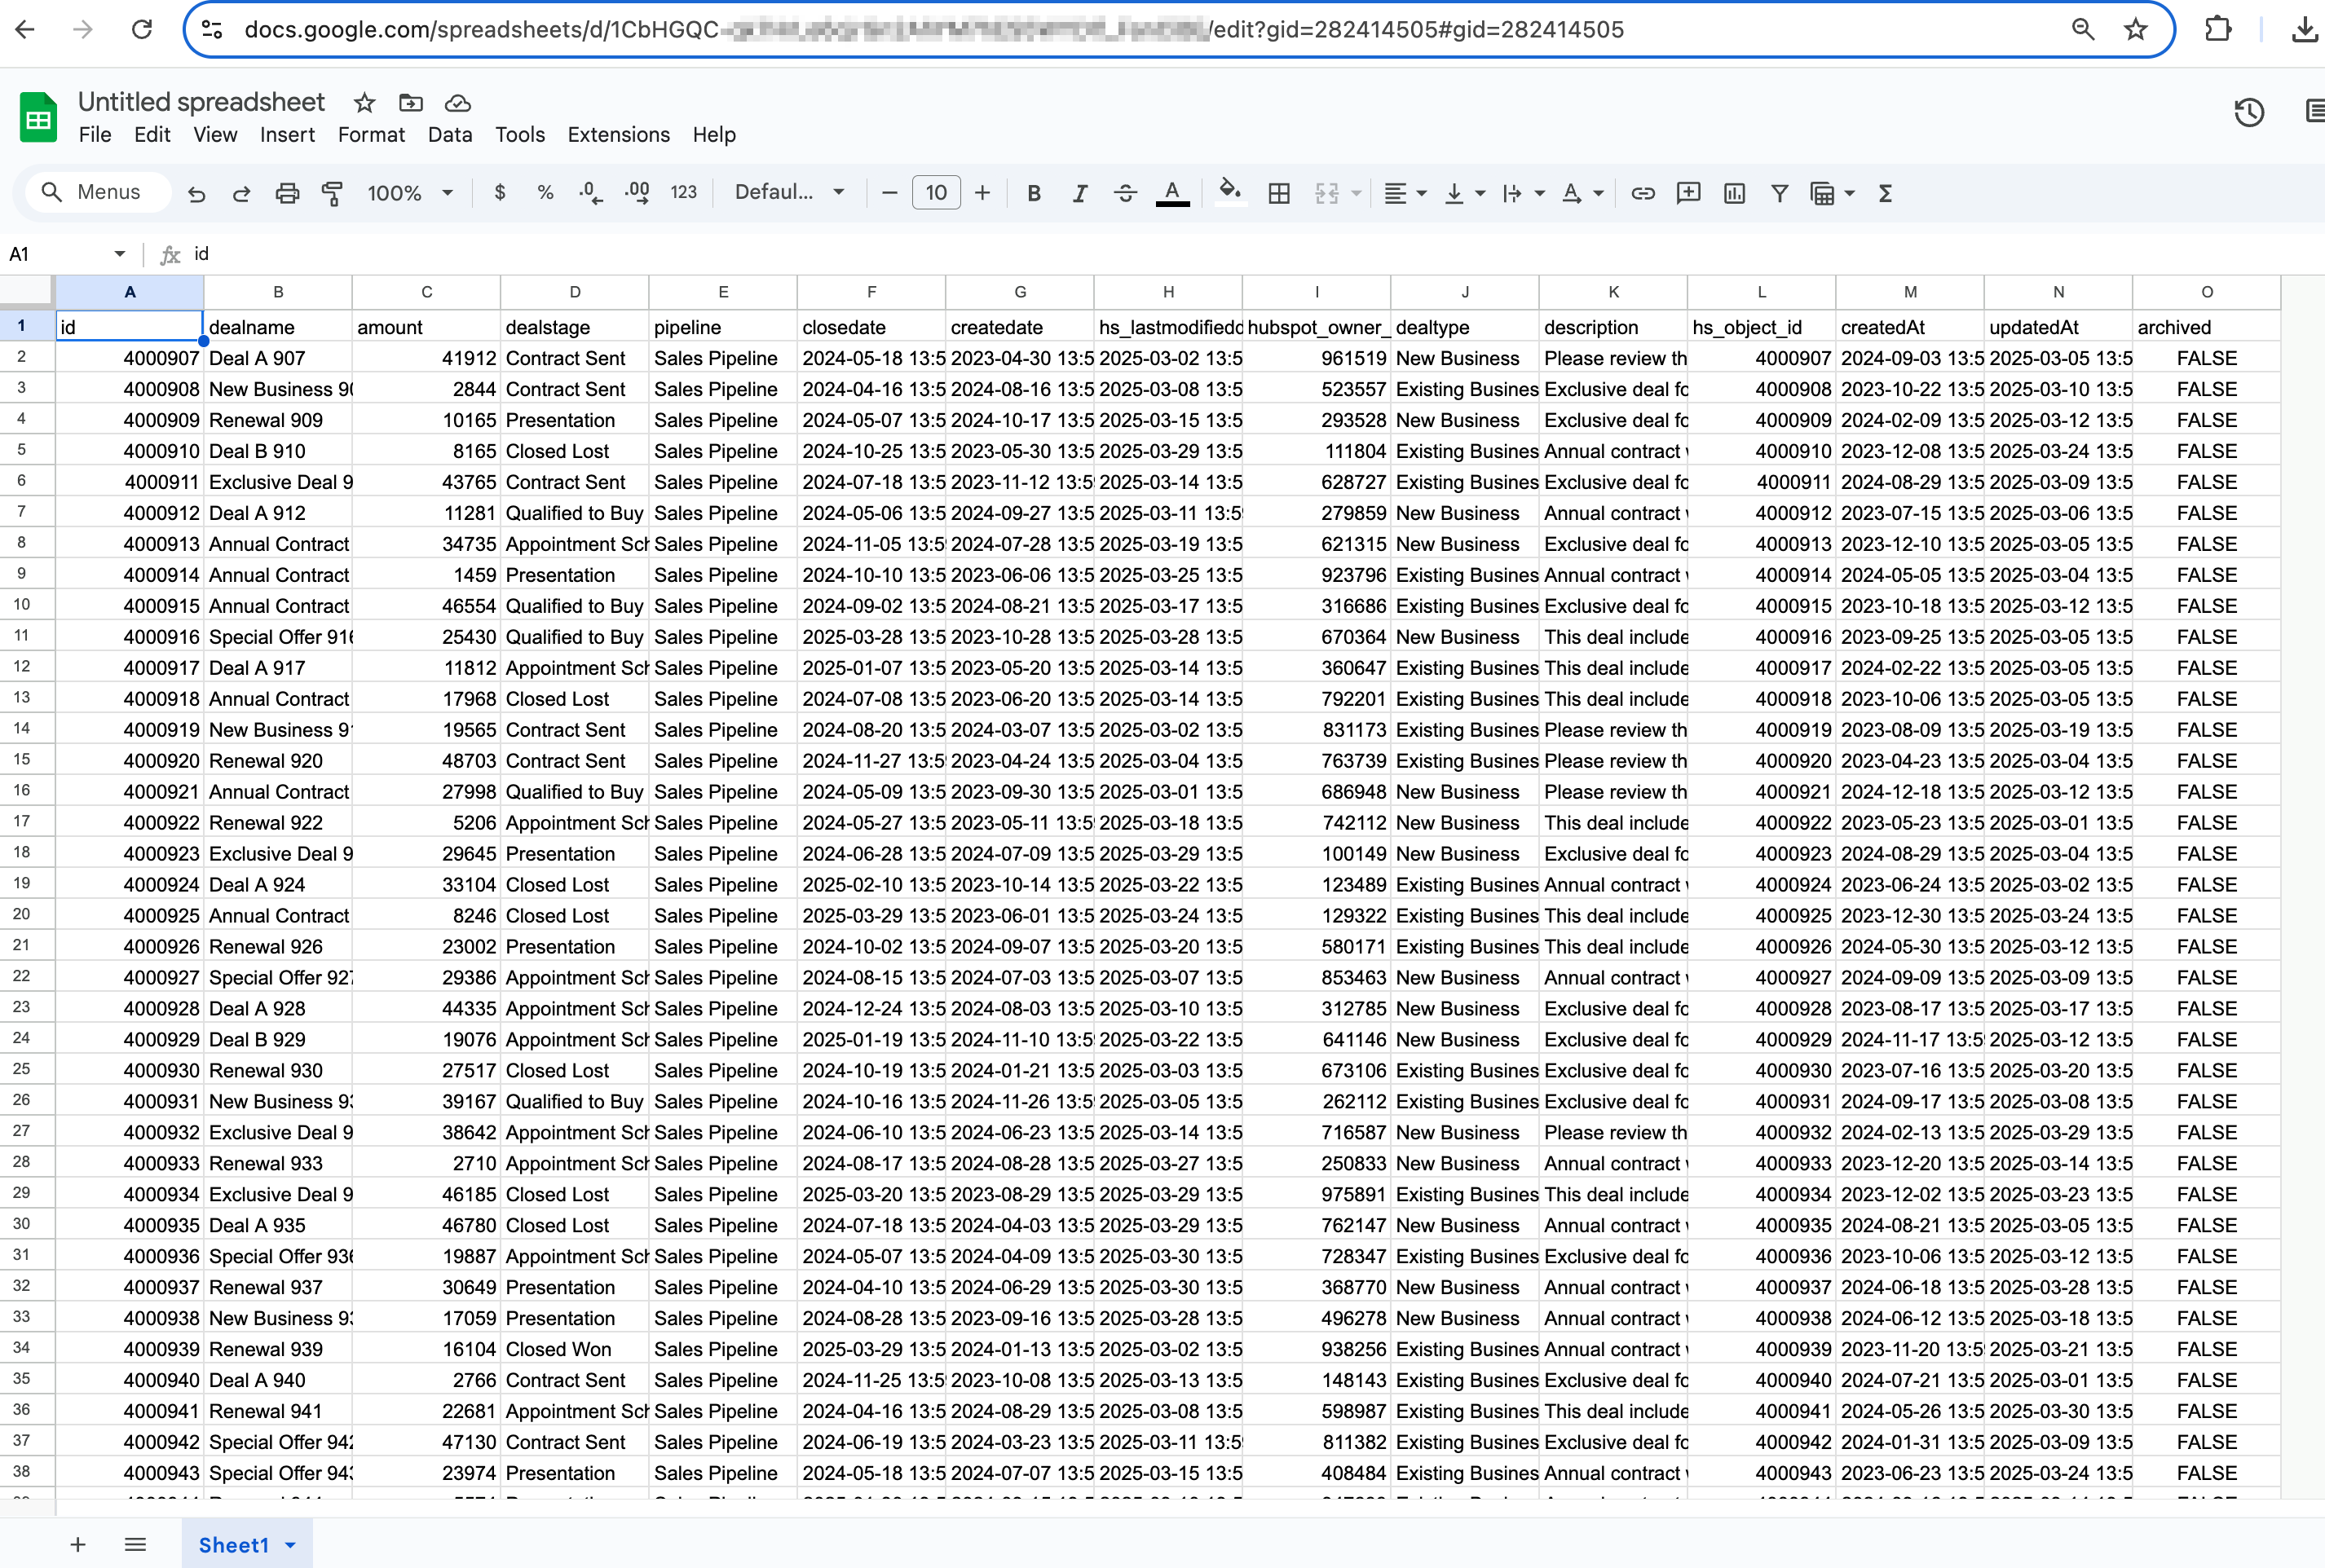
The sample data has been transferred to the destination sheet.
Do you now have an idea of what you can achieve with ETL configurations?
This time, we transferred sales activity data to Google Sheets.
By using TROCCO, you can also transfer your customer data registered in a CRM service and analyze customer behavior after sales activities using Google Sheets.