Specify source and destination
- Print
- PDF
Specify source and destination
- Print
- PDF
Article summary
Did you find this summary helpful?
Thank you for your feedback
summary
This page explains how to specify the source and destination in creating transfer settings.
Designation of source and destination
Click Create New Transfer Setting on the top screen
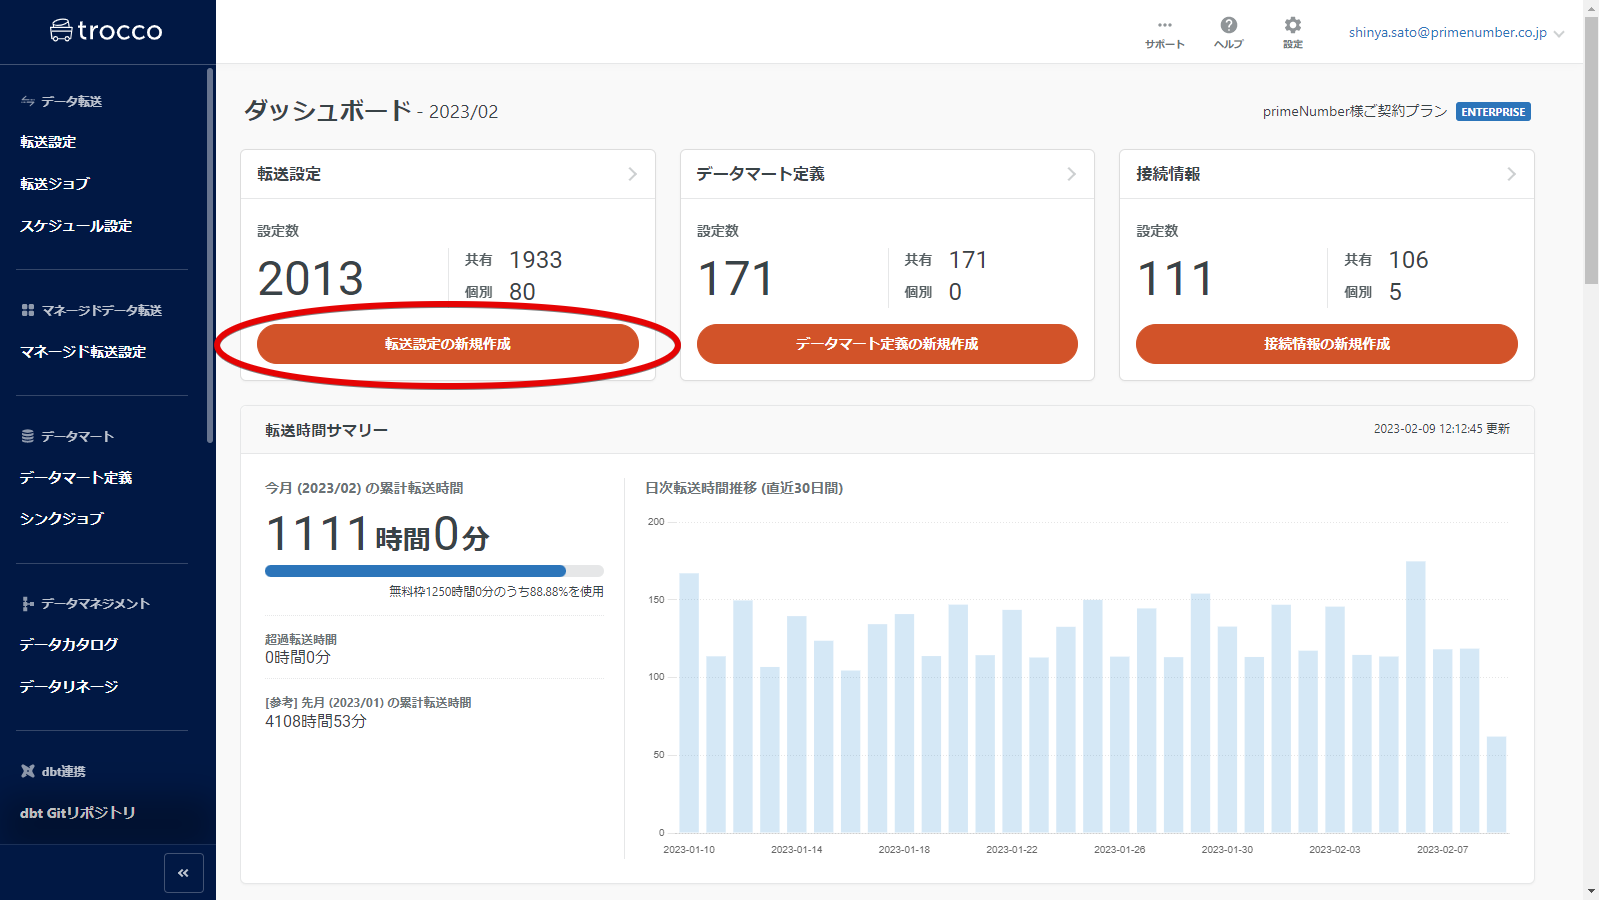
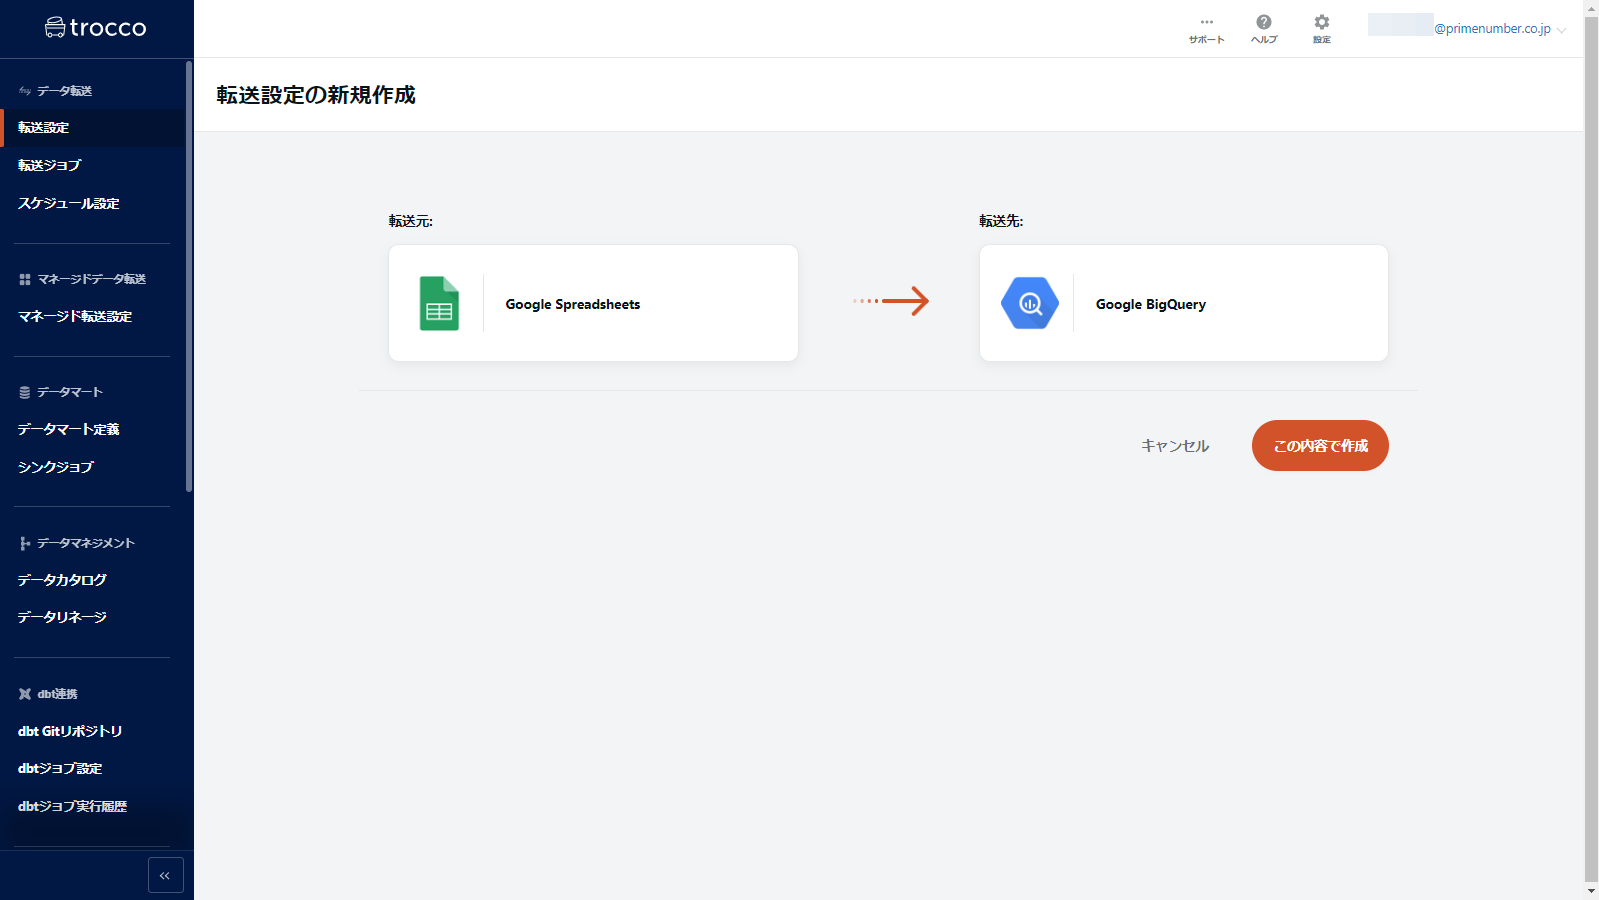
The Create New Forwarding Configuration screen will appear.
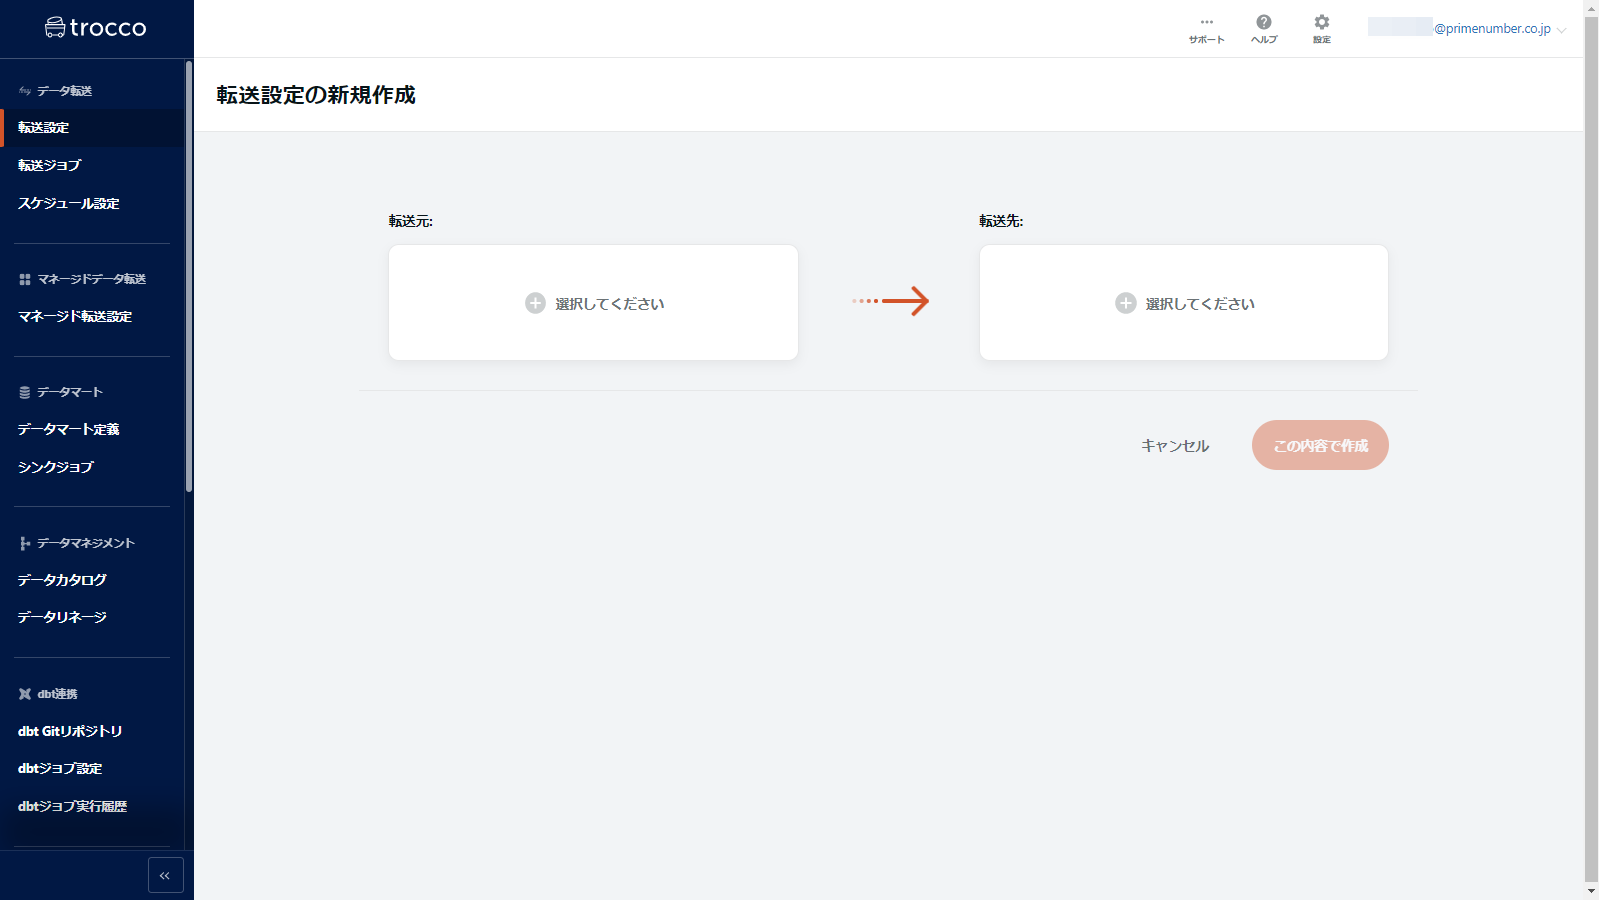
Specify the source and destination, then click Create with this information.
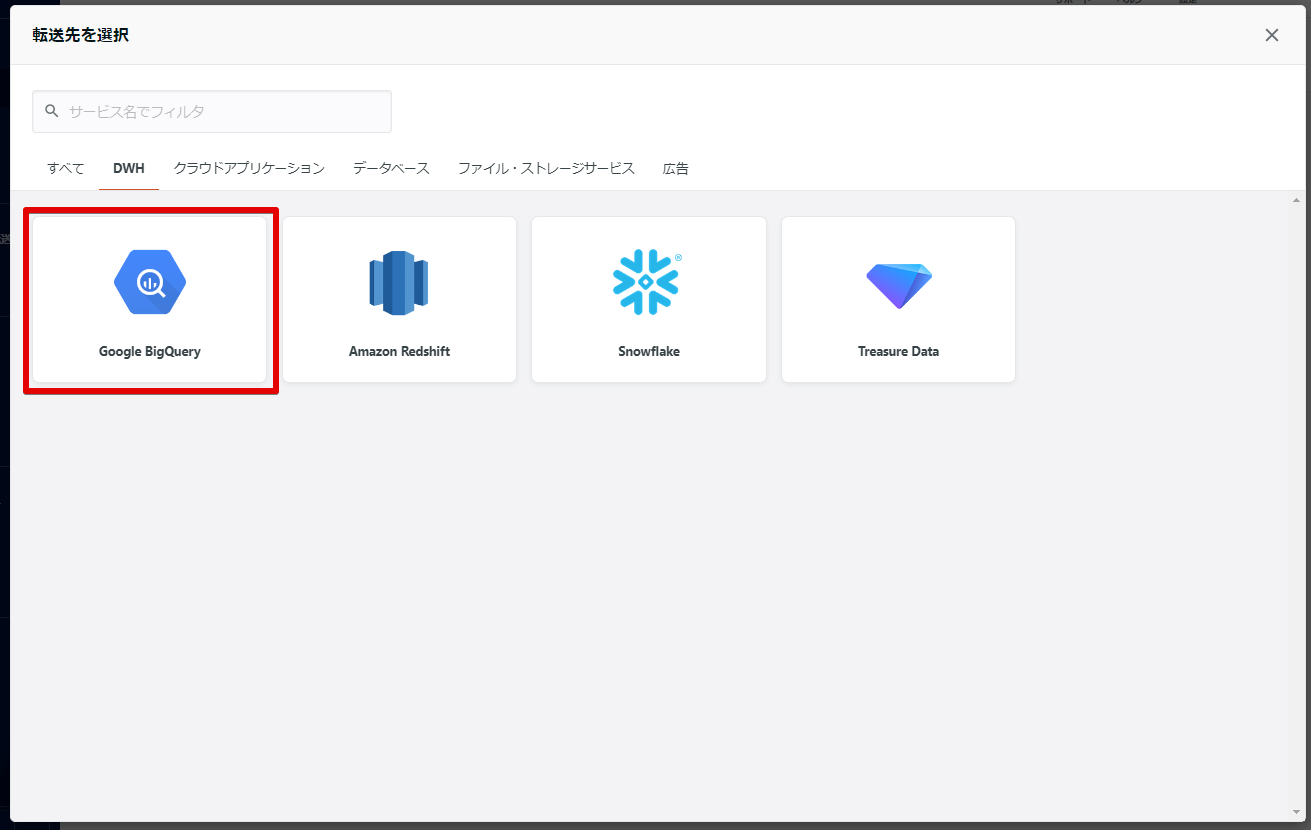
In this case, as an example, we specify Google Spreadsheets as the source and Google BigQuery as the destination.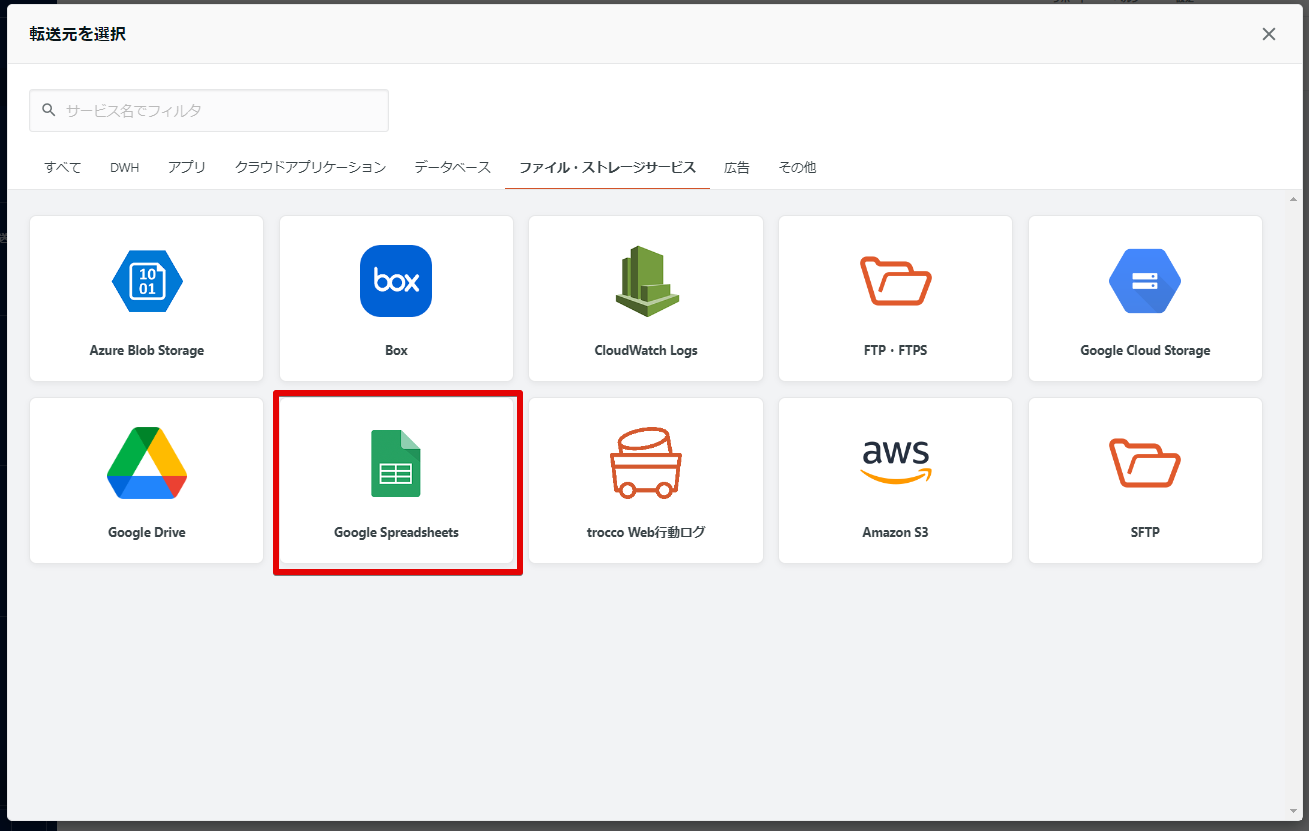


Next Steps
Was this article helpful?