summary
Help Page for ETL Configuration of Getting Facebook Lead Ads and Data Setting.
constraints
- Transfers may fail due to access token expiration or other causes. Please re-authenticate with the help of Facebook's Connection Configuration.
- Access tokens must be re-authenticated every 60 days.
Setting items
STEP1 Basic settings
| item name | indispensable | default value | Contents |
|---|---|---|---|
| Facebook Connection Configuration | Yes | - | Select the previously registered Connection Configuration that has the necessary permissions for this ETL Configuration. |
| form ID | Yes | - | Specify the form ID to retrieve lead ads. (*1) |
1 How to check Form ID
The layout of the management tool is different for each user, so please check with your own environment.
-
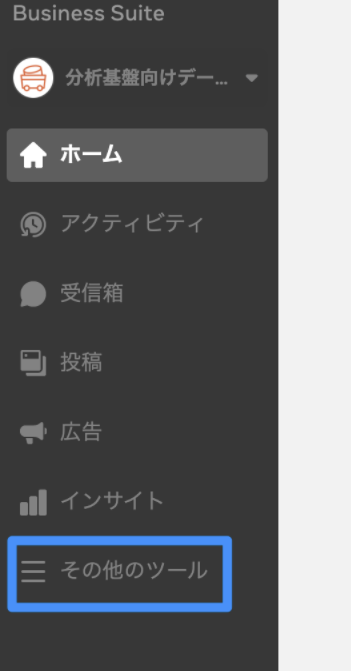
How to check from Facebook Business Suite
Go to Facebook Business Manager and select Other Tools → Instant Forms from the tabs on the left side.
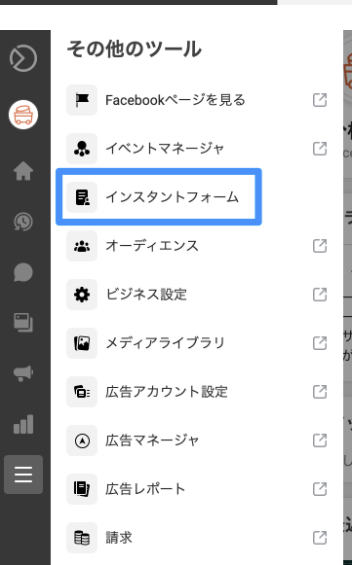
Click on the form for which you want to get a lead, and the form ID will appear on the detail screen. -
How to check from the form library
Select the page from which you want to retrieve leads from the pages you are managing.
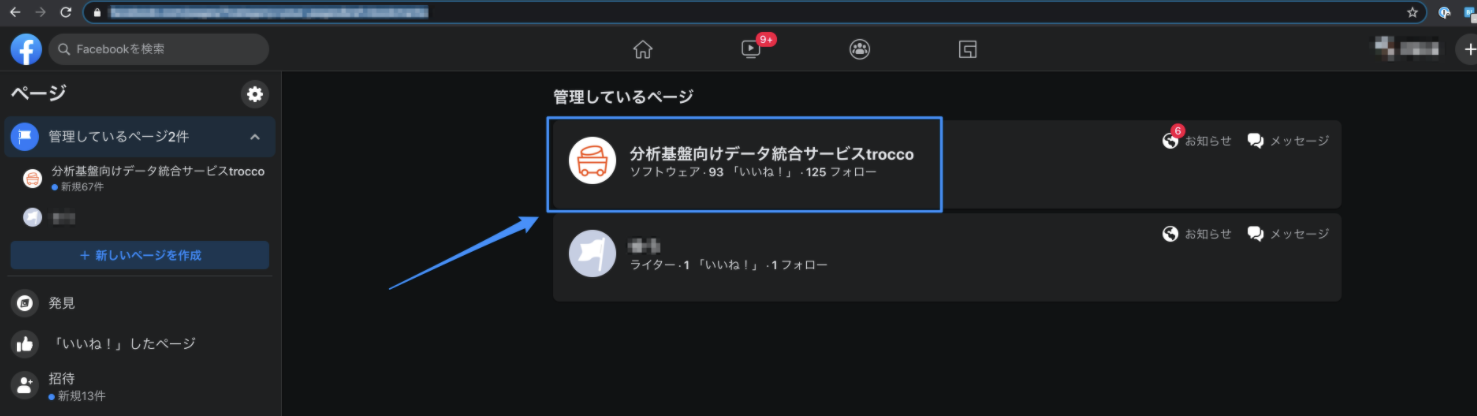
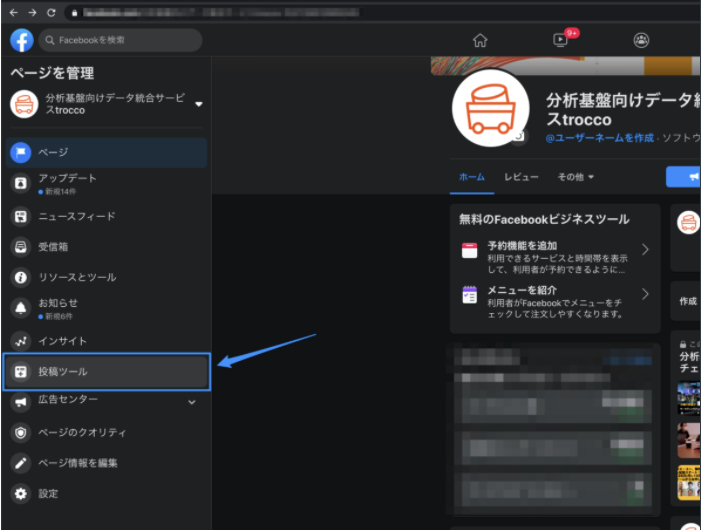
Select Posting Tools from the sidebar of the page.
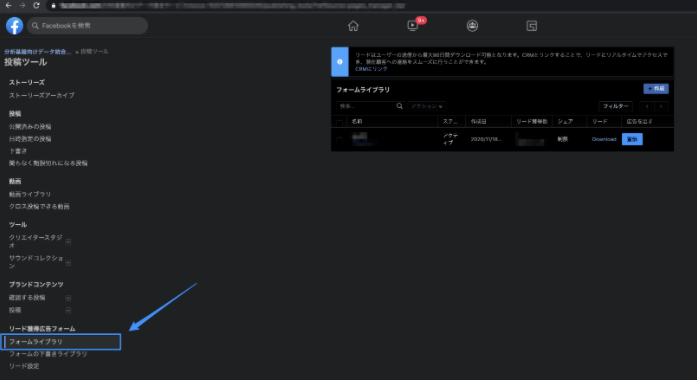
Select Form Library from the Submission Tools sidebar.
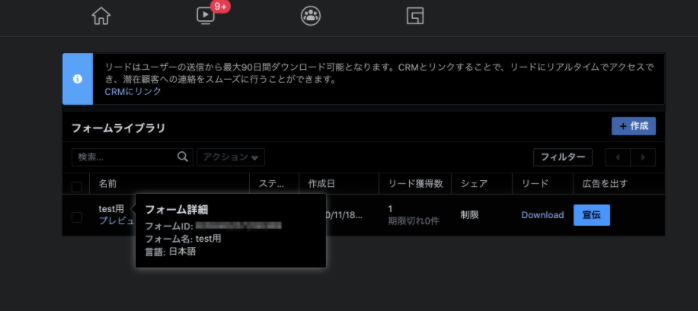
Mouse over the name of the form to see the form ID.
Granting Authority to Users
- Go to the Facebook Business Manager. Click the drop-down in the upper left corner and select Business Accounts.
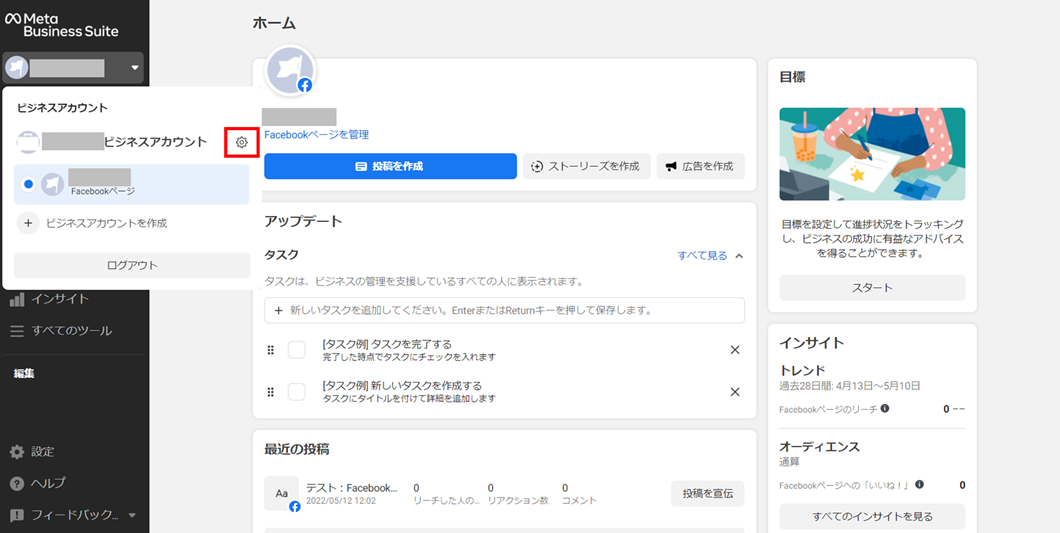
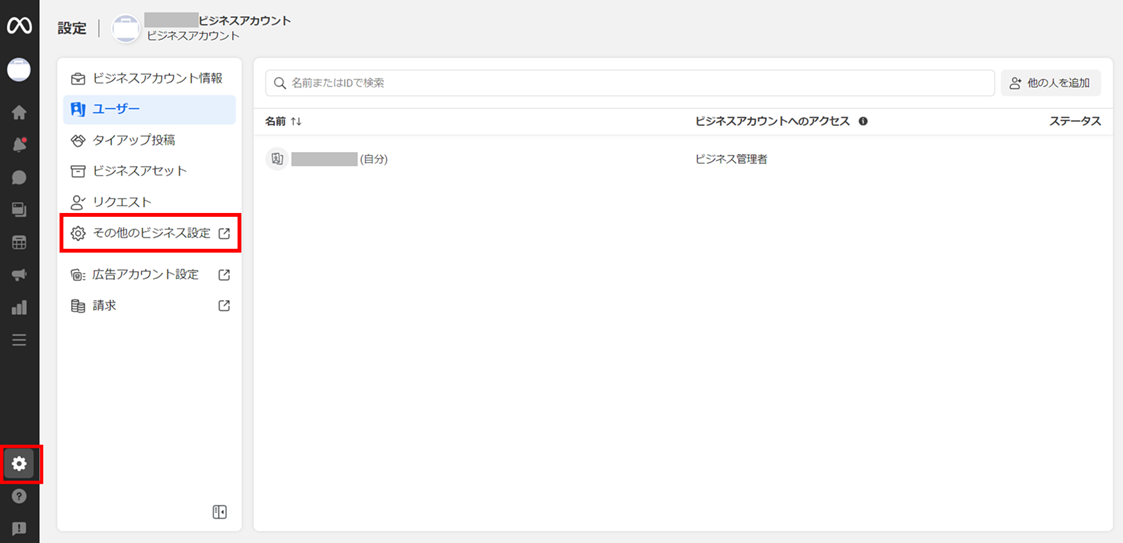
- Click on Settings in the lower left corner.
Click on Other Business Settings.
- Click on Integration in the menu on the left, then click on Lead Access.
Click Assign Users.
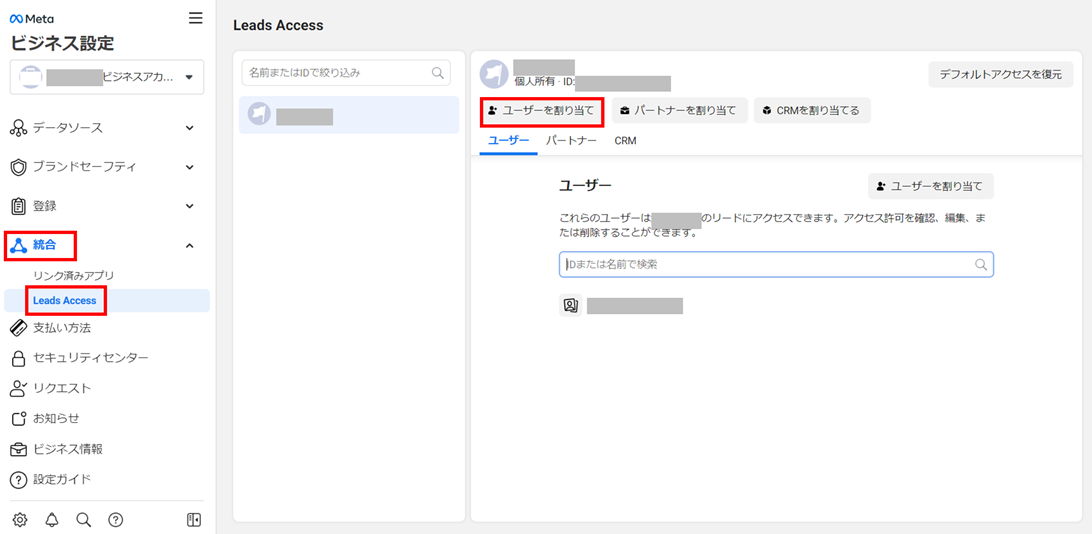
- A list of users who have been assigned permissions on the Facebook page will be displayed.
Check the circle next to the user to whom you want to assign permissions and click Assign.
Selected users will have access to the lead's information.
*For more information, please refer to the official documentation.
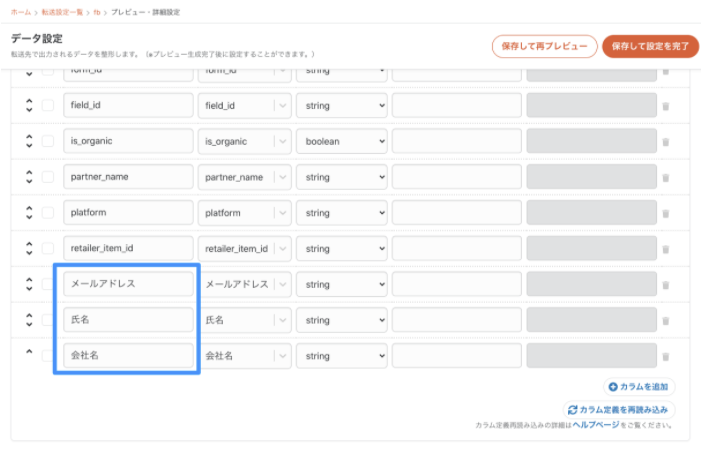
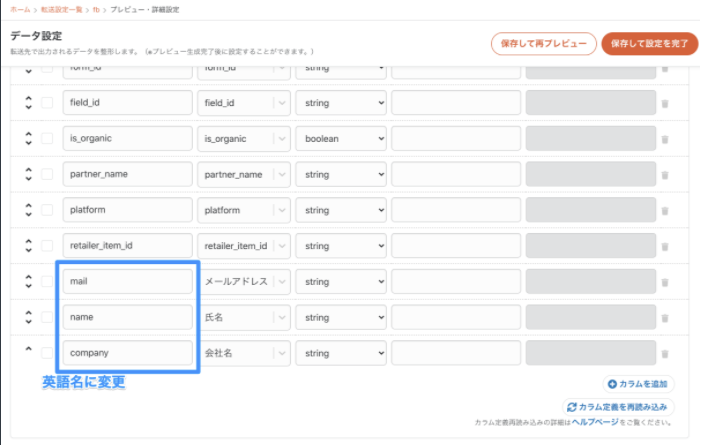
Transfer Notes
When previewing, column names may be entered in Japanese, but if you transfer the data to a data warehouse such as BigQuery as is, it will fail.
Change the column names accordingly to match the constraints of Data Destination.