Summary
Help page on inviting users.
Account administrator or higher privileges are required.
For details on how to change permissions, see User Permission Settings.
User Invitation Procedure
Users can be invited by following these steps
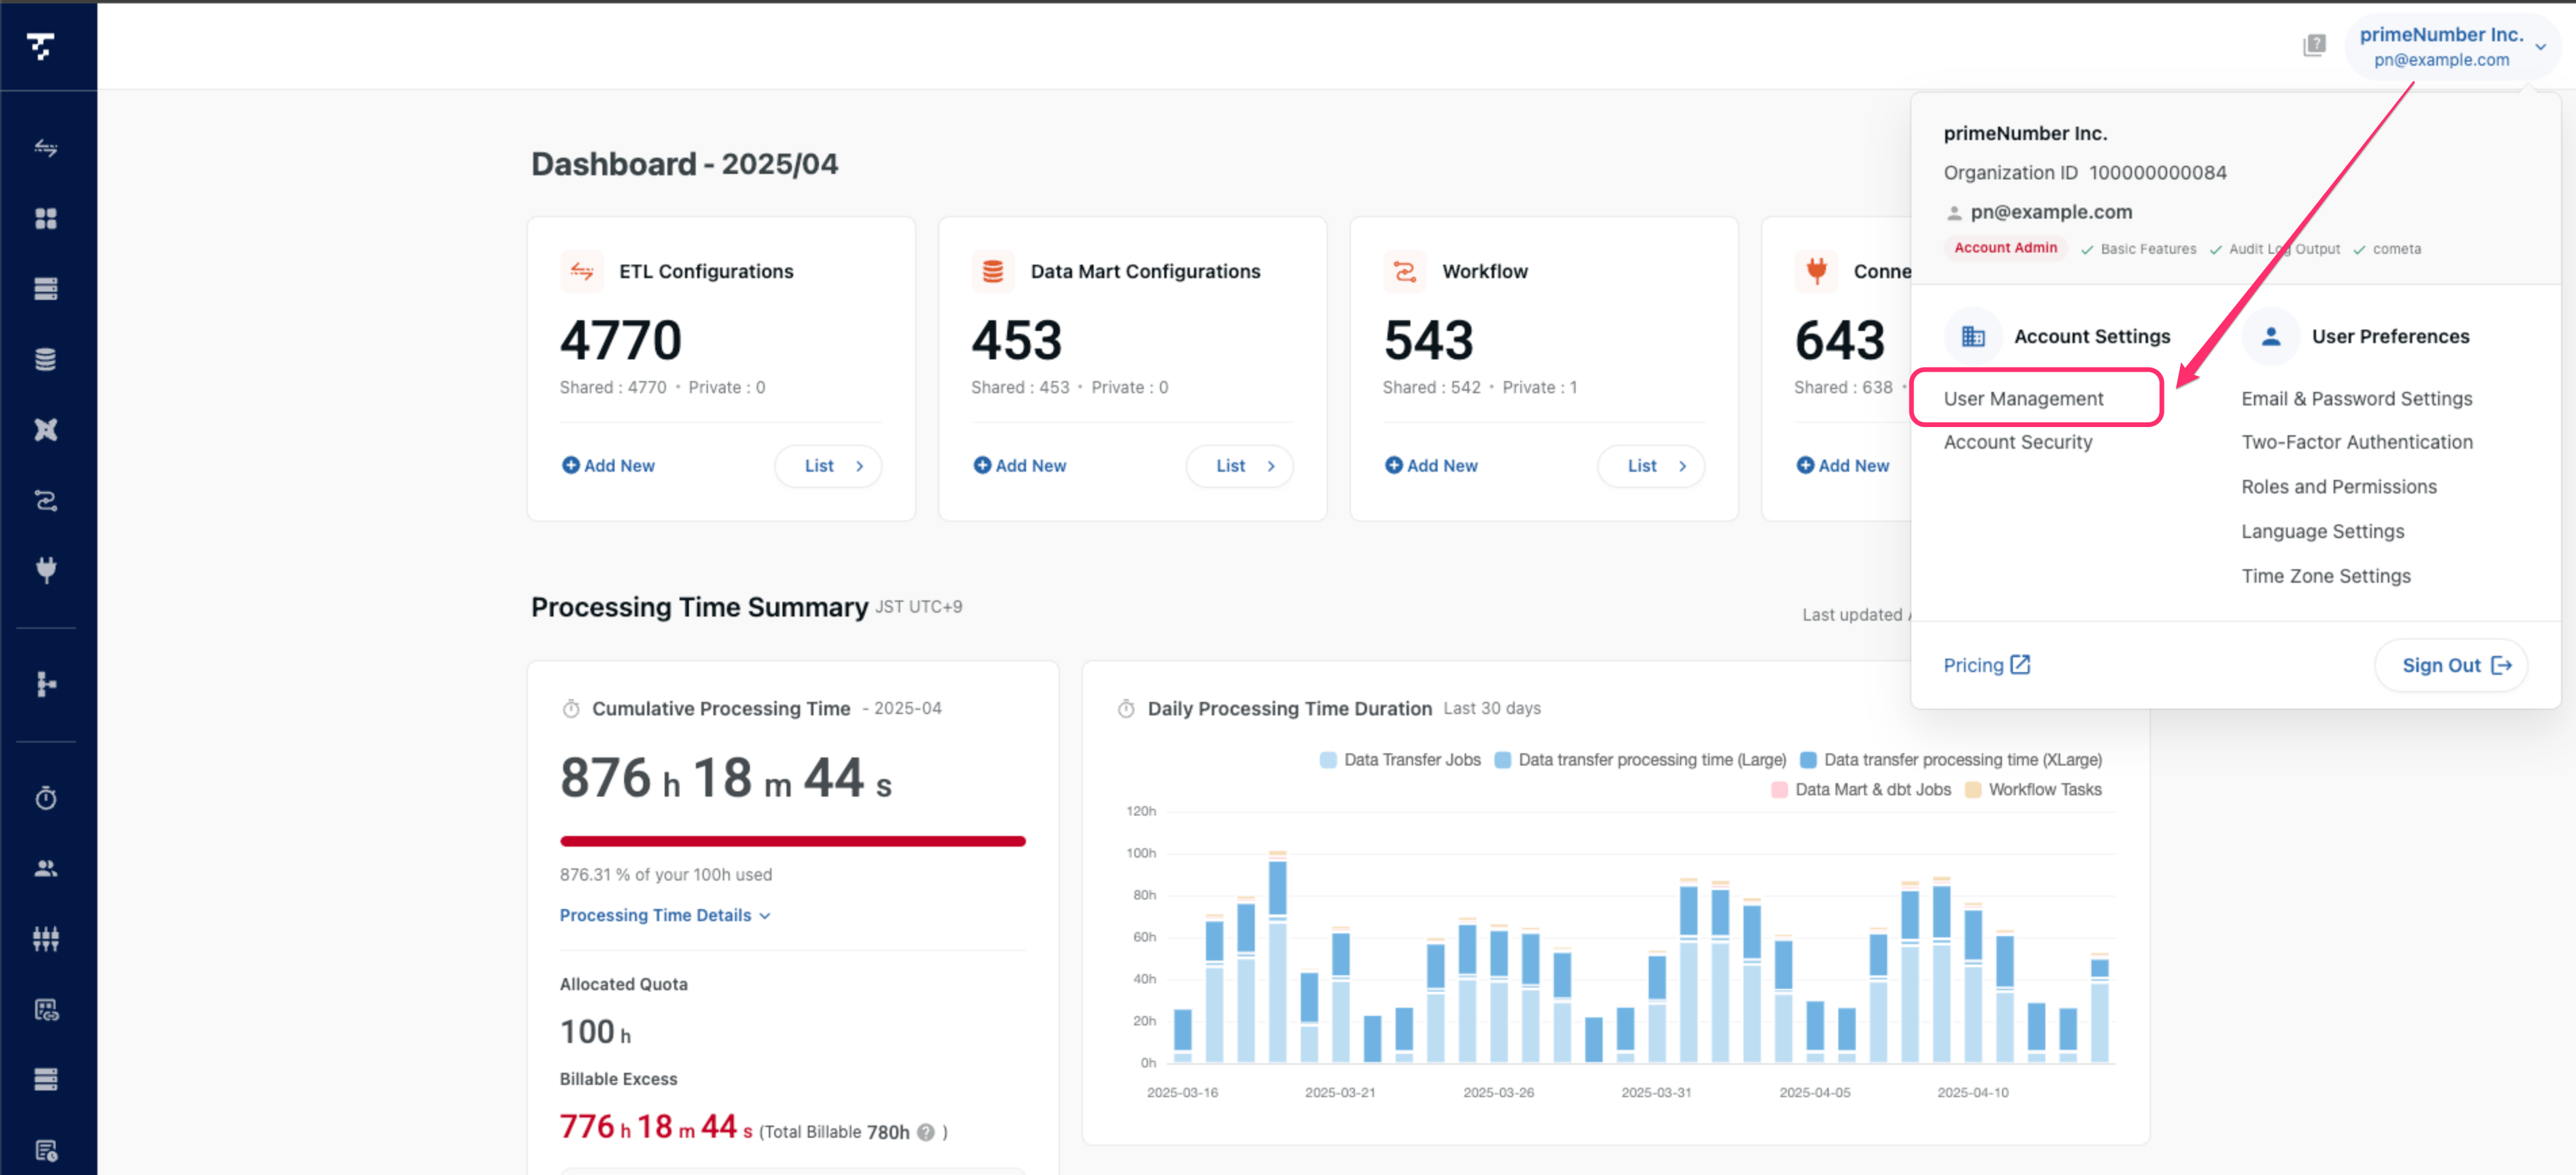
- Click on the email address section in the upper right corner of the TROCCO screen > User Management
-
Click on Invite User
-
Fill out the form and click Send invitation email
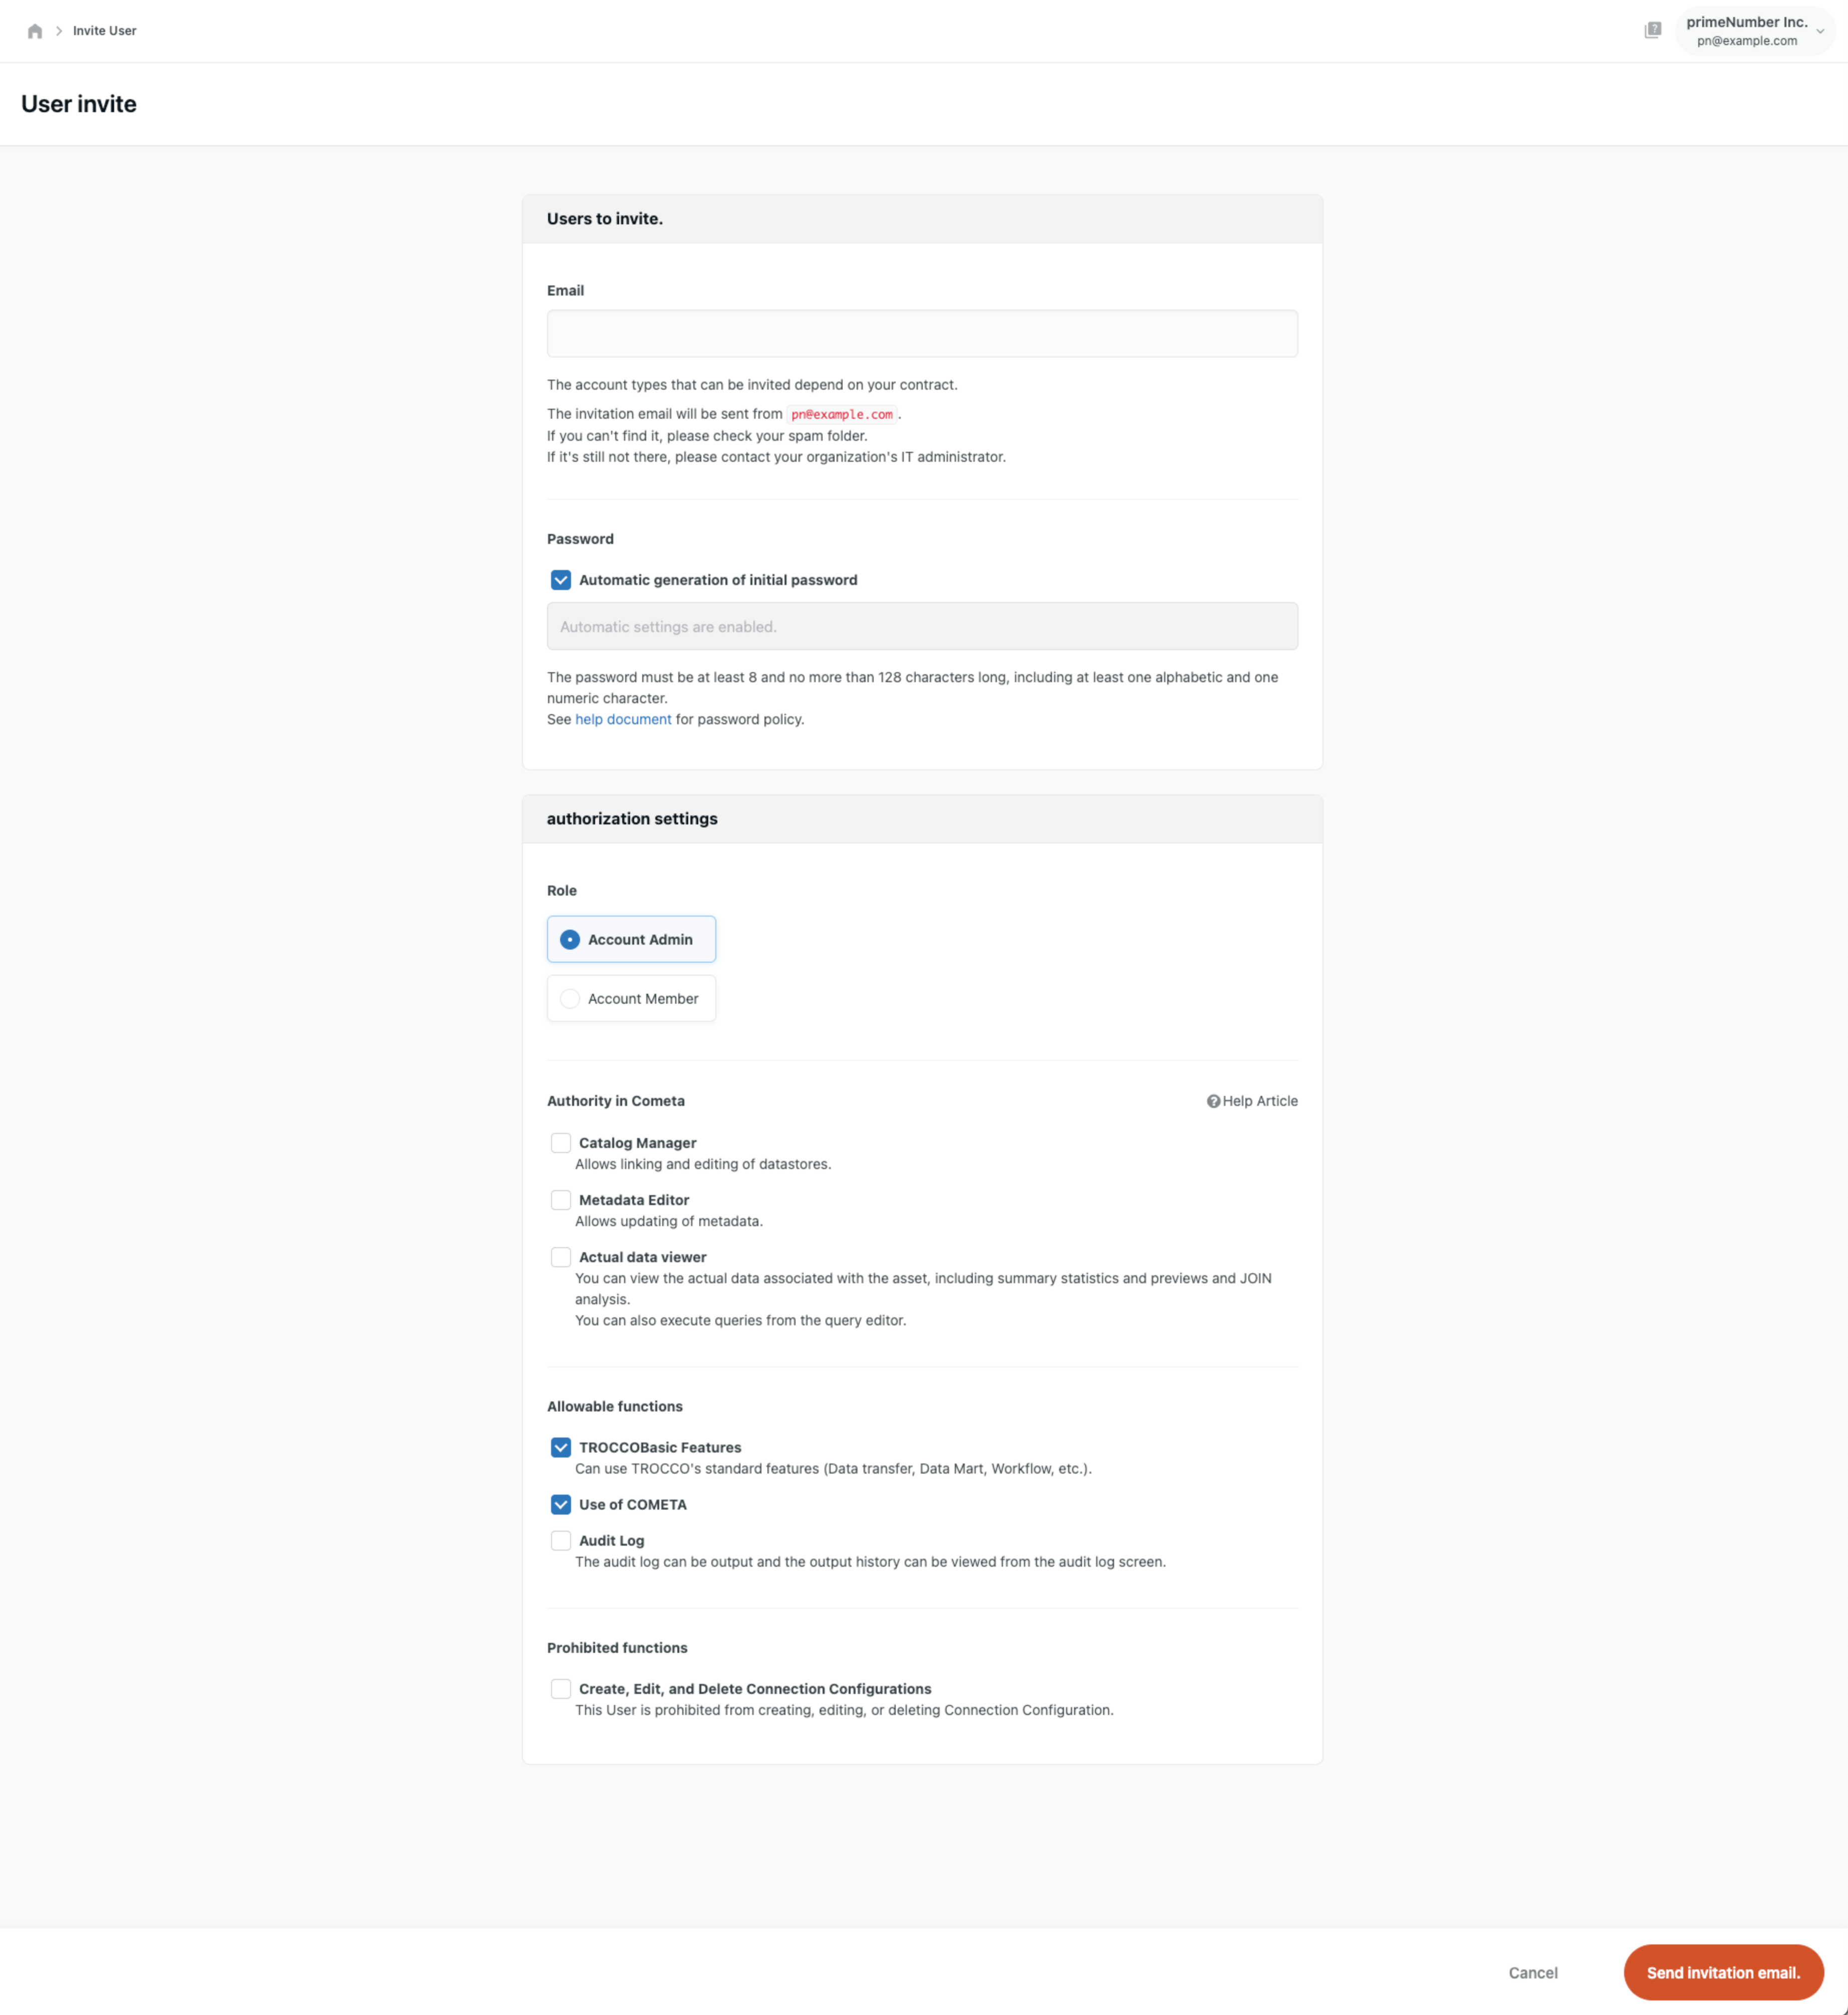
Fields to be filled in on the form are as follows
| item name | indispensable | Contents |
|---|---|---|
| Yes | Enter the email addresses of the users you wish to invite. | |
| Password | Yes | Enter the password that the invited user will use to log in for the first time. Please be careful not to enter your own password. |
| Role | Yes | Select the authority. For more information on privileges, please refer to what can be done with each user's privileges. |
| Functions | No | Select a function. For more information on features, see User Permissions > About Features. |
Clicking on Send invitation email will send an email invitation to the email address you entered.
Users who receive an e-mail invitation can log in to TROCCO by clicking on the URL in the body of the e-mail.
Invitation email will be sent from system@trocco.io.
If you do not receive the email, please set your domain name to allow trocco.io so that you can receive emails from TROCCO.
How to check invitation results
You can check whether or not the user you invited to TROCCO has completed registration from the user management screen.
At the time of invitation, the user's status is Awaiting email confirmation.
